  UIButton *first = [[UIButton alloc] initWithFrame:CGRectMake(0, 0, kHeight(80), kHeight(80))];
    [first setImage:[UIImage imageNamed:@"icon_index_housekeeping_10"] forState:UIControlStateNormal];
    [first setTitle:@"扫一扫" forState:UIControlStateNormal];
    [first.titleLabel setFont:kFont(14)];
    [first setTitleColor:[UIColor blackColor] forState:UIControlStateNormal];
    [first setTitleColor:kColor(0x444444ff) forState:UIControlStateHighlighted];
    [first setBackgroundColor:[UIColor whiteColor]];
    [first setContentHorizontalAlignment:UIControlContentHorizontalAlignmentLeft];
    [first setContentVerticalAlignment:UIControlContentVerticalAlignmentTop];
    [first setTitleEdgeInsets:UIEdgeInsetsMake((kGetHeigh(first.bounds) - first.titleLabel.intrinsicContentSize.height ) /2 + first.imageView.intrinsicContentSize.height / 2 + (((kGetHeigh(first.bounds) - first.imageView.intrinsicContentSize.height - first.titleLabel.intrinsicContentSize.height)/2)/2), (kGetWidth(first.bounds) - first.titleLabel.intrinsicContentSize.width) / 2 - first.imageView.intrinsicContentSize.width, 0,0)];
    [first setImageEdgeInsets:UIEdgeInsetsMake((kGetHeigh(first.bounds) - first.imageView.intrinsicContentSize.height ) /2 - (((kGetHeigh(first.bounds) - first.imageView.intrinsicContentSize.height - first.titleLabel.intrinsicContentSize.height)/2)/2), (kGetWidth(first.bounds) - first.imageView.intrinsicContentSize.width)/2, 0, 0)];
注释:
(((kGetHeigh(first.bounds) - first.imageView.intrinsicContentSize.height - first.titleLabel.intrinsicContentSize.height)/2)/2)

文字向下的偏移量   (总高度-图片高度-文字高度)/2)/2
上面的算法过于复杂,重新写了一个:
 self.contentHorizontalAlignment = .left;
 self.contentVerticalAlignment = .top;
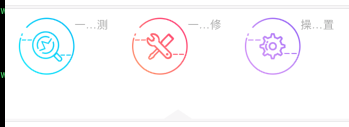
这两个方法会让图片和文字按照居左居上进行排列,如果不做任何改动,会显示如下:

设置完图片和文字的顺序后,可以进行修饰了
 //设置排列顺序为左上
            self.contentHorizontalAlignment = .left;
            self.contentVerticalAlignment = .top;
if style == .CusButtonStyleOne {
                //图上字下
                let Titletop = (kGetHeigh(self.bounds) -  self.imageView!.intrinsicContentSize.height - self.titleLabel!.intrinsicContentSize.height)/3 * 2 + self.imageView!.intrinsicContentSize.height;

                let Titleleft = (kGetWidth(self.bounds) - self.titleLabel!.intrinsicContentSize.width) / 2 - self.imageView!.intrinsicContentSize.width;
                self.titleEdgeInsets = UIEdgeInsets.init(top:Titletop , left: Titleleft, bottom: 0, right: 0);

                let imageTop = (kGetHeigh(self.bounds) - self.titleLabel!.intrinsicContentSize.height - self.imageView!.intrinsicContentSize.height) / 3;
                let imgLeft = (kGetWidth(self.bounds) - self.imageView!.intrinsicContentSize.width)/2;
                self.imageEdgeInsets = UIEdgeInsets.init(top: imageTop, left: imgLeft, bottom: 0, right: 0);
                NSLog("%@", self.titleLabel?.text ?? "");
            }
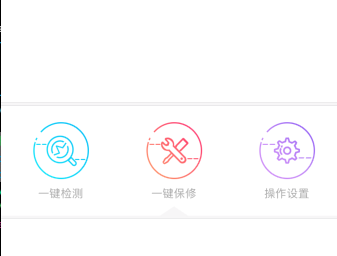
显示如下:
