小爬最近的一个需求是:将windows系统下的打印任务批量有序给到网络打印机。
用户先从公司的OA(B/S模式)系统下 打印指定内容的表单以及表单中的附件内容。这个问题可以这样分解:
1、抓包,得到OA对应的任务接口,然后利用python requests模拟post请求,获取所有的表单的URL并进行必要的去重处理;
2、打印OA表单的过程,需要浏览器在前台,这个时候可以结合selenium的driver.get(url)方法,打开每一个表单,同时解析网页内容,拿到所有附件的相关信息(名称、后缀、下载地址),利用requests再度保存这些附件至本地;
3、打开表单后,利用 win32api.keybd_event,模拟键盘快捷键“Ctrl + Shift + P”调出系统的打印窗口;
4、选中“PDF打印机”,需要电脑中有“Microsoft Print to Pdf”或者“Foxit Reader PDF Printer”等;
5、利用pywin32中的相关方法,驱动打印过程,将每个OA表单(网页)打印成PDF文件并格式化命名&存储,与前面的附件内容存储到同一个文件夹;
6、附件文件和OA生成的PDF文件均格式化存储,用OA单号作为文件名的一部分,将两者关联起来;
7、将本地对应文件夹的所有内容有序推送给打印机,指定打印机为某一台网络打印机。同时要确保打印过程中,不乱序;
针对步骤3,可以自定义函数来实现:
#键盘按下
def key_down(keyname):
    win32api.keybd_event(vk_code[keyname],0,0,0)

#键盘抬起
def key_up(key_name):
    win32api.keybd_event(vk_code[key_name],0,win32con.KEYEVENTF_KEYUP,0)

#按键组合操作
def simulate_three_key(firstkey,sencondkey,lastkey):
    key_down(firstkey)
    key_down(sencondkey)
    key_down(lastkey)
    key_up(lastkey)
    key_up(sencondkey)
    key_up(firstkey)
#按键组合操作
def simulate_two_key(firstkey,sencondkey):
    key_down(firstkey)
    key_down(sencondkey)
    key_up(sencondkey)
    key_up(firstkey)
然后利用 simulate_three_key('ctrl',"shift",'p') 即可呼出系统的默认打印窗口:
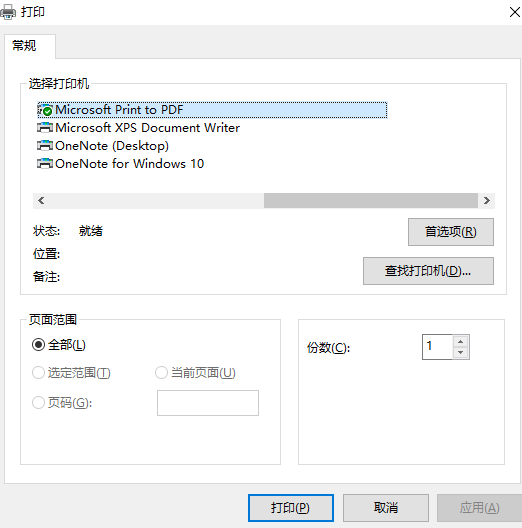
那么步骤4,也就是上图的打印窗口,如何选中某一个打印机呢?直接利用win32gui.SendMessage
来选中某个打印机是非常困难的。一种可行的方法是,利用pywin32下的win32print模块,也就是本文的重点。
比如,用下面的代码可以遍历并获取到当前计算机的所有打印机信息:
for it in win32print.EnumPrinters(6):
    print(it[1])
我们甚至可以知道某台打印机的当前状态,假定某台打印机名为printerName,则可以这样获取打印机状态:
hPrinter = win32print.OpenPrinter (printerName)
dic = hex(win32print.GetPrinter(hPrinter,2)['Status'])
if dic[-2]=="8":
    print("The printer is offline.")
if dic[-5]=="4":
   print("The printer is out of toner.")
elif dic[-5]=="2":
   print("The printer is low on toner.")
|
Printer status name/value |
Description |
|---|---|
|
PRINTER_STATUS_BUSY 0x00000200 |
The printer is busy. |
|
PRINTER_STATUS_DOOR_OPEN 0x00400000 |
The printer door is open. |
|
PRINTER_STATUS_ERROR 0x00000002 |
The printer is in an error state. |
|
PRINTER_STATUS_INITIALIZING 0x00008000 |
The printer is initializing. |
|
PRINTER_STATUS_IO_ACTIVE 0x00000100 |
The printer is in an active input or output state. |
|
PRINTER_STATUS_MANUAL_FEED 0x00000020 |
The printer is in a manual feed state. |
|
PRINTER_STATUS_NOT_AVAILABLE 0x00001000 |
The printer is not available for printing. |
|
PRINTER_STATUS_NO_TONER 0x00040000 |
The printer is out of toner. |
|
PRINTER_STATUS_OFFLINE 0x00000080 |
The printer is offline. |
|
PRINTER_STATUS_OUTPUT_BIN_FULL 0x00000800 |
The printer's output bin is full. |
|
PRINTER_STATUS_OUT_OF_MEMORY 0x00200000 |
The printer has run out of memory. |
|
PRINTER_STATUS_PAGE_PUNT 0x00080000 |
The printer cannot print the current page. |
|
PRINTER_STATUS_PAPER_JAM 0x00000008 |
Paper is stuck in the printer. |
|
PRINTER_STATUS_PAPER_OUT 0x00000010 |
The printer is out of paper. |
|
PRINTER_STATUS_PAPER_PROBLEM 0x00000040 |
The printer has an unspecified paper problem. |
|
PRINTER_STATUS_PAUSED 0x00000001 |
The printer is paused. |
|
PRINTER_STATUS_PENDING_DELETION 0x00000004 |
The printer is being deleted as a result of a client's call to RpcDeletePrinter. No new jobs can be submitted on existing printer objects for that printer. |
|
PRINTER_STATUS_POWER_SAVE 0x01000000 |
The printer is in power-save mode.<182> |
|
PRINTER_STATUS_PRINTING 0x00000400 |
The printer is printing. |
|
PRINTER_STATUS_PROCESSING 0x00004000 |
The printer is processing a print job. |
|
PRINTER_STATUS_SERVER_OFFLINE 0x02000000 |
The printer is offline.<183> |
|
PRINTER_STATUS_SERVER_UNKNOWN 0x00800000 |
The printer status is unknown.<184> |
|
PRINTER_STATUS_TONER_LOW 0x00020000 |
The printer is low on toner. |
|
PRINTER_STATUS_USER_INTERVENTION 0x00100000 |
The printer has an error that requires the user to do something. |
|
PRINTER_STATUS_WAITING 0x00002000 |
The printer is waiting. |
|
PRINTER_STATUS_WARMING_UP 0x00010000 |
The printer is warming up. |
更多的打印机接口信息,可查询微软的开发文档:https://docs.microsoft.com/en-us/openspecs/windows_protocols/ms-rprn/1625e9d9-29e4-48f4-b83d-3bd0fdaea787?redirectedfrom=MSDN
我们也可以得到当前默认的打印机,设置默认打印机:
currentPrinter=win32print.GetDefaultPrinterW()
win32print.SetDefaultPrinterW(printer)


我们利用上面两个函数,可以先得到系统当前的打印机,用变量存储后,再设置默认打印机至 PDF打印机,待执行完所有任务后,再设置默认打印机为用户一开始的默认打印机,整个过程用户不需要更多的干预;
重点说下步骤7:我们需要以OA表单+附件的形式,逐一给打印机分配任务,且不能乱序:
如果附件是图片性质,我们可以结合Pillow库来处理,示例代码如下:
import win32print
import win32ui
from PIL import Image, ImageWin


# Constants for GetDeviceCaps
#
#
# HORZRES / VERTRES = printable area
#
HORZRES = 8
VERTRES = 10
#
# LOGPIXELS = dots per inch
#
LOGPIXELSX = 88
LOGPIXELSY = 90
#
# PHYSICALWIDTH/HEIGHT = total area
#
PHYSICALWIDTH = 110
PHYSICALHEIGHT = 111
#
# PHYSICALOFFSETX/Y = left / top margin
#
PHYSICALOFFSETX = 112
PHYSICALOFFSETY = 113

def print_image(file_name):

    printer_name = win32print.GetDefaultPrinterW() # 获得默认打印机

    #
    # You can only write a Device-independent bitmap
    # directly to a Windows device context; therefore
    # we need (for ease) to use the Python Imaging
    # Library to manipulate the image.
    #
    # Create a device context from a named printer
    # and assess the printable size of the paper.
    #
    hDC = win32ui.CreateDC ()
    hDC.CreatePrinterDC (printer_name)
    printable_area = hDC.GetDeviceCaps (HORZRES), hDC.GetDeviceCaps (VERTRES)
    printer_size = hDC.GetDeviceCaps (PHYSICALWIDTH), hDC.GetDeviceCaps (PHYSICALHEIGHT)
    printer_margins = hDC.GetDeviceCaps (PHYSICALOFFSETX), hDC.GetDeviceCaps (PHYSICALOFFSETY)

    #
    # Open the image, rotate it if it's wider than
    # it is high, and work out how much to multiply
    # each pixel by to get it as big as possible on
    # the page without distorting.
    #
    bmp = Image.open (file_name)
    # bmp = bmp.rotate (90)
    # bmp.save("test1.png")
    if bmp.size[0] > bmp.size[1]:
        # bmp = bmp.rotate (90)
        bmp=bmp.transpose(Image.ROTATE_90)

    ratios = [1.0 * printable_area[0] / bmp.size[0], 1.0 * printable_area[1] / bmp.size[1]]
    scale = min (ratios)*0.85 #这个0.85的系数是不希望图片被打印太大,缺少margin,不方便文档的装订
    file_name=file_name.split("\")[-1] #这一步是为了提取fullpath中的filename部分

    #
    # Start the print job, and draw the bitmap to
    # the printer device at the scaled size.
    #
    hDC.StartDoc (file_name)
    hDC.StartPage ()

    dib = ImageWin.Dib (bmp)
    scaled_width, scaled_height = [int (scale * i) for i in bmp.size]
    x1 = int ((printer_size[0] - scaled_width) / 2)
    y1 = int ((printer_size[1] - scaled_height) / 2)
    x2 = x1 + scaled_width
    y2 = y1 + scaled_height
    dib.draw (hDC.GetHandleOutput (), (x1, y1, x2, y2))

    hDC.EndPage ()
    hDC.EndDoc ()
    hDC.DeleteDC ()
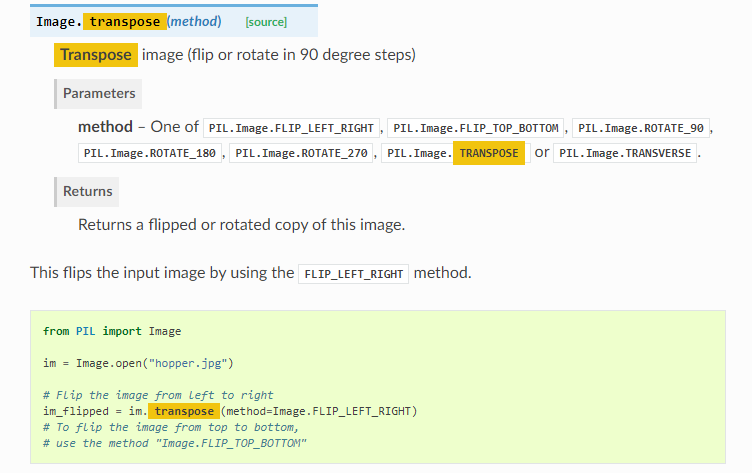
需要强调的是,如果我们对图片进行后台旋转90度时,一定要用transpose(Image.ROTATE_90),不要使用 rotate (90),否则打印的图片很有可能显示不完整,且有黑边;
具体的transpose用法见Pillow官网文档:
如果我们要打印的任务是PDF或者其他office类型的文档,可以利用win32api.ShellExecute方法,示例如下:
def printer_loading(filename):
    # open (filename, "r")
    currentPrinter=win32print.GetDefaultPrinterW()
    win32api.ShellExecute (0,"print",filename,'/d:"%s"' % currentPrinter,".",0)
该方法有一个缺陷,win32api.ShellExecute 会在指令发出后,立即返回值,而不是等打印任务真正传输到打印机后再返回。这就意味着,附件中的图片用win32ui的方法走后台已经传输给打印机,而PDF等其他文件可能还没及时发送给打印机,造成打印任务乱序。
可行的解决方法是,利用win32print.EnumJobs,定时获取打印机当前的任务队列,确保队列中出现刚推送的任务后,再来推送下一个打印任务。示例如下:
由于打印任务是动态增减的,每次得到的tasks可能都不同,且由于打印机可能有很多人共同使用,不能保证某个用户的某次打印任务一定会出现在打印队列的最上方。所以要尽可能拿到所有的任务;
+++++++++++++++++++++++++++++++++++++++++++++++++++++++++++++++++++++++++
+++++++++++++++++++++++++++++++++++++++++++++++++++++++++++++++++++++++++
至此,这个项目中的难点都逐一有了解决方案,希望小爬以上的思路,对喜欢自动化的你,能有所借鉴~~