官方资料:https://github.com/dangdangdotcom/elastic-job
-------------------------------------------------------------------------------------
官方资料非常完整而且思路清晰,按照自己学习过程整理如下:
1、 何为分布式任务?
自己理解,就是一件事情让多台机器来完成。单机环境下,所有任务都是单个电脑独立完成,分布式任务就是把任务按一定逻辑进行切分(也就是所谓的分片),分成几个小的片段,然后分给不同的电脑,每台电脑执行其中的几个片段。
分片概念:
任务的分布式执行,需要将一个任务拆分为n个独立的任务项,然后由分布式的服务器分别执行某一个或几个分片项。
例如:有一个遍历数据库某张表的作业,现有2台服务器。为了快速的执行作业,那么每台服务器应执行作业的50%。 为满足此需求,可将作业分成2片,每台服务器执行1片。作业遍历数据的逻辑应为:服务器A遍历ID以奇数结尾的数据;服务器B遍历ID以偶数结尾的数据。 如果分成10片,则作业遍历数据的逻辑应为:每片分到的分片项应为ID%10,而服务器A被分配到分片项0,1,2,3,4;服务器B被分配到分片项5,6,7,8,9,直接的结果就是服务器A遍历ID以0-4结尾的数据;服务器B遍历ID以5-9结尾的数据。
2、 github源码
从github下载下来,maven导入eclipse后,分为5部分:
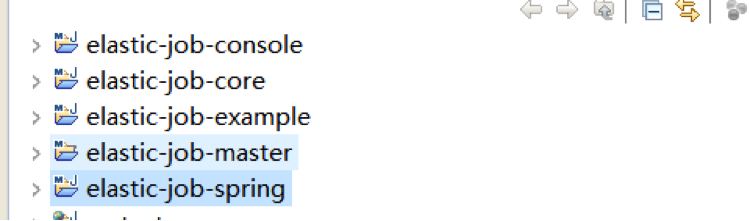
官方目录结构说明:
elastic-job-core //核心模块,只通过Quartz和Curator就可执行分布式作业。
elastic-job-spring //对spring支持的模块,包括命名空间,依赖注入,占位符等。
elastic-job-console // web控制台,可将编译之后的war放入tomcat等servlet容器中使用。
elastic-job-example //使用示例。
elastic-job-doc //使用markdown生成文档的项目,使用方无需关注。
需要说明一下,官方也提到了,需要一个lombok.jar。个人感觉这个确实很不错,有了这个jar包,可以省掉get set方法,在属性很多的时候特别方便。
*************************************************
lombok 的官方网址:http://projectlombok.org/
lombok 注解在线帮助文档:http://projectlombok.org/features/index.
下面介绍几个我常用的
lombok 注解:
@Data :注解在类上;提供类所有属性的 getting 和
setting 方法,此外还提供了equals、canEqual、hashCode、toString 方法
@Setter:注解在属性上;为属性提供
setting 方法
@Getter:注解在属性上;为属性提供
getting 方法
@Log4j :注解在类上;为类提供一个 属性名为log
的
log4j 日志对象
@NoArgsConstructor:注解在类上;为类提供一个无参的构造方法
@AllArgsConstructor:注解在类上;为类提供一个全参的构造方法
*************************************************
3、 快速上手部署应用(单机跟集群)
快速上手可以参照官方文档: http://dangdangdotcom.github.io/elastic-job/post/quick_start/
这是个单机环境的例子。为加深理解,自己部署集群环境,步骤如下:
a、启动zookeeper(测试用,可单机可集群),步骤参见官方快速上手文档
b、修改官方example代码如下:
1)、在com.dangdang.example.elasticjob.spring包下新建myjob包,创建新类MySimpleJobTest.java,代码如下:
@Component
public class MySimpleJobTest extends AbstractSimpleElasticJob {

    private PrintContext printContext = new PrintContext(SimpleJobDemo.class);

    @Resource
    private FooRepository fooRepository;

    private static AtomicInteger count = new AtomicInteger(0);

	@Override
	public void process(JobExecutionMultipleShardingContext shardingContext) {
	   System.out.println("第"+count.addAndGet(1)+"次执行,当前分片号为:"+shardingContext.getShardingItemParameters());
	}

}
2)、修改resources/META-INF/withNamespace.xml为:
<?xml version="1.0" encoding="UTF-8"?>
<beans xmlns="http://www.springframework.org/schema/beans"
    xmlns:xsi="http://www.w3.org/2001/XMLSchema-instance"
    xmlns:context="http://www.springframework.org/schema/context"
    xmlns:reg="http://www.dangdang.com/schema/ddframe/reg"
    xmlns:job="http://www.dangdang.com/schema/ddframe/job"
    xsi:schemaLocation="http://www.springframework.org/schema/beans
                        http://www.springframework.org/schema/beans/spring-beans.xsd
                        http://www.springframework.org/schema/context
                        http://www.springframework.org/schema/context/spring-context.xsd
                        http://www.dangdang.com/schema/ddframe/reg
                        http://www.dangdang.com/schema/ddframe/reg/reg.xsd
                        http://www.dangdang.com/schema/ddframe/job
                        http://www.dangdang.com/schema/ddframe/job/job.xsd
                        ">
    <context:component-scan base-package="com.dangdang.example.elasticjob" />
    <context:property-placeholder location="classpath:conf/*.properties" />

    <reg:zookeeper id="regCenter" serverLists="${serverLists}" namespace="${namespace}" baseSleepTimeMilliseconds="${baseSleepTimeMilliseconds}" maxSleepTimeMilliseconds="${maxSleepTimeMilliseconds}" maxRetries="${maxRetries}" nestedPort="${nestedPort}" nestedDataDir="${nestedDataDir}" />

<!--     <job:bean id="simpleElasticJob" class="com.dangdang.example.elasticjob.spring.job.SimpleJobDemo" regCenter="regCenter" shardingTotalCount="${simpleJob.shardingTotalCount}" cron="${simpleJob.cron}" shardingItemParameters="${simpleJob.shardingItemParameters}" monitorExecution="${simpleJob.monitorExecution}" monitorPort="${simpleJob.monitorPort}" failover="${simpleJob.failover}" description="${simpleJob.description}" disabled="${simpleJob.disabled}" overwrite="${simpleJob.overwrite}" /> -->
<!--     <job:bean id="throughputDataFlowJob" class="com.dangdang.example.elasticjob.spring.job.ThroughputDataFlowJobDemo" regCenter="regCenter" shardingTotalCount="${throughputDataFlowJob.shardingTotalCount}" cron="${throughputDataFlowJob.cron}" shardingItemParameters="${throughputDataFlowJob.shardingItemParameters}" monitorExecution="${throughputDataFlowJob.monitorExecution}" failover="${throughputDataFlowJob.failover}" processCountIntervalSeconds="${throughputDataFlowJob.processCountIntervalSeconds}" concurrentDataProcessThreadCount="${throughputDataFlowJob.concurrentDataProcessThreadCount}" description="${throughputDataFlowJob.description}" disabled="${throughputDataFlowJob.disabled}" overwrite="${throughputDataFlowJob.overwrite}" /> -->
<!--     <job:bean id="sequenceDataFlowJob3" class="com.dangdang.example.elasticjob.spring.job.SequenceDataFlowJobDemo" regCenter="regCenter" shardingTotalCount="${sequenceDataFlowJob.shardingTotalCount}" cron="${sequenceDataFlowJob.cron}" shardingItemParameters="${sequenceDataFlowJob.shardingItemParameters}" monitorExecution="${sequenceDataFlowJob.monitorExecution}" failover="${sequenceDataFlowJob.failover}" processCountIntervalSeconds="${sequenceDataFlowJob.processCountIntervalSeconds}" maxTimeDiffSeconds="${sequenceDataFlowJob.maxTimeDiffSeconds}" description="${sequenceDataFlowJob.description}" disabled="${sequenceDataFlowJob.disabled}" overwrite="${sequenceDataFlowJob.overwrite}" /> -->

	<job:bean id="simpleElasticJob2" class="com.dangdang.example.elasticjob.spring.myjob.MySimpleJobTest" regCenter="regCenter" shardingTotalCount="${simpleJob.shardingTotalCount}" cron="${simpleJob.cron}" shardingItemParameters="${simpleJob.shardingItemParameters}" monitorExecution="${simpleJob.monitorExecution}" monitorPort="${simpleJob.monitorPort}" failover="${simpleJob.failover}" description="${simpleJob.description}" disabled="${simpleJob.disabled}" overwrite="${simpleJob.overwrite}" />

</beans>
c、建虚拟机(多台电脑的用另一电脑即可),配置环境变量。
此处本地采用ubuntu16.04的64位版本.
需配置的有:jdk,maven,为了让maven能在本地找到jar包,而不再浪费时间去网络maven库下载,可以线运行mvn install生成.m2目录(该目录隐藏,本地虚拟机是位于/home下),将win下的.m2/repository文件夹拷贝到虚拟机的.m2下.
d、将elastic-job-example拷贝到虚拟机,本地为/usr/mytest目录
修改虚拟机中example项目的配置文件/resources/conf/reg.properties
serverLists为zookeeper服务器地址
nestedPort设置为-1,不启动自带zookeeper(两台电脑都不启用默认zookeeper)
e、虚拟机切换到elastic-job-example目录(该目录下有pom文件)
运行:mvn compile ,运行完毕后
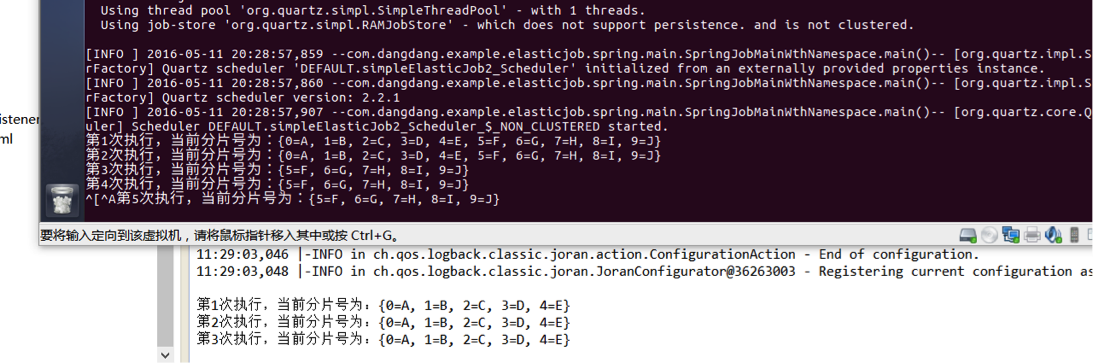
运行:mvn exec:java -Dexec.mainClass="com.dangdang.example.elasticjob.spring.main"
f、切回主机,com.dangdang.example.elasticjob.spring.main运行该文件的main方法
可明显看到:虚拟机开始单机运行时,处理分片为0-9,在主机开始运行后,变为5-9,两者确实进行了任务分配:
g、部署tomcat监控
虚拟机部署tomcat,将elastic-job-console在主机打war包,然后放入tomcat的webapp下,启动tomcat,访问http://ip:端口号/elastic-job-console,账号密码:root/root
填写zookeeper地址,作业名称等,可以看到控制页面:

我们刚刚部署的测试环境:

小结:
单纯开发使用的话,方式之一是:将elastic-job-core跟elastic-job-spring打jar包,然后按照官方的开发指南,重写相关方法即可。部署的话应该是按照上方集群部署的方式进行的。
至于具体分片怎么分(官方提供了几种方式,直接配置属性),具体内部调度原理,开发过程中具体应用等细节仍待思考。
补充:
ej的使用,方式之一是如上所说,jar引入,重写方法然后集群部署;方式之二是单独写一个调度项目,在此处进行“调度”,将分片信息以参数形式传递给远程方法接口,从而实现了将一个大的任务分割给了多个不同机器(这里边很可能由于远程也是分布式,
从而可能导致某机器多次接收之类,可能会并不那么均衡),从而减轻了单机压力。具体分片逻辑跟接口逻辑根据具体业务场景的不同而不同。东西是死的,具体怎么个用法,正如当当网张亮所言:怎么用都可以。
基于方式二的使用方式,即使不用ej框架,单纯的一个项目C用于定时请求某个远程接口,只要该远程接口是集群部署的,那么负载就会分发到不同的机器,从而导致某种程度上实现了多机器执行,虽然这只是分布式带来的福利而已。