最近想整合IdentityServer4跟API,但网上找到的都是各种坑,踩都踩不玩!
花了点时间终于整合好了,记录下。
新建空的asp.net core 项目
使用NuGet安装IdentityServer4最新版4.1.0。安装完成新建Config.cs类。内容如下:

using IdentityServer4;
using IdentityServer4.Models;
using IdentityServer4.Test;
using System;
using System.Collections.Generic;
using System.Linq;
using System.Threading.Tasks;

namespace IdsAPI
{
    public static class Config
    {
        /// <summary>
        /// 客户端
        /// </summary>
        /// <returns></returns>
        internal static IEnumerable<Client> Clients()
        {
            yield return new Client
            {
                ClientId = "test-id",
                ClientName = "Test client (Code with PKCE)",

                RedirectUris = new[] {
                    "http://localhost:5000/resource-server/swagger/oauth2-redirect.html", // Kestrel
                },

                ClientSecrets = { new Secret("test-secret".Sha256()) },
                RequireConsent = true,

                AllowedGrantTypes = GrantTypes.Code,
                RequirePkce = true,
                AllowedScopes = new[] { "api",IdentityServerConstants.StandardScopes.OpenId,
                        IdentityServerConstants.StandardScopes.Profile},
            };
        }
        /// <summary>
        /// api资源
        /// </summary>
        /// <returns></returns>
        internal static IEnumerable<ApiResource> ApiResources()
        {
            return new List<ApiResource>
           {
                new ApiResource("api","my api")
                {
                    Scopes ={"api"},//重要,不配置返回 invalid_scope
                }
           };
        }
        /// <summary>
        /// api范围
        /// </summary>
        /// <returns></returns>
        internal static IEnumerable<ApiScope> GetApiScopes()
        {
            return new List<ApiScope>
           {
                new ApiScope("api")
           };
        }
        internal static IEnumerable<IdentityResource> GetIdentityResourceResources()
        {
            return new List<IdentityResource>
           {
               new IdentityResources.OpenId(),
               new IdentityResources.Profile()
           };
        }
        /// <summary>
        /// 测试用户
        /// </summary>
        /// <returns></returns>
        internal static List<TestUser> TestUsers()
        {
            return new List<TestUser>
            {
                new TestUser
                {
                    SubjectId = "joebloggs",
                    Username = "admin",
                    Password = "123456"
                }
            };
        }
    }
}
注入IdentityServer4,代码如下:
using System;
using System.Collections.Generic;
using System.Linq;
using System.Threading.Tasks;
using Microsoft.AspNetCore.Builder;
using Microsoft.AspNetCore.Hosting;
using Microsoft.AspNetCore.Http;
using Microsoft.Extensions.DependencyInjection;
using Microsoft.Extensions.Hosting;

namespace IdentityServer4API
{
    public class Startup
    {
        // This method gets called by the runtime. Use this method to add services to the container.
        // For more information on how to configure your application, visit https://go.microsoft.com/fwlink/?LinkID=398940
        public void ConfigureServices(IServiceCollection services)
        {
            //注入IdentityServer
            services.AddIdentityServer()
               .AddDeveloperSigningCredential()
               .AddInMemoryClients(Config.Clients())
               .AddInMemoryApiResources(Config.ApiResources())
               .AddTestUsers(Config.TestUsers())
              .AddInMemoryIdentityResources(Config.GetIdentityResourceResources())
              //4.0版本需要添加,不然调用时提示invalid_scope错误
              .AddInMemoryApiScopes(Config.GetApiScopes());
            //注入mvc
            services.AddControllersWithViews();
        }

        // This method gets called by the runtime. Use this method to configure the HTTP request pipeline.
        public void Configure(IApplicationBuilder app, IWebHostEnvironment env)
        {
            if (env.IsDevelopment())
            {
                app.UseDeveloperExceptionPage();
            }
            //添加静态资源引用
            app.UseStaticFiles();
            app.UseRouting();
            //添加IdentityServer
            app.UseIdentityServer();
            app.UseEndpoints(endpoints =>
            {
                endpoints.MapDefaultControllerRoute();
            });
        }
    }
}
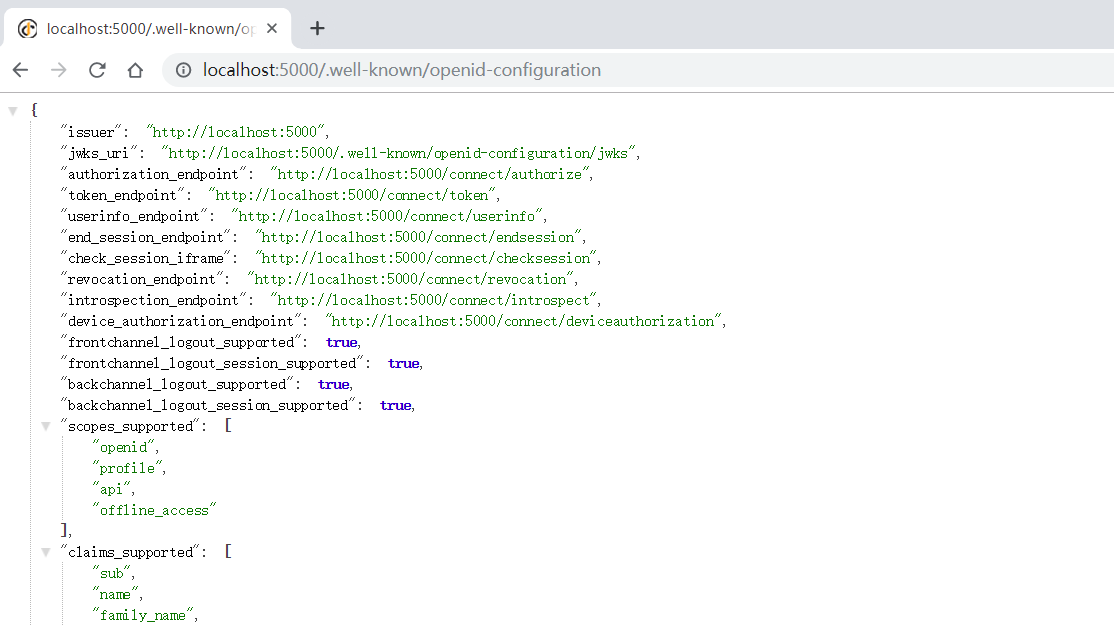
启动访问 http://localhost:5000/.well-known/openid-configuration 能正常访问即可。
添加Swagge
使用NuGet安装IdentityServer4.AccessTokenValidation跟Swashbuckle.AspNetCore最新版。
新建类SecurityRequirementsOperationFilter,内容如下:
using Microsoft.AspNetCore.Authorization;
using Microsoft.OpenApi.Models;
using Swashbuckle.AspNetCore.SwaggerGen;
using System;
using System.Collections.Generic;
using System.Linq;
using System.Threading.Tasks;

namespace IdentityServer4API
{
    public class SecurityRequirementsOperationFilter : IOperationFilter
    {
        public void Apply(OpenApiOperation operation, OperationFilterContext context)
        {
            //获取是否添加登录特性
            //策略名称映射到范围
            var requiredScopes = context.MethodInfo
                .GetCustomAttributes(true)
                .OfType<AuthorizeAttribute>()
                .Select(attr => attr.Policy)
                .Distinct();

            if (requiredScopes.Any())
            {
                operation.Responses.Add("401", new OpenApiResponse { Description = "未经授权" });
                operation.Responses.Add("403", new OpenApiResponse { Description = "禁止访问" });

                var oAuthScheme = new OpenApiSecurityScheme
                {
                    Reference = new OpenApiReference { Type = ReferenceType.SecurityScheme, Id = "oauth2" }
                };

                operation.Security = new List<OpenApiSecurityRequirement>
                {
                    new OpenApiSecurityRequirement
                    {
                        [ oAuthScheme ] = requiredScopes.ToList()
                    }
                };
            }
        }
    }
}
修改Startup中 ConfigureServices方法,增加新的配置:
            //身份验证设置有点细微差别,因为此应用提供了身份验证服务器和资源服务器
            //默认情况下使用“ Cookies”方案,并且在资源服务器控制器中明确要求“ Bearer”
            //详细查看 https://docs.microsoft.com/en-us/aspnet/core/security/authorization/limitingidentitybyscheme?tabs=aspnetcore2x
            services.AddAuthentication(CookieAuthenticationDefaults.AuthenticationScheme)
                .AddCookie()
                .AddIdentityServerAuthentication(c =>
                {
                    c.Authority = "http://localhost:5000/";
                    c.RequireHttpsMetadata = false;
                    c.ApiName = "api";
                });
            //配置直接映射到OAuth2.0范围的命名身份验证策略
            services.AddAuthorization(c =>
            {
                c.AddPolicy("AuthorizedAccess", p => p.RequireClaim("scope", "api"));
            });

            services.AddSwaggerGen(c =>
            {
                c.SwaggerDoc("v1", new OpenApiInfo { Version = "v1", Title = "Test API V1" });

                // 定义正在使用的OAuth2.0方案
                c.AddSecurityDefinition("oauth2", new OpenApiSecurityScheme
                {
                    Type = SecuritySchemeType.OAuth2,
                    Flows = new OpenApiOAuthFlows
                    {
                        AuthorizationCode = new OpenApiOAuthFlow
                        {
                            AuthorizationUrl = new Uri("/connect/authorize", UriKind.Relative),
                            TokenUrl = new Uri("/connect/token", UriKind.Relative),
                            Scopes = new Dictionary<string, string>
                            {
                                { "api", "授权读写操作" },
                            }
                        }
                    }
                });
                // 根据AuthorizeAttributea分配是否需要授权操作
                c.OperationFilter<SecurityRequirementsOperationFilter>();
            });
修改改Configure,增加配置,完整代码如下:
 public void Configure(IApplicationBuilder app, IWebHostEnvironment env)
        {
            if (env.IsDevelopment())
            {
                app.UseDeveloperExceptionPage();
            }
            //添加静态资源引用
            app.UseStaticFiles();
            app.UseRouting();
            //身份验证
            app.UseAuthentication();
            app.UseAuthorization();
            //添加IdentityServer
            app.UseIdentityServer();
            app.UseEndpoints(endpoints =>
            {
                endpoints.MapDefaultControllerRoute();
            });
            //api配置
            app.Map("/resource-server", resourceServer =>
            {
                resourceServer.UseRouting();
                //身份验证
                resourceServer.UseAuthentication();
                resourceServer.UseAuthorization();
                //
                resourceServer.UseEndpoints(endpoints =>
                {
                    endpoints.MapControllers();
                });
                //Swagger
                resourceServer.UseSwagger();
                resourceServer.UseSwaggerUI(c =>
                {
                    c.SwaggerEndpoint("/resource-server/swagger/v1/swagger.json", "My API V1");
                    c.EnableDeepLinking();

                    // Additional OAuth settings (See https://github.com/swagger-api/swagger-ui/blob/v3.10.0/docs/usage/oauth2.md)
                    c.OAuthClientId("test-id");
                    c.OAuthClientSecret("test-secret");
                    c.OAuthAppName("test-app");
                    c.OAuthScopeSeparator(" ");
                    c.OAuthUsePkce();
                });
            });
        }
修改Properties下的launchSettings启动配置文件:
{
  "iisSettings": {
    "windowsAuthentication": false,
    "anonymousAuthentication": true,
    "iisExpress": {
      "applicationUrl": "http://localhost:8950",
      "sslPort": 44380
    }
  },
  "profiles": {
    "IIS Express": {
      "commandName": "IISExpress",
      "launchBrowser": true,
      "environmentVariables": {
        "ASPNETCORE_ENVIRONMENT": "Development"
      }
    },
    "IdentityServer4API": {
      "commandName": "Project",
      "launchBrowser": true,
      "launchUrl": "resource-server/swagger",//初始页
      "applicationUrl": "http://localhost:5000",
      "environmentVariables": {
        "ASPNETCORE_ENVIRONMENT": "Development"
      }
    }
  }
}
新建api控制器:
using System.Collections.Generic;
using Microsoft.AspNetCore.Mvc;
using Microsoft.AspNetCore.Authorization;

namespace API.Controllers
{
    [Route("products")]
    public class ProductsController : Controller
    {
        [HttpGet]
        [Authorize(AuthenticationSchemes = "Bearer")]
        [Authorize("AuthorizedAccess")]
        public IEnumerable<Product> GetProducts()
        {
            yield return new Product
            {
                Id = 1,
                SerialNo = "ABC123",
            };
        }

        [HttpGet("{id}")]
        public Product GetProduct(int id)
        {
            return new Product
            {
                Id = 1,
                SerialNo = "ABC123",
            };

        }

        [HttpPost]
        public void CreateProduct([FromBody]Product product)
        {
        }

        [HttpDelete("{id}")]
        public void DeleteProduct(int id)
        {
        }
    }

    public class Product
    {
        public int Id { get; internal set; }
        public string SerialNo { get; set; }
        public ProductStatus Status { get; set; }
    }

    public enum ProductStatus
    {
        InStock, ComingSoon
    }
}
启动后我们可以看到加了Authorize的方法有一把琐一样的图标

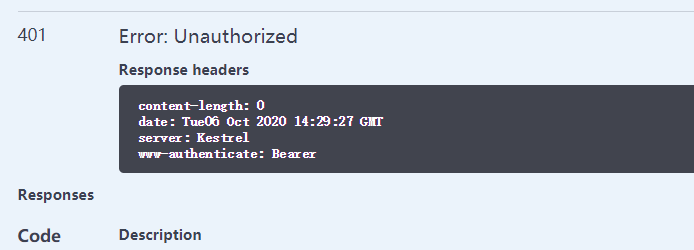
这样的接口需要登录才能正常使用,不登录授权调用返回401,无效授权错误。
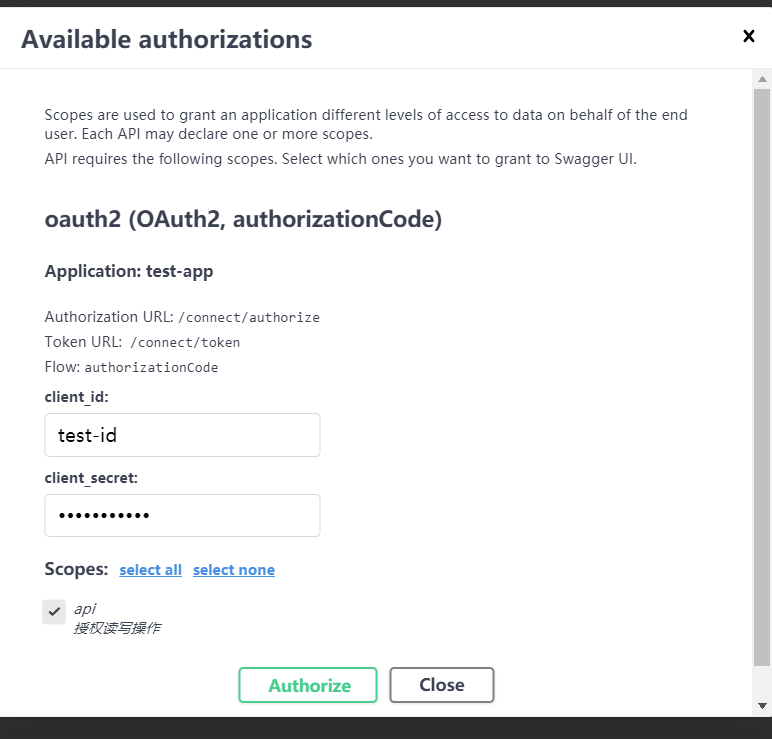
点击琐或者Authorize按钮显示如下界面,勾选对应的api名称,
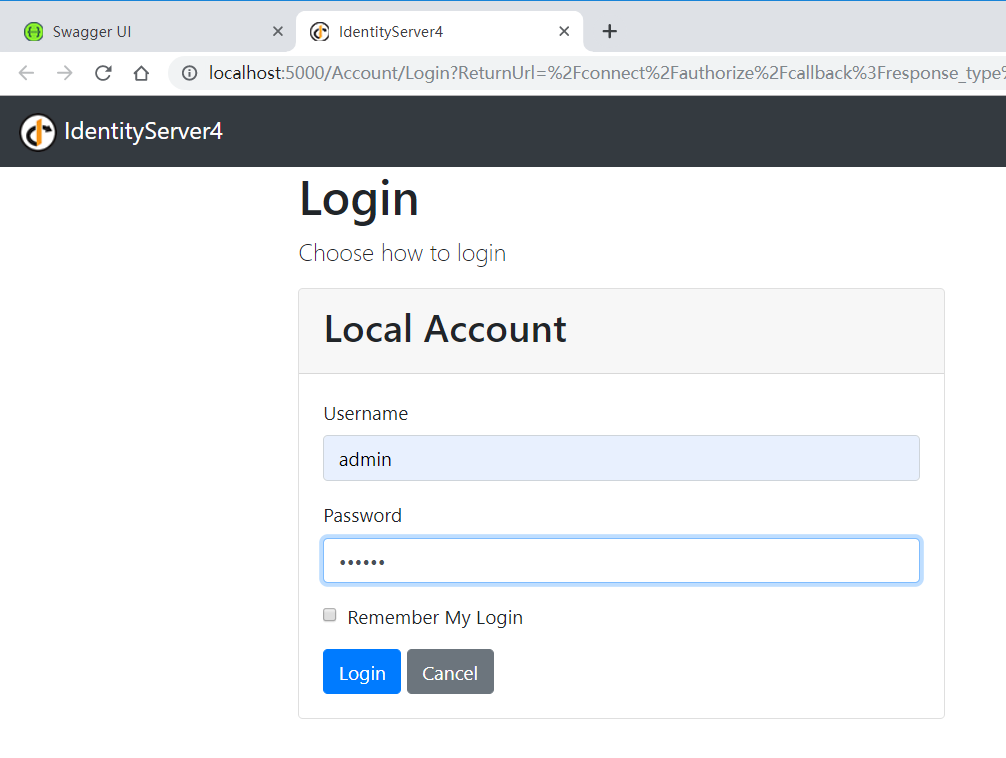
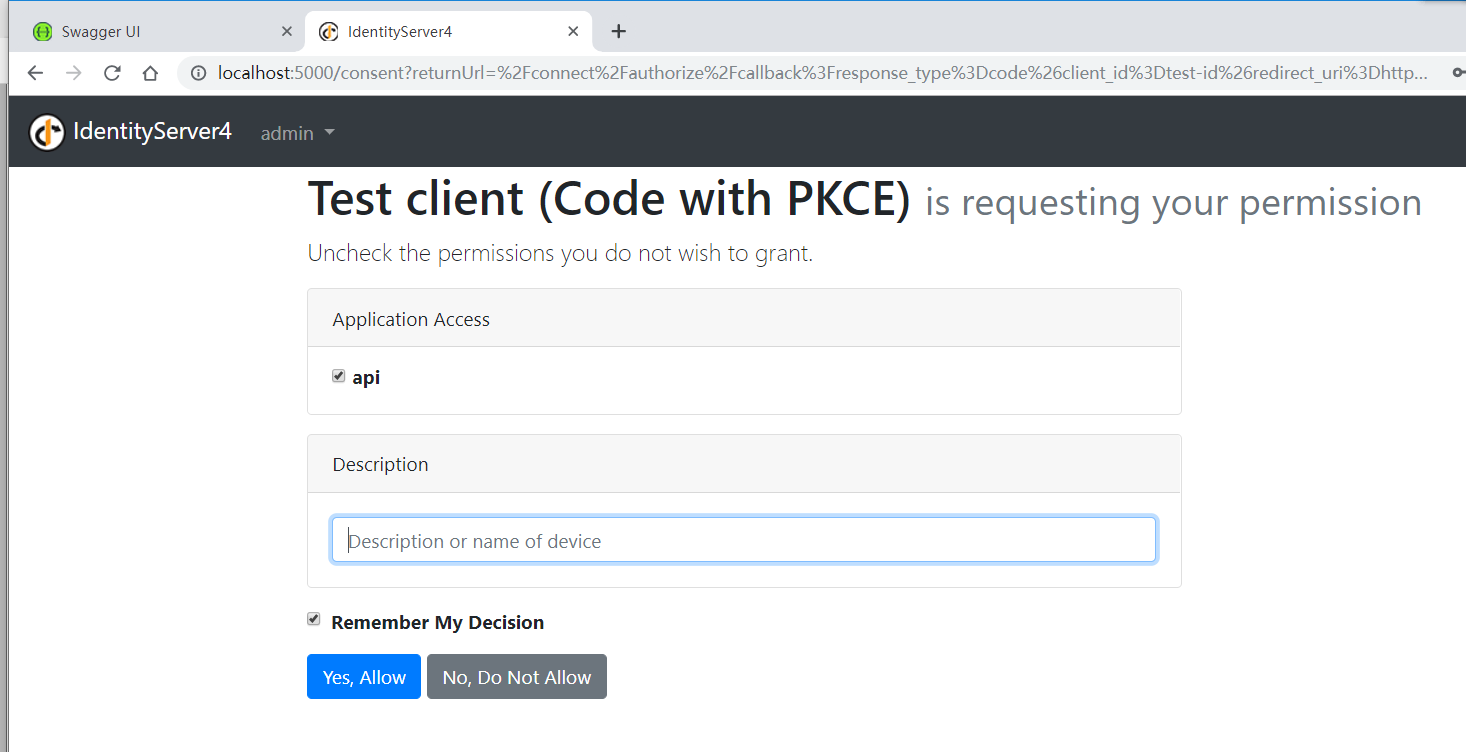
在次点击Authorize会跳转到登录页面,登录在config种配置的用户会跳到授权页面授权后返回api接口页面。
这是完成授权后的界面

在次调用api就能正常调用:

演示源码地址:https://github.com/ice-ko/IdentityServer4-API-Swagger
