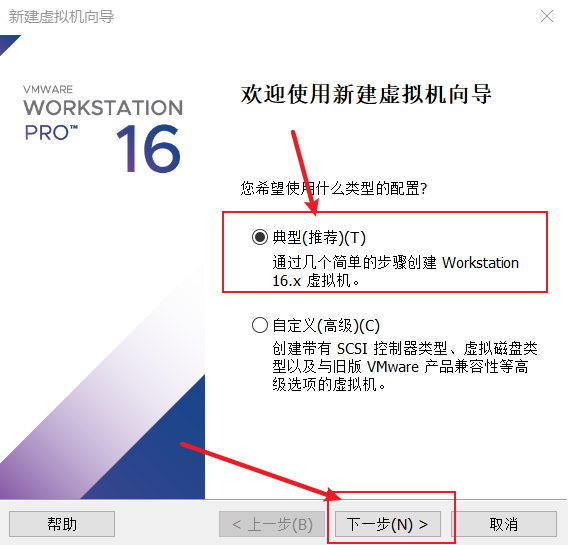
OpenEuler基础实验
VmWare安装OpenEuler21.03
1 下载OpenEuler的镜像
下载完成后进行校验,验证无误后进行安装。
2 安装OpenEuler虚拟机
过程如下:
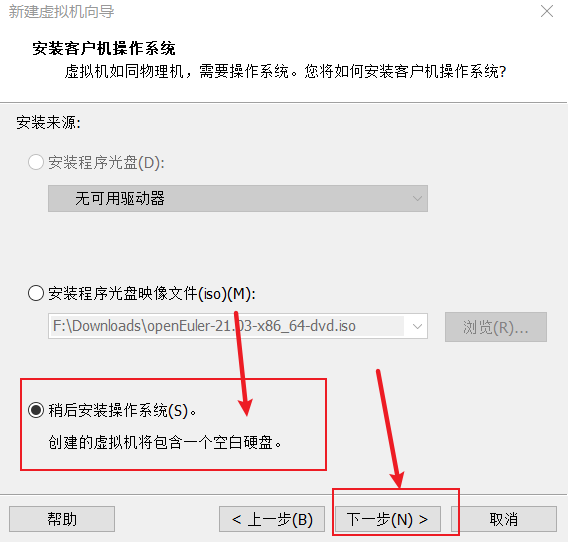
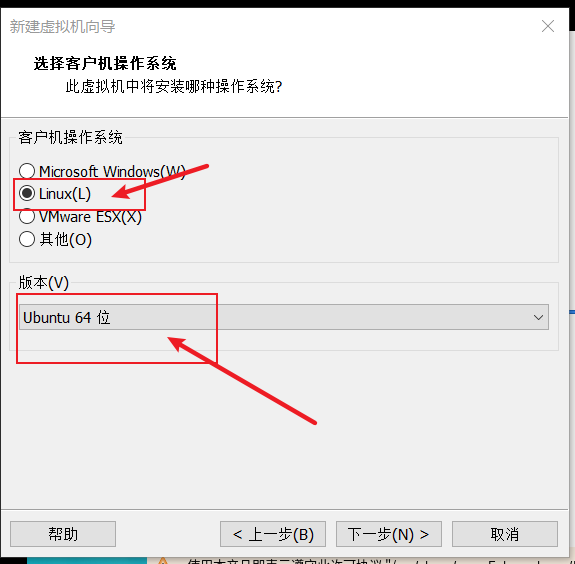

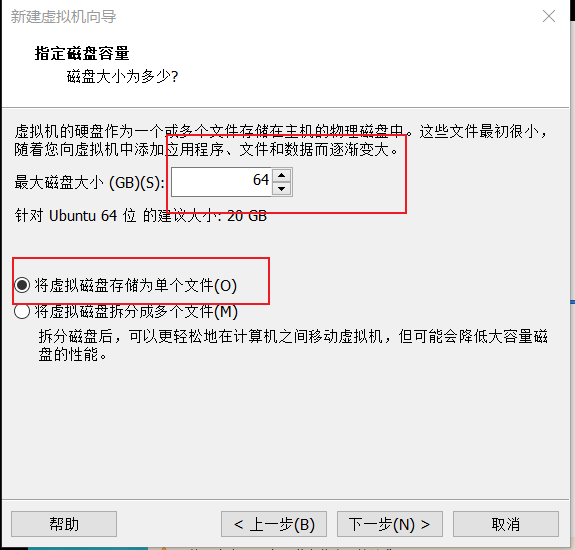
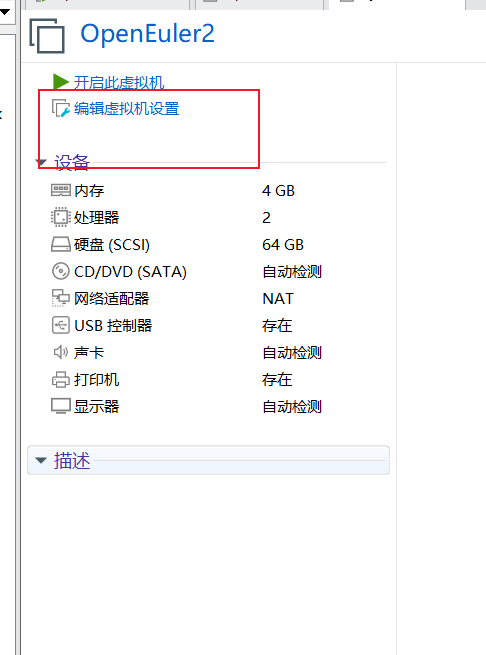
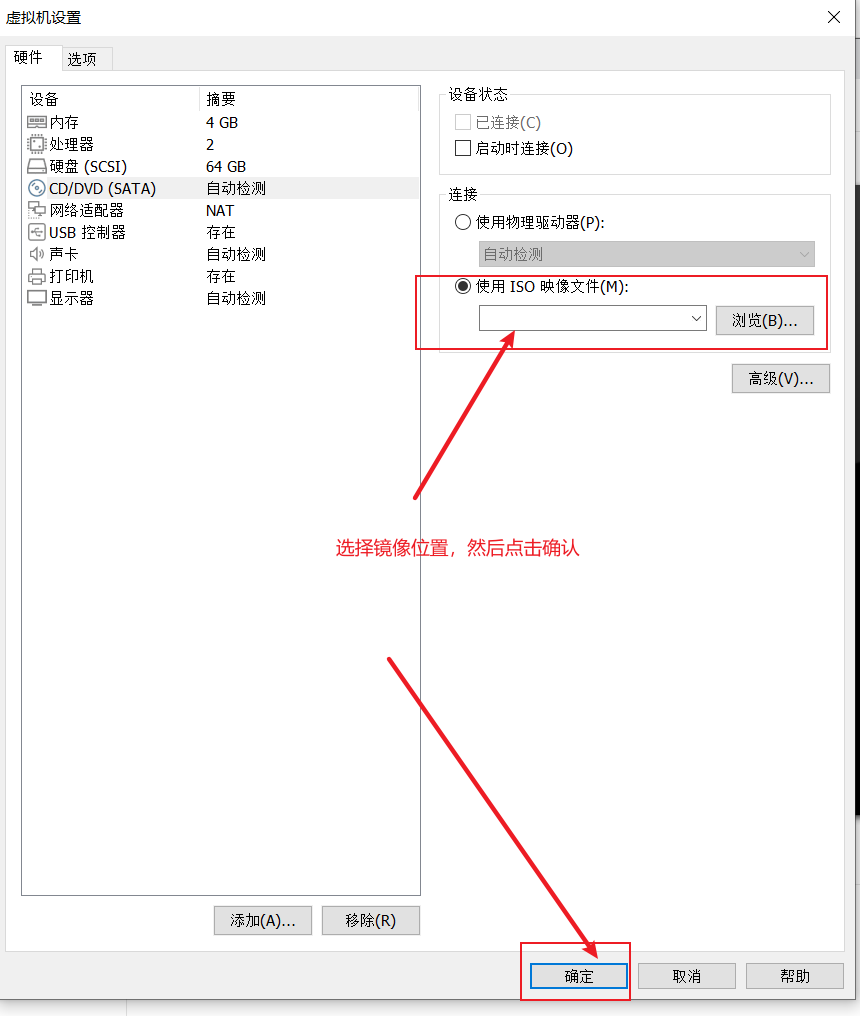
启动虚拟机
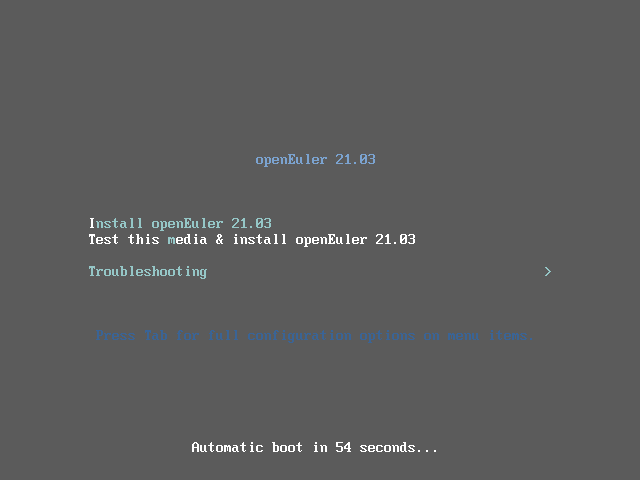
回车,等一会
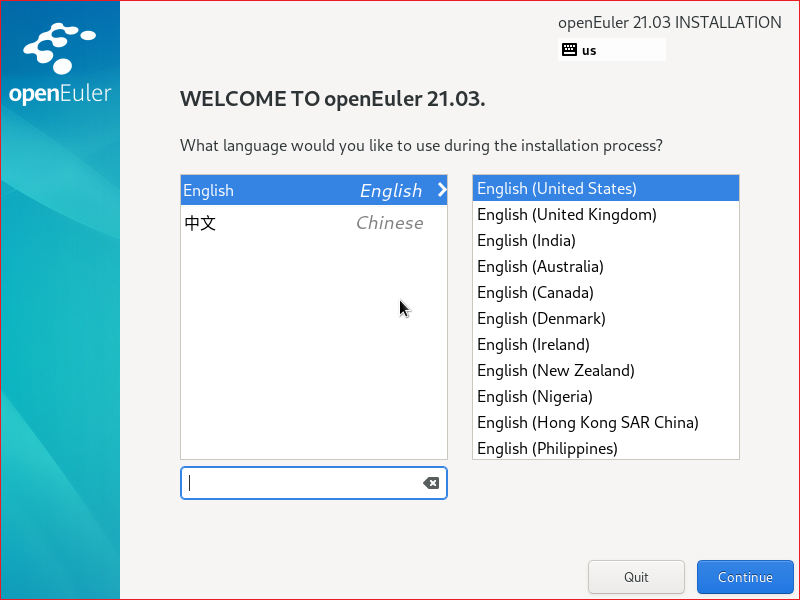
根据喜好选择语言,然后next
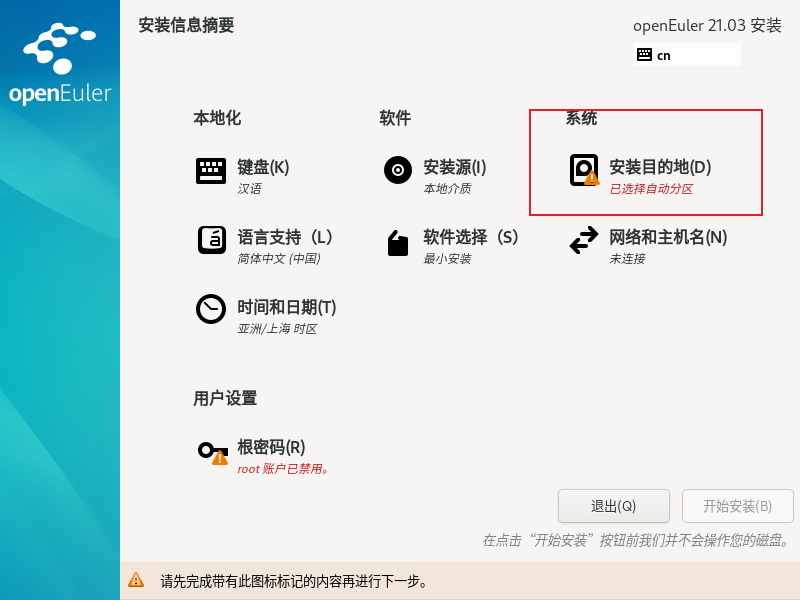
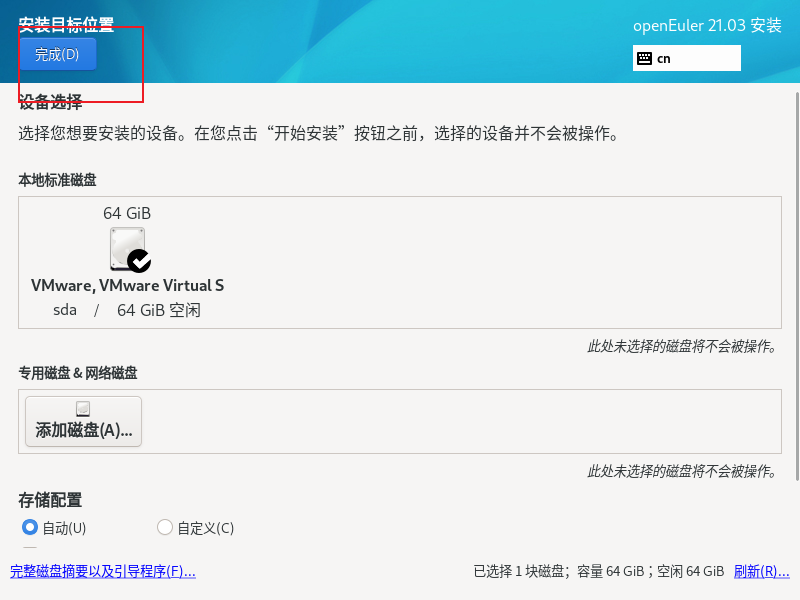
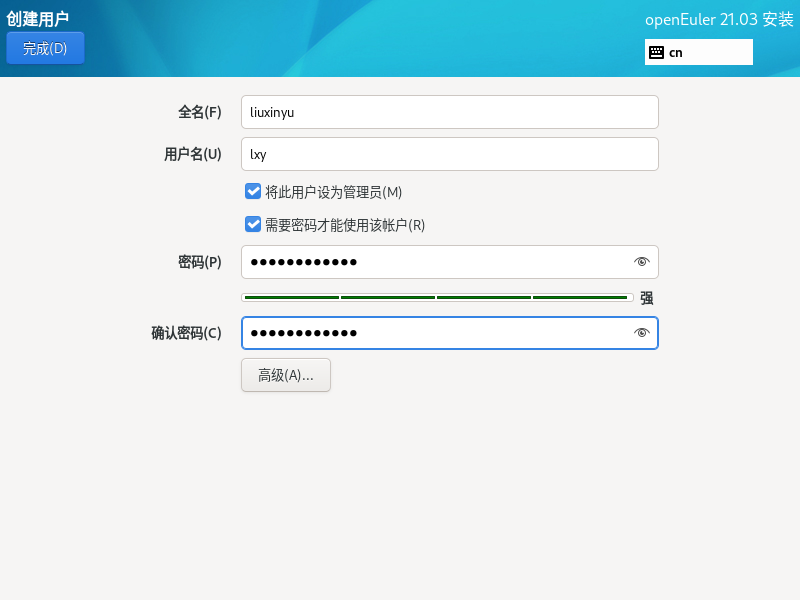
设置root账户密码并创建一个新的管理员账户

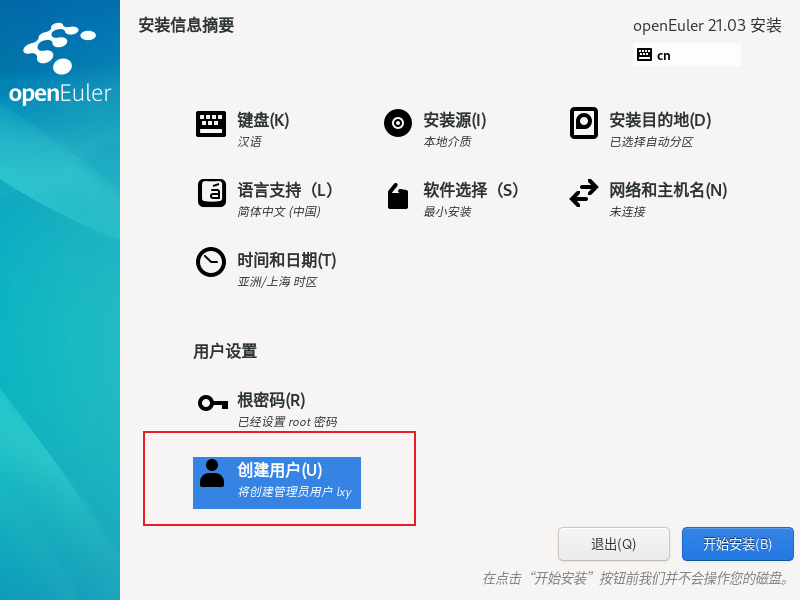
点击开始安装
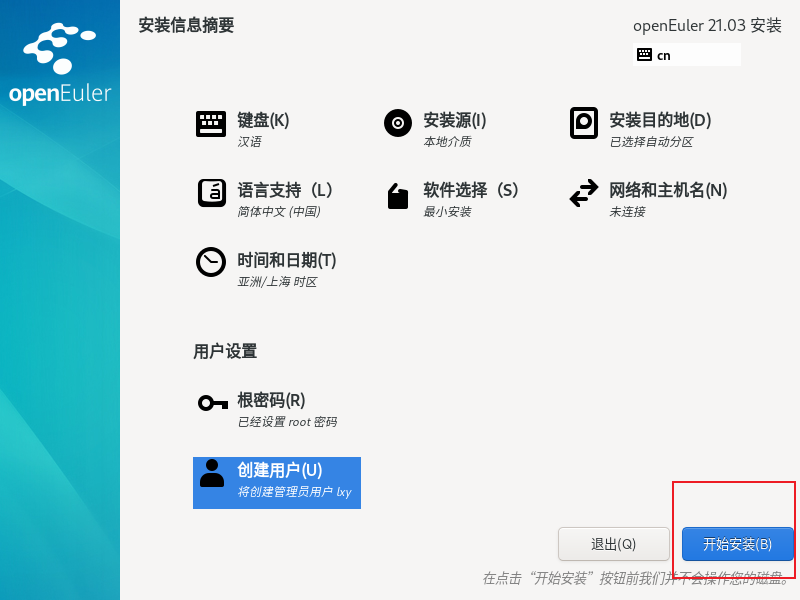
点击开始安装后,等待安装完成重启虚拟机。
3 相关配置
-
配置网络连接
命令:
dhclient ens33

-
安装图形化界面(UKUI)
-
安装图形化界面(XFCF)
这个比UKUI大不少
参考:https://docs.openeuler.org/zh/docs/21.03/docs/desktop/Install_XFCE.html
安装并测试OpenSSL
安装OpenSSL
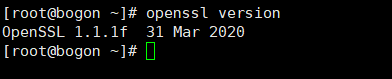
OpenEuler系统中已经安装好了OpenSSL,下面直接开始测试
- 查看版本
- OpenSSL命令
- 标准命令
- 消息摘要命令
- 密码命令
- 测试
-
简单测试
代码:
/*testOpenSSL.c*/
#include <stdio.h>
#include <openssl/evp.h>

int main(){

    OpenSSL_add_all_algorithms();

    return 0;
}
遇到问题:编译时出现报错

分析应该是路径问题,查找openssl库文件路径,发现此时没有对应库文件。重新安装。
安装过程如下:
-
使用
wget https://www.openssl.org/source/openssl-1.1.1l.tar.gz下载源码
-
使用
tar -zxvf openssl-1.1.1l.tar.gz -C OpenSSLsrc命令解压源码 -
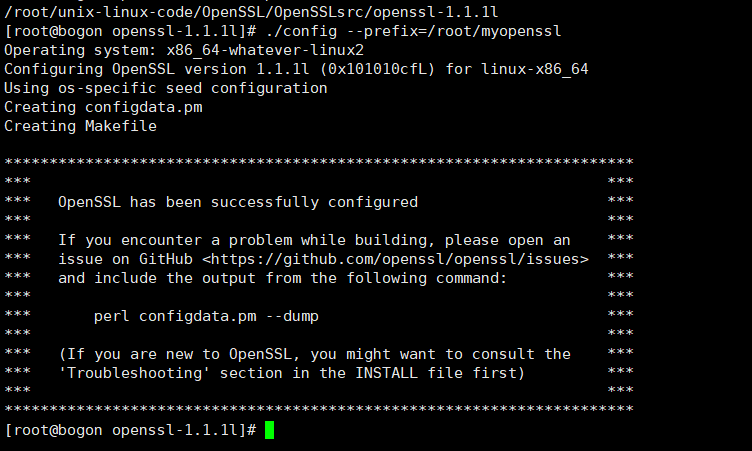
进入
OpenSSLsrc/openssl-1.1.1l目录,使用./config --prefix=/root/myopenssl命令设置编译安装路径
-
编译、测试、安装
使用
make命令进行编译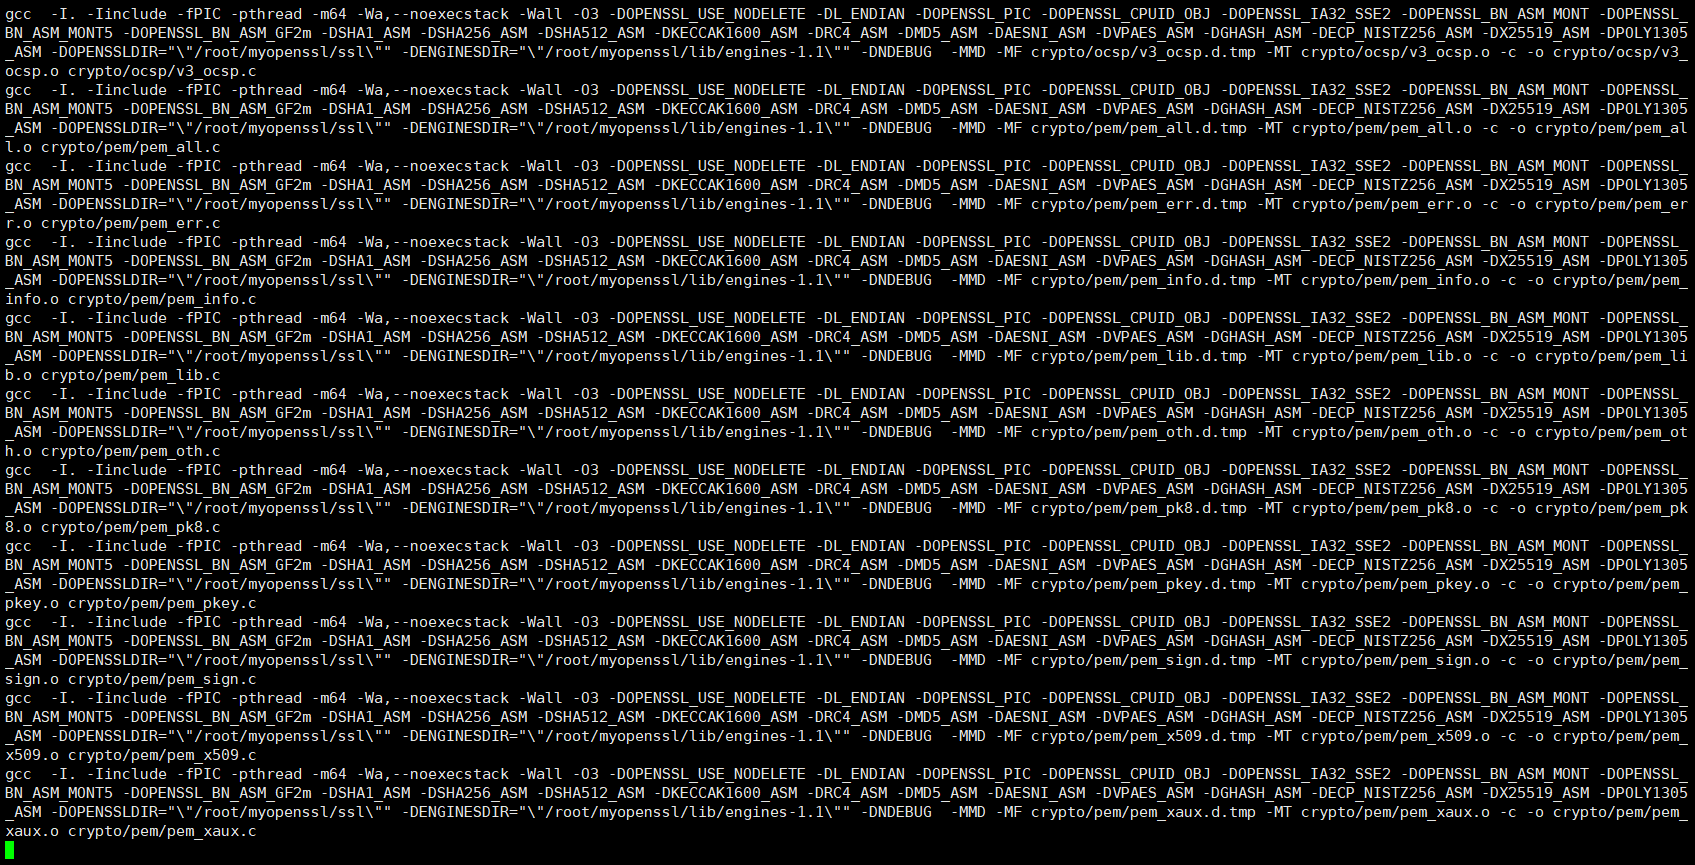
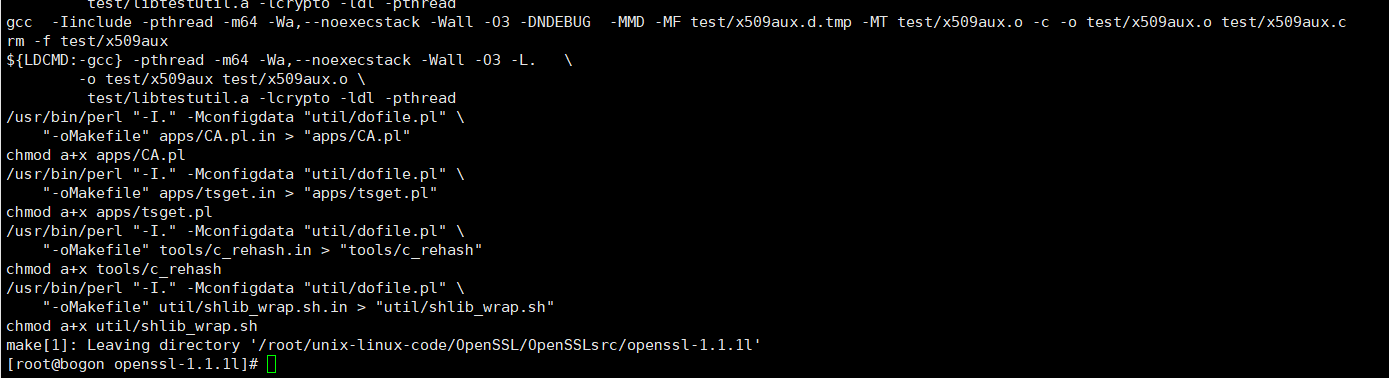
等待一会完成编译后,使用
make test命令进行测试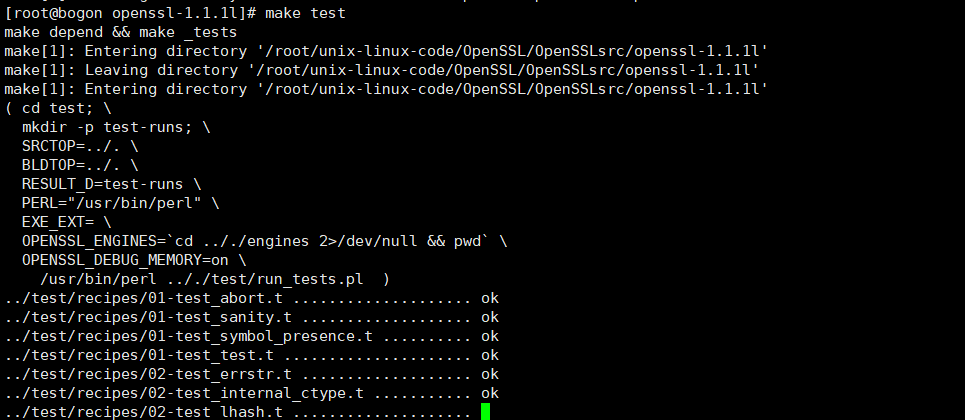

-
最后使用
make install进行安装
-
-
测试OpenSSL
OpenSSL命令的使用
-
使用
openssl help查看帮助文档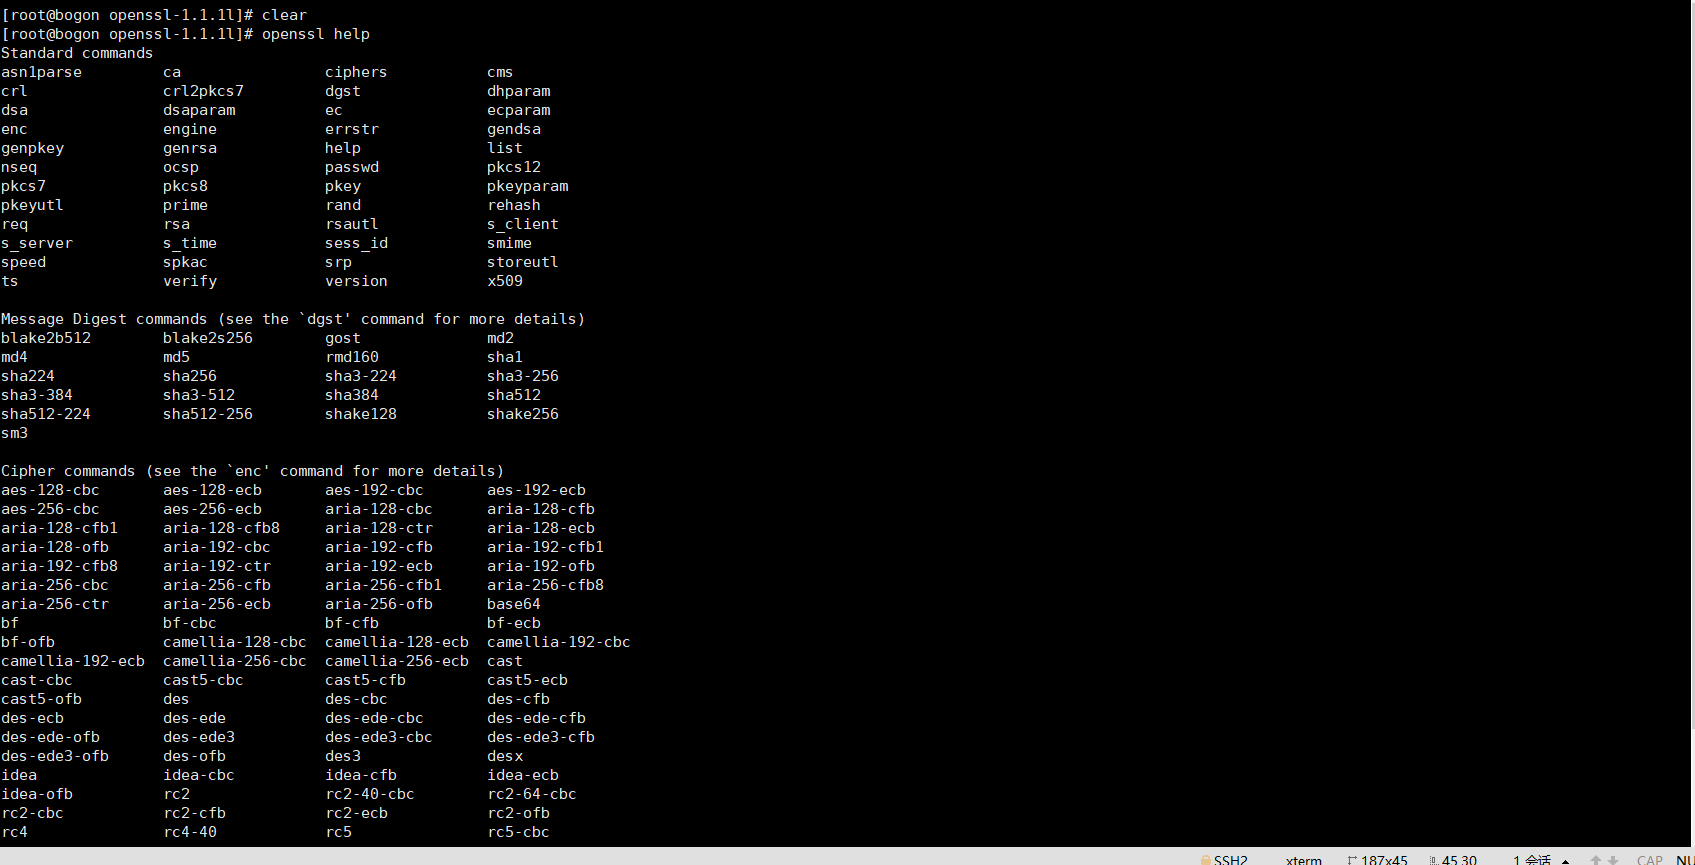
-
OpenSSL命令
- 标准命令
- 消息摘要命令
- 密码命令
-
使用
openssl version查看版本的两种方法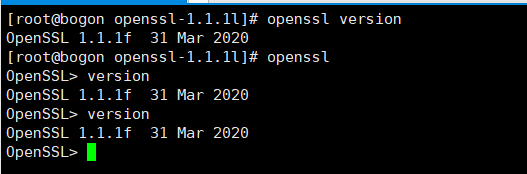
-
把
liuxinyu放到20191312.txt文件中,计算文件的摘要: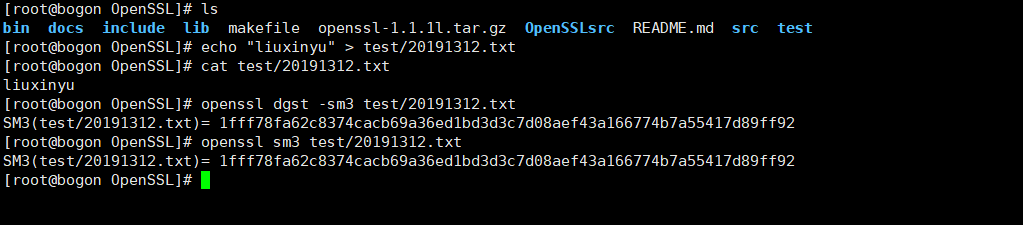
OpenSSL编程
-
简单测试
代码
/*testOpenSSL.c*/
#include <stdio.h>
#include <openssl/evp.h>

int main(){

    OpenSSL_add_all_algorithms();

    return 0;
}
使用
gcc -o bin/testOpenSSL src/testOpenSSL.c -I /root/myopenssl/include -L /root/myopenssl/lib -lcrypto -lpthread命令编译并使用bin/testOpenSSL;echo $?命令运行。
-
BASE64测试
代码
#include <stdio.h>
#include <string.h>
#include <openssl/evp.h>
#include <openssl/x509.h>

//Base64编码
void tEVP_Encode()
{
	EVP_ENCODE_CTX *ctx;
        ctx = EVP_ENCODE_CTX_new();	//EVP编码结构体
	unsigned char in[1024];			//输入数据缓冲区
	int inl;						//输入数据长度
	char out[2048]={0};				//输出数据缓冲区
	int outl;						//输出数据长度
	FILE *infp;						//输入文件句柄
	FILE *outfp;					//输出文件句柄

	infp = fopen("test.dat","rb");//打开待编码的文件
	if(infp == NULL)
	{
		printf("Open File "Test.dat"  for Read Err.
");
		return;
	}

	outfp = fopen("test.txt","w");//打开编码后保存的文件
	if(outfp == NULL)
	{
		printf("Open File "test.txt" For Write Err.
");
		return;
	}
	EVP_EncodeInit(ctx);//Base64编码初始化
	printf("文件"Test.dat" Base64编码后为:
");
	//循环读取原文,并调用EVP_EncodeUpdate计算Base64编码
	while(1)
	{
		inl = fread(in,1,1024,infp);
		if(inl <= 0)
			break;
		EVP_EncodeUpdate(ctx,out,&outl,in,inl);//编码
		fwrite(out,1,outl,outfp);//输出编码结果到文件
		printf("%s",out);
	}
	EVP_EncodeFinal(ctx,out,&outl);//完成编码,输出最后的数据。
	fwrite(out,1,outl,outfp);
	printf("%s",out);
	fclose(infp);
	fclose(outfp);
	printf("对文件"Test.dat" Base64编码完成,保存到"test.txt"文件.


");
}

//Base64解码
void tEVP_Decode()
{
	EVP_ENCODE_CTX *ctx;
        ctx = EVP_ENCODE_CTX_new();			//EVP编码结构体
	char in[1024];					//输入数据缓冲区
	int inl;						//输入数据长度
	unsigned char out[1024];		//输出数据缓冲区
	int outl;						//输出数据长度
	FILE *infp;						//输入文件句柄
	FILE *outfp;					//输出文件句柄

	infp = fopen("test.txt","r");//打开待解码的文件
	if(infp == NULL)
	{
		printf("Open File "Test.txt"  for Read Err.
");
		return;
	}
	outfp = fopen("test-1.dat","wb");//打开解码后保存的文件
	if(outfp == NULL)
	{
		printf("Open File "test-1.txt" For Write Err.
");
		return;
	}
	EVP_DecodeInit(ctx);//Base64解码初始化
	printf("开始对文件"Test.txt" Base64解码...

");
	//循环读取原文,并调用EVP_DecodeUpdate进行Base64解码
	while(1)
	{
		inl = fread(in,1,1024,infp);
		if(inl <= 0)
			break;
		EVP_DecodeUpdate(ctx,out,&outl,in,inl);//Base64解码
		fwrite(out,1,outl,outfp);//输出到文件
	}
	EVP_DecodeFinal(ctx,out,&outl);//完成解码,输出最后的数据。
	fwrite(out,1,outl,outfp);
	fclose(infp);
	fclose(outfp);
	printf("对文件"Test.txt" Base64解码完成,保存为"test-1.dat"


");

}

int main()
{

	tEVP_Encode();
	tEVP_Decode();

	return 0;
}
代码中有中文,编译运行可能出现乱码,使用gcc编译时可以使用如下参数:
- -finput-charset 指定源文件(保存文件时选择)的编码方式(若不指定,编译器默认是UTF-8)
- -fexec-charset 指定可执行程序中的字符以什么编码方式来表示,默认是UTF-8
使用
gcc -o bin/testbase64 src/testbase64.c -I /root/myopenssl/include -L /root/myopenssl/lib -lcrypto -lpthread -finput-charset=GBK -fexec-charset=UTF-8进行编译,出现错误cc1: 错误:无法从 GBK 转换到 UTF-8。

实验
3-2 查找最大数
.section .data
.align 3
my_data:
	.quad 1
	.quad 2
	.quad 5
	.quad 1312
	.quad 10
	.quad 12

my_data_count:
	.quad 6

.align 3
print_data:
	.string "big data: %d
"

.section .text
.globl main
main:
	stp x29, x30, [sp, -16]!

	ldr x0, =my_data
	ldr x1, my_data_count

	add x4, x0, #40

	mov x3, xzr
1:
	ldr x2, [x0], #8
	cmp x2, x3
	csel x3, x2, x3, hi

	cmp x0, x4
	b.ls 1b

	ldr x0, =print_data
	mov x1, x3

	bl printf

	ldp x29, x30, [sp], 16
	ret
运行结果为1312