1. Run spring boot as a standalone application (non-web)
<?xml version="1.0" encoding="UTF-8"?>
<project xmlns="http://maven.apache.org/POM/4.0.0" xmlns:xsi="http://www.w3.org/2001/XMLSchema-instance"
    xsi:schemaLocation="http://maven.apache.org/POM/4.0.0 http://maven.apache.org/xsd/maven-4.0.0.xsd">
    <modelVersion>4.0.0</modelVersion>

    <groupId>com.study</groupId>
    <artifactId>SpringBootTest</artifactId>
    <version>0.0.1-SNAPSHOT</version>
    <packaging>jar</packaging>

    <name>SpringBootTest</name>
    <description></description>

    <parent>
        <groupId>org.springframework.boot</groupId>
        <artifactId>spring-boot-starter-parent</artifactId>
        <version>2.0.1.RELEASE</version>
        <relativePath /> <!-- lookup parent from repository -->
    </parent>

    <properties>
        <project.build.sourceEncoding>UTF-8</project.build.sourceEncoding>
        <project.reporting.outputEncoding>UTF-8</project.reporting.outputEncoding>
        <java.version>1.8</java.version>
    </properties>

    <dependencies>
        <dependency>
            <groupId>org.springframework.boot</groupId>
            <artifactId>spring-boot-starter</artifactId>
        </dependency>
    </dependencies>

    <build>
        <plugins>
            <plugin>
                <groupId>org.springframework.boot</groupId>
                <artifactId>spring-boot-maven-plugin</artifactId>
            </plugin>
        </plugins>
    </build>


</project>
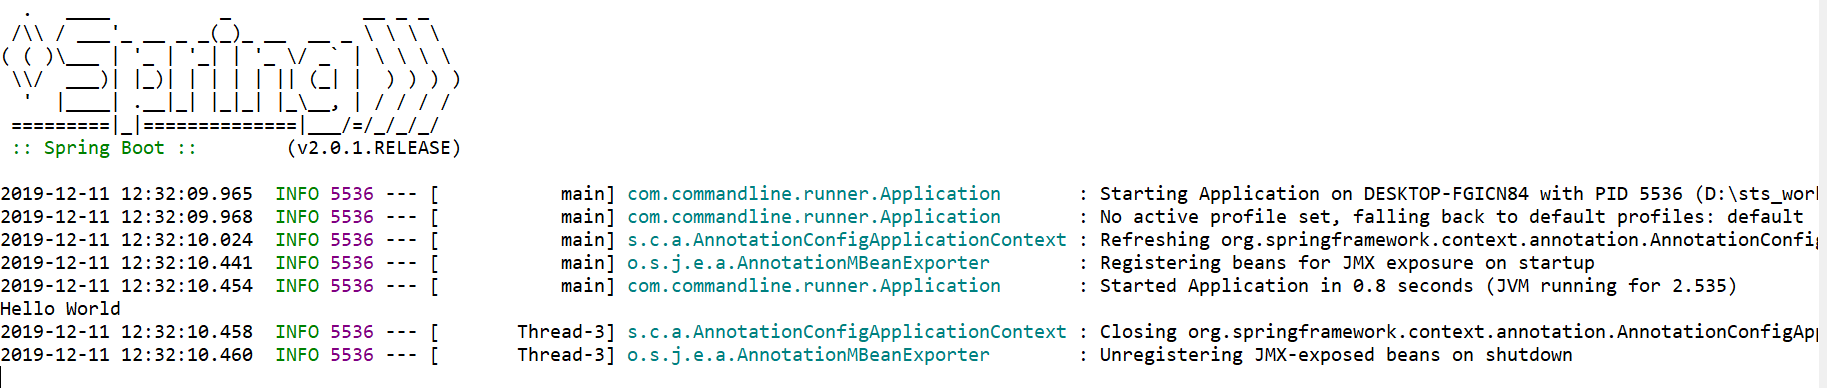
package com.commandline.runner;

import org.springframework.boot.CommandLineRunner;
import org.springframework.boot.SpringApplication;
import org.springframework.boot.autoconfigure.SpringBootApplication;

@SpringBootApplication
public class Application implements CommandLineRunner {

    public static void main(String[] args) {

        SpringApplication app = new SpringApplication(Application.class);
        app.run(args);
    }

    @Override
    public void run(String... args) throws Exception {
        System.out.println("Hello World");
    }

}
2. Use CommandLineRunner 启动系统任务
有一些特殊的任务需要在系统启动时执行,例如配置文件加载、数据库初始化等操作。
Spring Boot 项目会在启动时遍历素有CommandLineRunner的实现类并调用其中的 run 方法,如果有多个CommandLineRunner的实现类,那么可以使用@Order对这些实现类的调用顺序进行排序。
如下有2个实现CommandLineRunner 的类,并用 @Order 定义调用顺序。
<project xmlns="http://maven.apache.org/POM/4.0.0" xmlns:xsi="http://www.w3.org/2001/XMLSchema-instance"
    xsi:schemaLocation="http://maven.apache.org/POM/4.0.0 http://maven.apache.org/xsd/maven-4.0.0.xsd">
    <modelVersion>4.0.0</modelVersion>
    <parent>
        <groupId>org.springframework.boot</groupId>
        <artifactId>spring-boot-starter-parent</artifactId>
        <version>2.0.1.RELEASE</version>
        <relativePath />
    </parent>
    <groupId>com.study</groupId>
    <artifactId>SpringBootTest-1</artifactId>
    <version>0.0.1-SNAPSHOT</version>
    <name>RequestBodyTest</name>
    <description>Demo project for Spring Boot</description>

    <properties>
        <java.version>1.8</java.version>
    </properties>


    <dependencies>
        <dependency>
            <groupId>org.springframework.boot</groupId>
            <artifactId>spring-boot-starter-web</artifactId>
        </dependency>

    </dependencies>

    <build>
        <plugins>
            <plugin>
                <groupId>org.springframework.boot</groupId>
                <artifactId>spring-boot-maven-plugin</artifactId>
            </plugin>
        </plugins>
    </build>

</project>
import java.util.Arrays;

import org.springframework.boot.CommandLineRunner;
import org.springframework.core.annotation.Order;
import org.springframework.stereotype.Component;

@Component
@Order(1)
public class MyCommandLineRunner1 implements CommandLineRunner {

    @Override
    public void run(String... args) throws Exception {
    System.out.println("Runner1>>>" + Arrays.toString(args));

    }

}
package com.commandline.runner;

import java.util.Arrays;

import org.springframework.boot.CommandLineRunner;
import org.springframework.core.annotation.Order;
import org.springframework.stereotype.Component;

@Component
@Order(2)
public class MyCommandLineRunner2 implements CommandLineRunner {

    @Override
    public void run(String... args) throws Exception {
    System.out.println("Runner2>>>" + Arrays.toString(args));

    }

}
import org.springframework.boot.SpringApplication;
import org.springframework.boot.autoconfigure.SpringBootApplication;


@SpringBootApplication
public class WebApplication {

    public static void main(String[] args) {

    SpringApplication.run(WebApplication.class, args);
    }

}
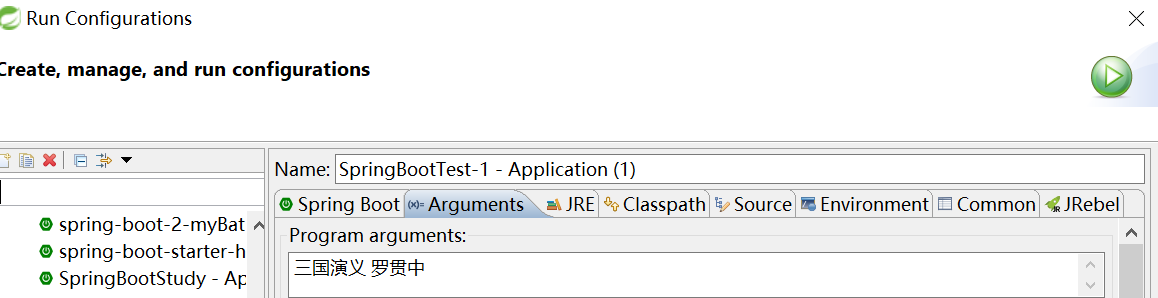
配置参数
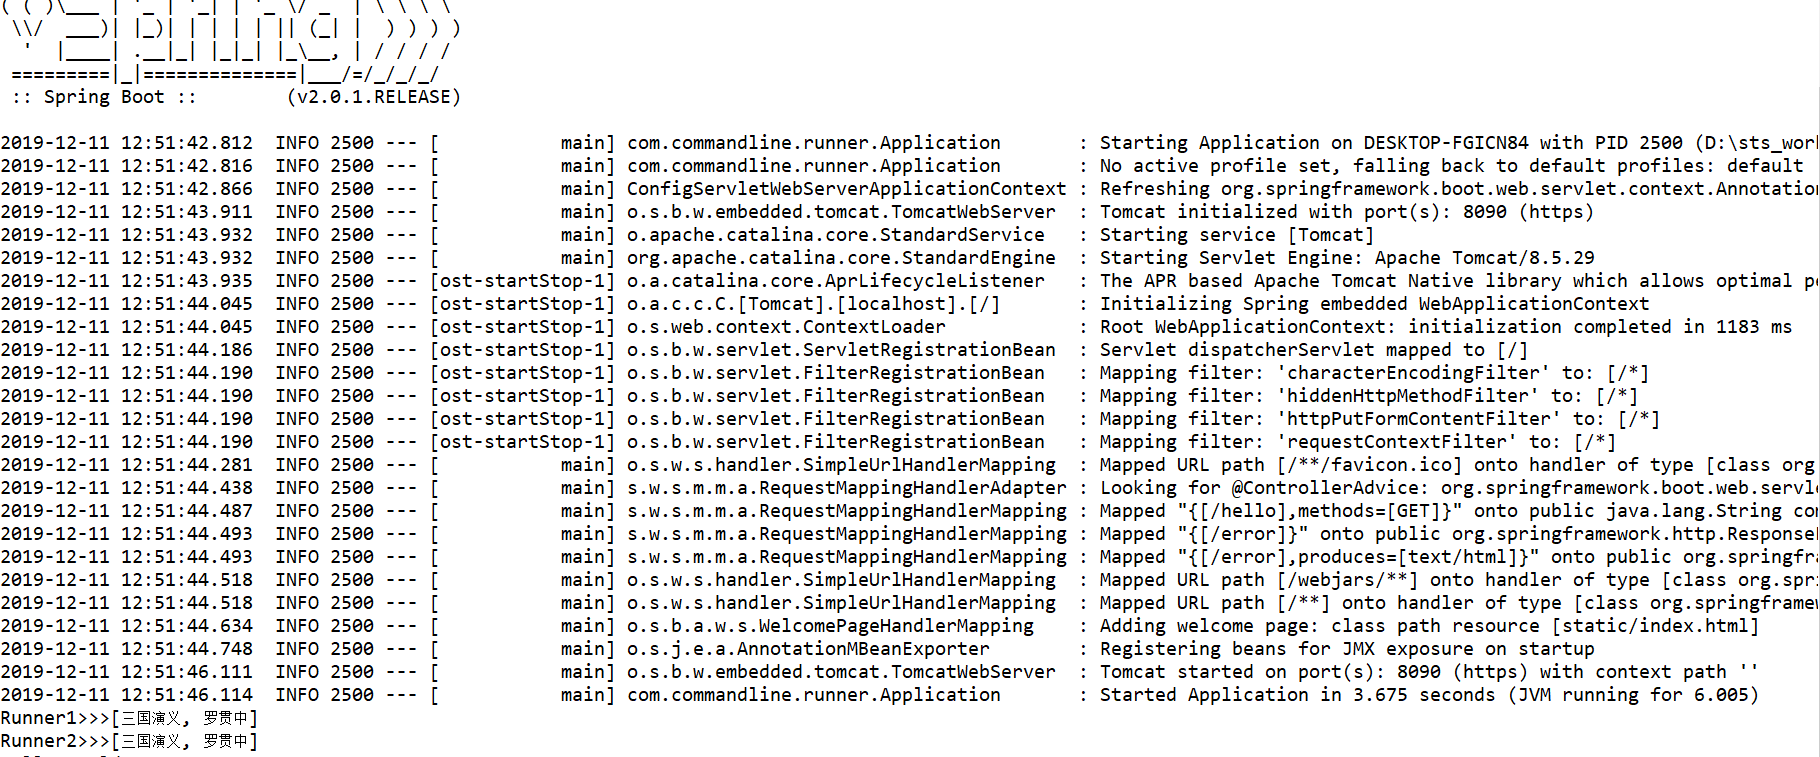
启动WebApplication, 可以看到,如下运行结果:
CommandLineRunner 实现类的 run 方法, 在SpringBoot Application 启动后被调用。
3. CommandLineRunner 和 ApplicationRunner 的区别
CommandLineRunner 和 ApplicationRunner 基本一致,差别主要体现在参数上:
CommandLineRunner: 参数为 String... args
ApplicationRunner: 参数为 ApplicationArguments
import org.springframework.boot.ApplicationArguments;
import org.springframework.boot.ApplicationRunner;
import org.springframework.stereotype.Component;

import java.util.List;
import java.util.Set;

@Component
public class MyApplicationRunner1 implements ApplicationRunner {
    @Override
    public void run(ApplicationArguments args) throws Exception {
        List<String> nonOptionArgs = args.getNonOptionArgs();
        System.out.println("NonOptionArgs>>>" + nonOptionArgs);
        Set<String> optionNames = args.getOptionNames();
        for (String optionName : optionNames) {
            System.out.println("key:" + optionName + ";value:" +
                    args.getOptionValues(optionName));
        }
    }
}
将项目打包,并在命令行执行:

得到如下执行结果:
