Vuex 的核心是 store, 它是一个通过 Vuex.Store 构造函数生成的对象。为什么它会是核心呢?因为我们调用这个构造函数创建store 对象的时候,给它传递参数中包装了state, mutation , action 等核心内容。看一下官网的例子
const store = new Vuex.Store({
  state: {
    count: 0
  },
  mutations: {
    increment (state) {
      state.count++
    }
  }
})
Vuex 的思想是 当我们在页面上点击一个按钮,它会处发(dispatch)一个action, action 随后会执行(commit)一个mutation, mutation 立即会改变state, state 改变以后,我们的页面会state 获取数据,页面发生了变化。 Store 对象,包含了我们谈到的所有内容,action, state, mutation,所以是核心了。
state: When we say state we are talking about a group of dozens of variables to store data, 就是我们页面中用到的各种变量。在写vue 页面中,我们经常写 {{mes}}, mes 就是一个状态,因为它变化,页面就会重新渲染,页面也会发生改变,改变就意状态改变了。
写一个简单的小项目体验一下, 这里用vue-cli webpack-simple
1, vue init webpack-simple count, count 是项目文件名。
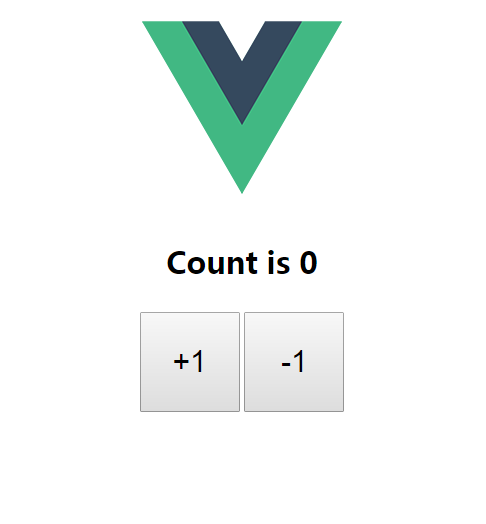
2,cd count && cnpm install && npm run dev, 可以看到大的vue logo ,证明项目启动成功。
3,webpack-simple默认没有安装vuex, 所以要安装vuex; 在命令行中按两次ctrl+c 结束服务器,cnpm install vuex –save 安装vuex.
4, 打开app.vue,删除掉除图片在内的所有内容。
5,在src 目录下新建一个display.vue 组件,用于展示;新建一个increment 组件进行操作。
display.vue:
<template>
    <div>
        <h3>Count is 0</h3>
    </div>
</template>

<script>

</script>

<style scoped>
    h3 {
        font-size: 30px;
    }
</style>
increment.vue
<template>
    <div>
        <button>+1</button>
        <button>-1</button>
    </div>
</template>

<script>

</script>

<style scoped>
    button  {
         100px;
        height: 100px;
        font-size: 30px;
    }
</style>
app.vue
<template>
  <div id="app">
    <img src="./assets/logo.png">
    <display></display>
    <increment></increment>
  </div>
</template>

<script>
import display from "./display.vue";
import increment from "./increment.vue";

export default {
  data () {
    return {

    }
  },
  components: {
    display,
    increment
  }
}
</script>

<style>
  #app {
    text-align: center;
  }
</style>

项目很简单,就是单击按钮+-1. 可以想到,我们这个项目中只有一个变量,就是count, 现在它是0.
用vuex 进行状态管理,store 是vuex的核心,所以命名为store.js. 在src 目录下新建store.js 文件(如下)。可以看到使用vuex 之前,要告诉 vue 使用它,Vue.use(Vuex); 我们这里只有一个变量count 需要管理,所以在创建 store 对象的时候,给构造函数传参,state 下面只有一个count, 且初始化为0。
import Vue from "vue";
import Vuex from "vuex";

Vue.use(Vuex);

const store = new Vuex.Store({
    state: {
        count:0
    }
})
export default store
现在所有的状态,也就是变量都放到了store.js中,那我们组件怎么才能获取到状态修值呢?这里有两个步骤需要操作
1, vue 提供了注入机制,就是把我们的store 对象注入到根实例中。vue的根实例就是 new Vue 构造函数,然后在所有的子组件中,this.$store 来指向store 对象。在store.js 中,我们export store, 把store已经暴露出去了,new Vue() 在main.js中,所以直接在main.js 中引入store 并注入即可。
import Vue from 'vue'
import App from './App.vue'

import store from "./store.js"  // 引入store 对象

new Vue({
  el: '#app',
  store,  // 注入到根实例中
  render: h => h(App)
})
2, 在子组件中,用computed 属性, computed 属性是根据它的依赖自动更新的。所以只要store中的state 发生变化,它就会自动变化。在display.vue 中作下面的更改, 子组件中 this.$store 就是指向store 对象。我们把 store.js 里面的count 变为8, 页面中就变为了8。
<template>
    <div>
        <h3>Count is {{count}}</h3>
    </div>
</template>

<script>
    export default {
        computed: {
            count () {
                return this.$store.state.count
            }
        }
    }
</script>
3, 通过computed属性可以获取到状态值,但是组件中每一个属性(如:count)都是函数,如果有10个,那么就要写10个函数,且重复写10遍return this.$store.state,不是很方便。vue 提供了 mapState 函数,它把state 直接映射到我们的组件中。
当然使用mapState 之前要先引入它。它两种用法,或接受一个对象,或接受一个数组。还是在display.vue 组件下。
对象用法如下:
<script>     import {mapState} from "vuex";  // 引入mapState
    export default {       // 下面这两种写法都可以
        computed: mapState({
            count: state => state.count   // 组件内的每一个属性函数都会获得一个默认参数state, 然后通过state 直接获取它的属性更简洁
            count: 'count'         // 'count' 直接映射到state 对象中的count, 它相当于 this.$store.state.count,
        })
    }
</script>
数组方式:上面的第二种方式count: 'count',还是有点麻烦,因为要写两遍。如果我们组件中的属性和state 中的属性名称一样,我们不想改名字,那就把直接把属性名写在数组中。
<script>
    import {mapState} from "vuex";
    export default {
        computed: mapState([   // 数组
            "count"
        ])
    }
</script>
4, 还有最后一个问题,如果我们组件内部也有computed 属性怎么办?它又不属于mapState 中。那就用到了对象分割,把mapState函数生成的对象再分割成一个个的,就像最开始的时候,我们一个一个罗列计算属性,有10个属性,我们就写10个函数。
es6中的... 就是分割用的,但是只能分割数组。在ECMAScript stage-3 阶段它可以分割对象,所以这时还要用到babel-stage-3; npm install babel-preset-stage-3 --save-dev, 安装完全后,一定不要忘记在babelrc 就是babel 的配置文件中,写入stage-3,
否则一直报错。在页面中添加个 p 标签,显示我们组件的计算熟悉
babelrc
{
  "presets": [
    ["env", {
      "es2015": { "modules": false }
    }],
    "stage-3"   // 一定不要忘记
  ]
}
display.vue 组件更改后
<template>
    <div>
        <h3>Count is {{count}}</h3>
        <p>组件自己的内部计算属性 {{ localComputed }}</p>
    </div>
</template>

<script>
    import {mapState} from "vuex";
    export default {
        computed: {
            localComputed () {
                return this.count + 10;
            },
            ...mapState({
                count: "count"
            })
        }
    }
</script>
