安装GPU驱动和CUDA工具包(nvidia)
-
环境
显卡型号: GPU 2080 ti *8
操作系统: CentOS Linux release 7.8.2003 (Core)
docker 版本: 20.10.6 (18 版本不支持gpu) -
软件下载
nvidia驱动
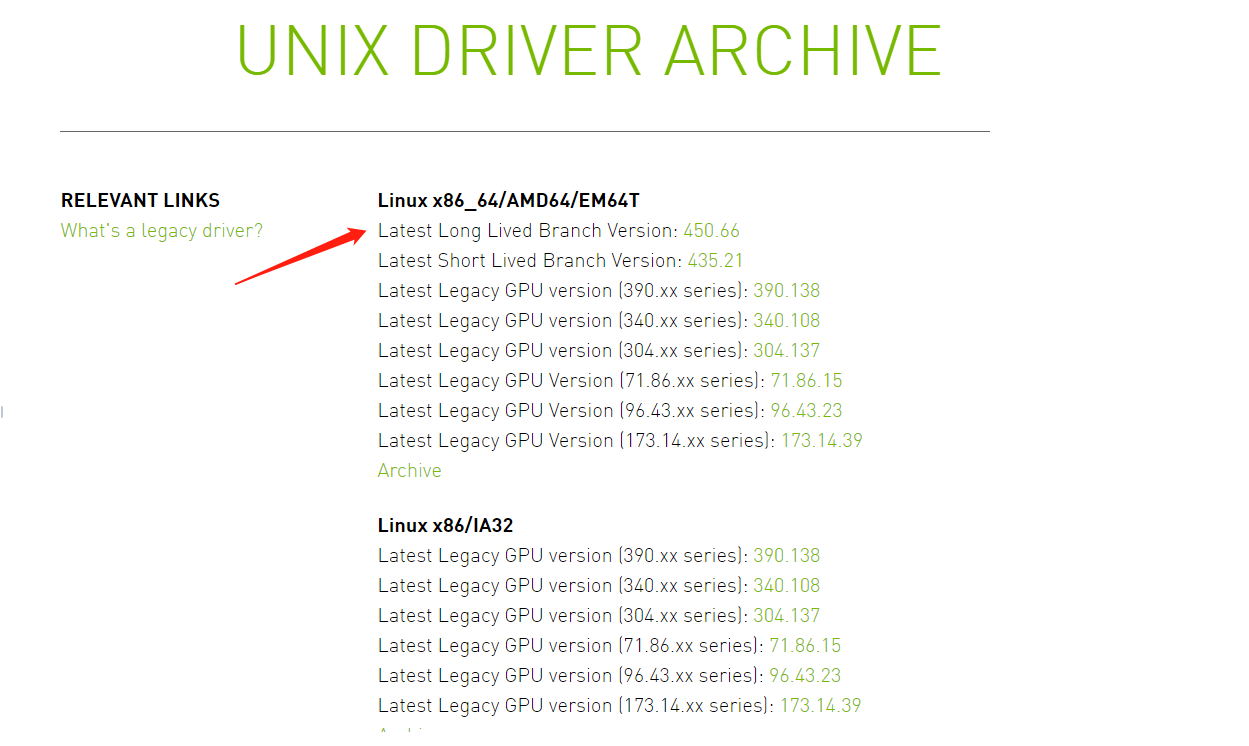
官方地址:https://www.nvidia.com/en-us/drivers/unix/
找到 Latest Long Lived Branch Version(长期支持版)

- cuda工具包
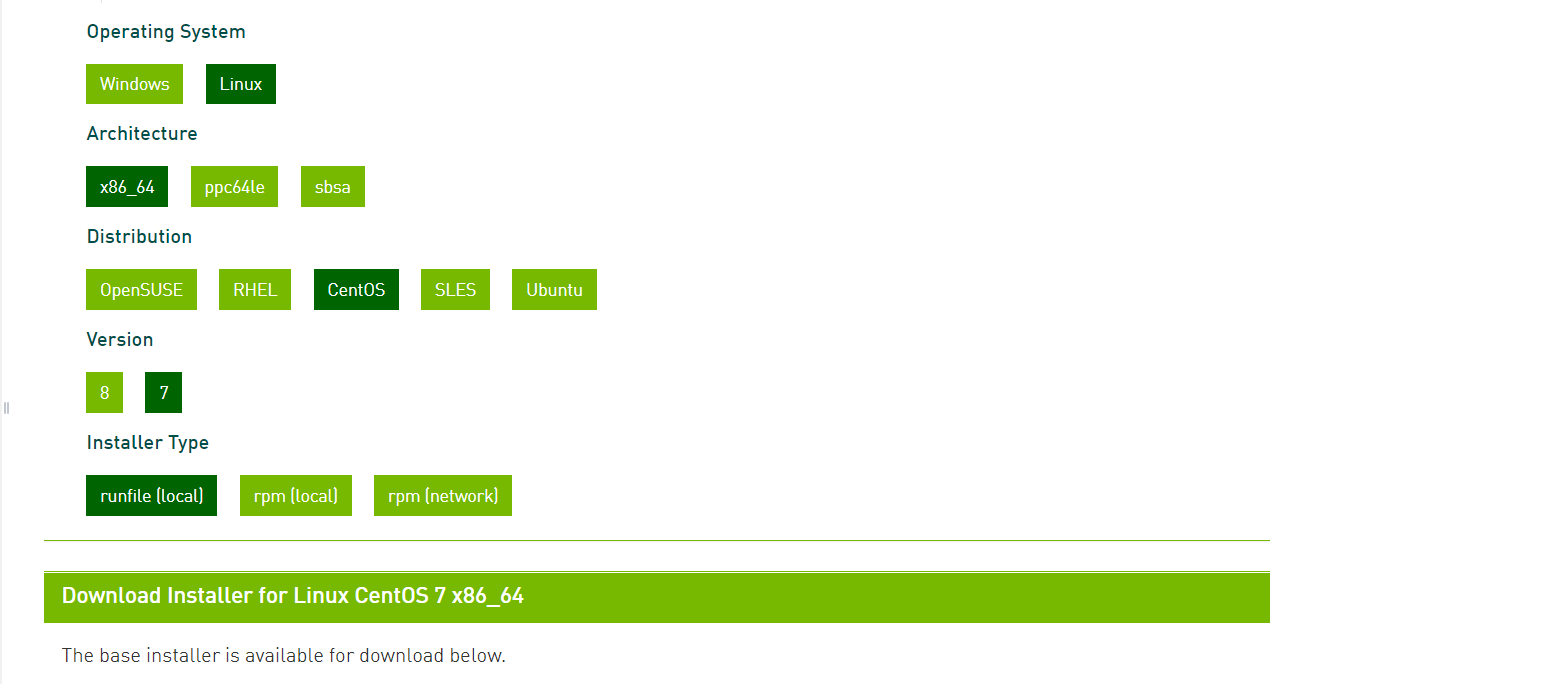
官方地址:https://developer.nvidia.com/cuda-downloads


- 升级内核
# 安装yum源
rpm --import https://www.elrepo.org/RPM-GPG-KEY-elrepo.org
rpm -Uvh http://www.elrepo.org/elrepo-release-7.0-3.el7.elrepo.noarch.rpm

# 查看列表
yum --disablerepo=* --enablerepo=elrepo-kernel repolist
yum --disablerepo=* --enablerepo=elrepo-kernel list kernel*


# 安装
yum --enablerepo=elrepo-kernel install kernel-ml-devel kernel-ml -y


# 设置生成新的grub
grub2-set-default 0
grub2-mkconfig -o /etc/grub2.cfg


# 移除旧版本工具包
yum remove kernel-tools-libs.x86_64 kernel-tools.x86_64 -y

# 安装新版本
yum --disablerepo=* --enablerepo=elrepo-kernel install -y kernel-ml-tools.x86_64


# 重启
reboot

# 查看内核版本
uname -sr
- 安装NVIDIA驱动和CUDA工具包
- 环境依赖
shell> wget -O /etc/yum.repos.d/epel.repo http://mirrors.aliyun.com/repo/epel-7.repo
shell> yum install -y gcc dkms

- 禁用nouveau
shell> echo -e "blacklist nouveau
options nouveau modeset=0" | sudo tee -a /etc/modprobe.d/blacklist.conf
shell> mv /boot/initramfs-$(uname -r).img /boot/initramfs-$(uname -r).img.bak
shell> dracut /boot/initramfs-$(uname -r).img $(uname -r)

- 修改 /etc/default/grub,在 GRUB_CMDLINE_LINUX 添加 rdblacklist=nouveau,并重启
shell> sed -i 's/quiet/& rdblacklist=nouveau/' /etc/default/grub
shell> grub2-mkconfig -o /boot/grub2/grub.cfg
shell> reboot

- 首次安装Nvidia驱动
shell> bash NVIDIA-Linux-x86_64-450.66.run
- 安装过程中一些选项
1、问题:Would you like to register the kernel module souces with DKMS? This will allow DKMS to automatically build a new module, if you install a different kernel later?
选择 No 继续。
2、问题:CC version check failed

选择 Abort installation 继续。
- 解决gcc版本问题
shell> gcc --version
gcc (GCC) 4.8.5 20150623 (Red Hat 4.8.5-39)
Copyright (C) 2015 Free Software Foundation, Inc.
This is free software; see the source for copying conditions. There is NO
warranty; not even for MERCHANTABILITY or FITNESS FOR A PARTICULAR PURPOSE.

shell> yum -y install centos-release-scl
shell> yum list |grep gcc |grep sclo
shell> yum install -y devtoolset-9-gcc*

shell> scl enable devtoolset-9 bash
[root@YingPuOS src]# gcc --version
gcc (GCC) 9.3.1 20200408 (Red Hat 9.3.1-2)
Copyright (C) 2019 Free Software Foundation, Inc.
This is free software; see the source for copying conditions. There is NO
warranty; not even for MERCHANTABILITY or FITNESS FOR A PARTICULAR PURPOSE.
- 再次安装Nvidia驱动
shell> bash NVIDIA-Linux-x86_64-450.66.run
shell> exit
- 安装过程中一些选项:
1、问题:Would you like to register the kernel module souces with DKMS? This will allow DKMS to automatically build a new module, if you install a different kernel later?
选择 No 继续。
2、问题:Nvidia’s 32-bit compatibility libraries?
选择 No 继续。
3、问题:The distribution-provided pre-install script failed! Are you sure you want to continue?
选择 yes 继续。
4、问题:Would you like to run the nvidia-xconfigutility to automatically update your x configuration so that the NVIDIA x driver will be used when you restart x? Any pre-existing x confile will be backed up.
选择 Yes 继续

5、问题:WARNING: nvidia-installer was forced to guess the X library path '/usr/lib64' and X module path '/usr/lib64/xorg/modules'; these paths were
not queryable from the system. If X fails to find the NVIDIA X driver module, please install the `pkg-config` utility and the X.Org
SDK/development package for your distribution and reinstall the driver.

选择ok继续
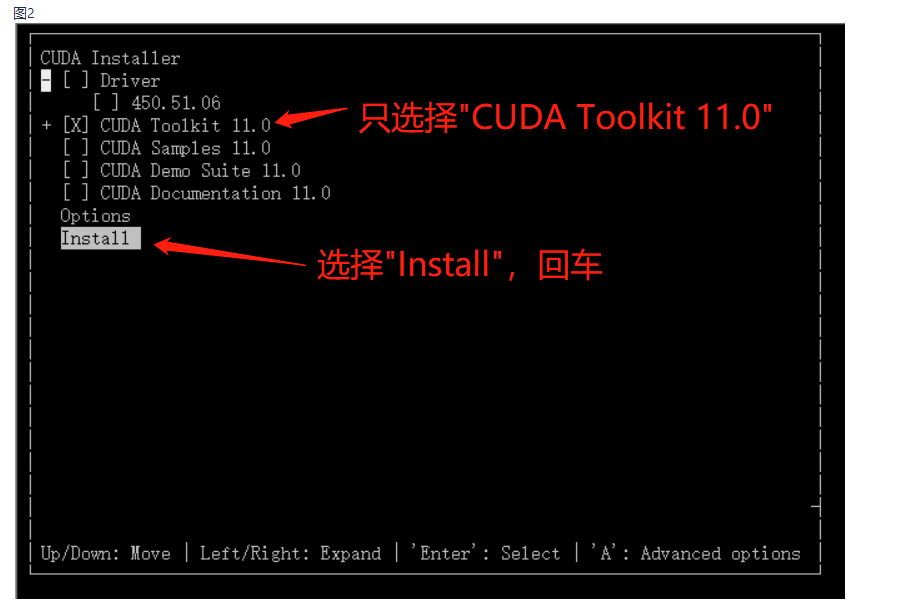
- 安装CUDA
shell> bash cuda_11.0.3_450.51.06_linux.run


- 开启 persistence-mode 模式
shell> /usr/bin/nvidia-persistenced --persistence-mode
shell> echo "/usr/bin/nvidia-persistenced --persistence-mode" >> /etc/rc.d/rc.local
- 查看GPU使用情况

- 设置NVIDIA Container Toolkit
distribution=$(. /etc/os-release;echo $ID$VERSION_ID)
   && curl -s -L https://nvidia.github.io/nvidia-docker/$distribution/nvidia-docker.repo | sudo tee /etc/yum.repos.d/nvidia-docker.repo

#更新软件包清单后,安装软件包(和依赖项):
yum clean expire-cache

yum install -y nvidia-docker2

# cat  /etc/docker/daemon.json
{
    "default-runtime": "nvidia",
    "runtimes": {
        "nvidia": {
            "path": "nvidia-container-runtime",
            "runtimeArgs": []
        }
    },
    "insecure-registries": ["xxxxxxxxxxxxx"]
}

#设置默认运行时后,重新启动Docker守护程序以完成安装:
systemctl restart docker

#可以通过运行基本CUDA容器来测试工作设置:
docker run --rm --gpus all nvidia/cuda:11.0-base nvidia-smi
