安装:
方法1:
下载:进入要安装目录path/www:执行 如下命令 创建一个文件名为blog的项目 然后composer将laravel的文件下载到此文件
composer create-project --prefer-dist laravel/laravel blog
下载完毕后执行composer install 安装laravel的依赖包及自动生成应用程序密钥
方法2:
github.com下载压缩包解压到你要安装的目录 ,cmd控制台进入该目录 然后执行命令composer instal
2、安装完成后 在cmd控制台输入: php artisan key:generate 没有这一步很大可能报错 in compiled.php line 13331:The only supported ciphers are AES-128-CBC and AES-256-CBC with the correct key lengths.
复制根目录.env.example文件为.env (window cmd copy .env.example .env | linux系统 cp .env.example .env)
定位到项目根目录 输入 php artisan key:generate 然后key就自动填写到.env文件里了
当然也可以复制key到config/app.php文件(虽然没什么必要) 'key' => env('APP_KEY','上一部生成的key'),
方法3:
像我一样换了国内镜像也慢的不行的 那就下载一键安装包吧 下载地址 解压即可访问
出现 file_get_contents(D:xampphtdocslaravel-master/.env): failed to open stream: No such file or directory 给app/storage目录设置权限即可解决问题chmod -Rvc 777 app/storage
如果有些版本不起作用那么使用
find
app/storage -type d -exec chmod -vc 777 {} \;
find
app/storage -type f -exec chmod -vc 777 {} \;
打开开发者调试模式:
出现Whoops, looks like something went wrong 那么需要打开config/app.php将debug调试以便打印错误原因
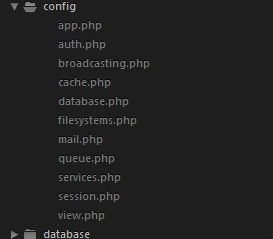
配置目录:
获取配置信息:
config('app');                #获取/config/app.php的所有信息
config('app.name');           #获取/config/app.php的某个信息
config('auth.defaults');      #获取/config/auth.php的某个信息
动态设置配置信息:
config([
    'app.timezone' => 'America/Chicago',
    'app.name'=>'Laravel',
    'auth.default'=>[
        'guard' => 'web',
        'passwords' => 'users',
    ]
]);
配置缓存、维护模式
核心概念:
服务容器、服务提供器、契约 即依赖注入 依赖注入精要
路由:
//在/routes/web.php 中定义路由
//首页 转发到/resources/views/welcome.blade.php
Route::get('/', function () {
    return view('welcome');

});


# (get请求) 路由输出字符串:http://localhost/laravel/public/base
Route::get('base', function () {
    return 'hello world!';
});

# (post请求) 路由输出字符串:http://localhost/laravel/public/base
Route::post('base', function () {
    return 'hello world!';
});

# 由http://localhost/laravel/public/about的转发到/resources/views/home/index.blade.php
Route::get('about', function () {
    return view('home.index');
});

# 多请求路由
Route::match(['get','post'],'base2',function(){
   return '多请求路由,可以接受get和post请求';
});
Route::any('base3',function(){
    return  '接受任何请求'  ;
});
# 路由参数:http://localhost/laravel/public/user/1    路由传递id=1
Route::get('user/{id}',function($id){
    return 'user-'.$id;
});

# 可选的路由参数
Route::get('user/{name?}',function($name=null){
    return 'user-'.$name;
});
# 带默认值的可选的路由参数
Route::get('user/{name?}', function($name = 'John') {
    return $name;
});

# 带正则表达式约束的路由  Route::get()->where()
Route::get('user/{name}', function($name) {
    return $name;
})->where('name', '[A-Za-z]+');

Route::get('user/{id}', function($id) {
    return $id;
})->where('id', '[0-9]+');

#多参数的约束路由//http://localhost/laravel/public/user/2/tom
Route::get('user/{id}/{name?}', function($id,$name='sean') {
    return $id.$name;
})->where(['id'=>'[0-9]+','name'=>'[A-Za-z]+']);

#前缀+路由群组
Route::group(['prefix'=>'member'],function(){
    # http://localhost/laravel/public/member/user/custom
    Route::get('user/custom',['as'=>'center', function() {
        return route('center');
    }]);
    # http://localhost/laravel/public/member/base
    Route::any('base',function(){
        return 'this is base';
    });
});


#转发到控制器方法
# 由http://localhost/laravel/public/member/info的转发到/app/Http/Controller/MemberController.php 里的MemberController类的demofunction
Route::get('member/info', "MemberController@demofunction");
Route::get('member/info', ['uses'=>"MemberController@demofunction"]);

#路由别名:   控制器等地方获取路由时使用别名就ok route('memberinfo');
Route::get('member/info', [
    'uses'=>"MemberController@demofunction",
    'as'=>"memberinfo"                                     #路由别名#指定路由名称
    ]);


#转发到控制器方法
# 由http://localhost/laravel/public/member/2/dash
Route::get('member/{id}/{name?}', "MemberController@info")
->where(['id'=>'[0-9]+','name'=>'[A-Za-z]+'])
->name('member');

Route::get('member/{id}/{name?}', [
    'uses'=>"MemberController@info",
    function() {
        return route('center');
    }
])->where(['id'=>'[0-9]+','name'=>'[A-Za-z]+'])
->name('member');#等同于下面这个:

#路由别名:   控制器等地方获取路由时使用别名就ok route('memberinfo');
Route::get('member/{id}/{name?}', [
    'uses'=>"MemberController@info",
    'as'=>"member",   #等同于->name('uses')
    function(){
        return route('member');
    }
])->where(['id'=>'[0-9]+','name'=>'[A-Za-z]+']);
路由和URL生成
Route::get('articles',[
    'uses'=>'ArticlesController@index',
    'as'=>'articles.index' #等同于name()
]);
Route::get('/iocallreport/export-file/{type}', 'CmsReportsController@exportFile');
#简单模式    格式  网站根url+参数
<a href="{{ url('/articles') }}">链接</a>
<a href="{{ url('iocallreport/export-file/',['type'=>'xls']) }}">Download Excel xls</a>
# or
<a href="{{ URL::to('/articles') }}">链接</a>

#路由模式 这种方式是指定匹配注册路由时的 'as' 参数,得到注册的uri。
URL::route('articles.index')
Route::get('/iocallreport/export-file/{type}', 'CmsReportsController@exportFile')->name('iocallreport');
<a href="{{ route('iocallreport',['type'=>'xls'])   }}">Download Excel xls</a>


#控制器动作模式: 这种方式是根据注册路由时 'uses' 参数
URL::action('ArticlesController@index')
Route::controller() #5.2已废弃
参数的获取; 详情
input('') $request request()
Laravel 5 中间件、路由群组、子域名路由、 权限控制的基本使用方法
MVC
M:/app/Models (官方让自己建Models目录 /app下给了一个参考的User.php)
namespace AppModels;
use IlluminateDatabaseEloquentModel;

class Member extends Model
{
    public static function getMembers(){
        return 'members';
    }
}
V:/resources/views 模板文件:/resources/views/[ooxxDir/]xxoo.blade.php 输出模板 控制器方法 rerurn view('[ooxxDir/]xxoo');
公共模板


<!DOCTYPE html>
<html lang="zh-cn">
<head>
    <title>this is @yield('title')</title>
    <meta charset="utf-8">
    <meta name="viewport" content="width=device-width,initial-scale=1.0,minimum-scale=1.0,maximum-scale=1.0,user-scalable=no"/>

    <link href="" rel="stylesheet">

    <script src="" type="text/javascript"></script>
    <style>
        *{
            border:0;
            margin: 0;
            padding: 0;
            border: 1px solid red;
            -moz-box-sizing:border-box; /* Firefox */
            -webkit-box-sizing:border-box; /* Safari */
            box-sizing: border-box;
        }
        .header,.footer{
            width: 100%;
            max-width:1290px;
            height: 100px;
        }
        .main{
            margin:0 auto;
            display: -webkit-flex;                /* Safari */
            display:flex;
            flex-flow: row nowrap;           /*flex-flow: <flex-direction> <flex-wrap>前两个排列和换行的缩写*/
            /*
            flex-direction: row                   横向->为主轴 默认
            flex-direction:row-reverse            横向<-为主轴
            flex-direction: column                竖向↓为主轴
            flex-direction: column-reverse;       竖向↑为主轴
            flex-wrap: nowrap:超出不换行(默认) | wrap:换行第一行在上方 | wrap-reverse:第一行在下方;
            */
            justify-content: flex-start ;
            align-items:     center;
            /*
            justify-content: flex-start | flex-end | center | space-between | space-around;     与主轴对其方式
            align-items: flex-start | flex-end | center | baseline | stretch;                   交叉轴的对齐方式
            */
        }

        .sidebar{
            height: 500px;
            width:200px;
        }
        .content{
            height: 500px;
            width:1090px;
        }

    </style>
</head>

<body>
    <div class="header">
        @section('header')
            头部
        @show
    </div>
    <div class="main">
        <div class="sidebar">
            @section('sidebar')
                侧边栏
            @show
        </div>
        <div class="content">
            @yield('content','主要内容区')
        </div>
    </div>
    <div class="footer">
        @section('footer')
            底部
        @show
    </div>
</body>
</html>
子模板
@extends('layouts')

@section('title', '重写的Title')

@section('header')
    @parent     将父模板的也显示出来
    重写的头部
@stop

@section('sidebar')
    重写的侧边栏

    <!--模板输出变量-->
    <p>{{$name=1}}</p>
    <!-- 调动php代码-->
    <p>{{time()}}</p>
    <p>{{date('Y-m-d H:i:s',time())}}</p>
    <p>{{in_array($name,$arr=[0,1,2])?"true":"false"}}</p>
    <p>{{isset($name)?$name:"default"}}</p>
    <p>{{$name or "default"}}</p><!--等同于上面-->
    <!--原样输出-->
    <p>@{{$name}}</p>
    <!--包裹原样输出的区域  这样就不用为每个需要解析的变量加@了-->
    @verbatim
        <div class="container">
            Hello, {{ name }}.
        </div>
    @endverbatim

    <!--模板注释 不输出到浏览器-->
    <p>{{--看不到我看不到我--}}</p>
    <!--
    引入子视图 所有在父视图的可用变量在被引入的视图中都是可用的 还可以传入二外的变量至子视图
    加载views/component/upload.blade.php 并传值
    -->
    @include('component.upload',['extradata'=>'elsedata'])      被引入的子视图不存在,报错
    @includeif('component.upload',['extradata'=>'elsedata'])    被引入的子视图不存在时不会报错
    <!--流程控制  if-->
    @if (count($records=[0,1]) === 1)
        我有一条记录!
    @elseif (count($records) > 1)
        我有多条记录!
    @else
        我没有任何记录!
    @endif

    @unless (Auth::check())
        当为false时输出
    @endunless
    <!--循环-->
        for、 foreach、while
    <!--显示未经过htmlspecialchars转义过的数据-->
    <p>Hello, {!! $name !!}.</p>

@stop


@section('content')
    重写的内容区
@stop

@section('footer')
    重写的页脚
@stop
C:/app/Http/Controller
namespace appHttpControllers;
use AppHttpControllersController;
use AppModelsMember;
/**
* this is MemberController
*/
class MemberController extends Controller
{
    public function info($id,$name)
     {

         $member=Member::getMembers();
         url('member',['id'=>$id,'name'=>$name]);
         //var_dump($member);
         return view('member/info');
     }

}
数据查询
laravel提供三种数据库查询方式:
#1、DB facade(原始查询)
#2、查询构造器
#3、Eloquent ORM


#在config/database.php下配置数据库并且在.env文件里填写数据库参数
#注意:有表前缀的话也在config/database.php下添加修改'prefix' => 'mdl_',


#原始查询
#DB类在use IlluminateSupportFacadesDB;  在控制器引入并在控制器方法里实现增删改查
DB::insert('insert into mdl_student(name,age) values(?,?)',['tom',18]); //成功返回true
DB::delete('delete from mdl_student where id > ?',[0]);                 //返回行数
DB::update('update mdl_student set age=? where name= ?',[20,'tom']);    //成功返回行数
$students=DB::select('select * from mdl_student');
dd($students); #相当于tp的dump


#构造器查询

#增加数据
$res=DB::table('student')->insert(array('name'=>'tom','age'=>18));                              //返回布尔
$res=DB::table('student')->insert([['name'=>'tom','age'=>18],['name'=>'lily','age'=>20]]);      //返回布尔
$res=DB::table('student')->insertGetId(array('name'=>'tom','age'=>18));                          //返回id


#修改数据
$res=DB::table('student')->where('id',33)->update(array('age'=>30));  //返回行数
$res=DB::table('student')->increment('age');  //返回行数  全表id自增1
$res=DB::table('student')->increment('age',3);  //返回行数  全表id自增3
$res=DB::table('student')->decrement('age');  //返回行数  全表id自减1
$res=DB::table('student')->decrement('age',3);  //返回行数  全表id自减3
$res=DB::table('student')->where('id',33)->decrement('age',3);  //返回行数  id=33 的行age自减3
$res=DB::table('student')->where('id',33)->increment('age',3,['name'=>'yinli']);  //返回行数  id=33 的行age自增3并改变name的值

#删除数据
$res=DB::table('student')->where('id',33)->delete();  //返回行数     删除id=33的数据
$res=DB::table('student')->where('id','>=',33)->delete();  //返回行数     删除id>=33的数据
$res=DB::table('student')->truncate();  //不反回任何数据  清空数据表  慎用!!!

#查询数据:
$res=DB::table('student')->where('id','>=',1)->get();  //查询符合条件的所有数据
$res=DB::table('student')->whereRaw('id >= ? and age > ?',[3,21])->get();  //多条件查询
$res=DB::table('student')->first();  //返回结果集的第一行数据
$res=DB::table('student')->pluck('name');  //返回结果集特定字段
$res=DB::table('student')->pluck('name','id');  //返回结果集特定字段并制定下标
$res=DB::table('student')->select('id','name','age')->get();  //指定字段
#分段查询 每次查询2条数据 return false就会停止查询后面的数据
DB::table('student')->orderBy('id','asc')->chunk(2,function($res){
    if($res[0]->id >= 3){
        return false;
    }
}); #指定字段

#聚合查询:
$res=DB::table('student')->count();  //总条数
$res=DB::table('student')->sum('age');  //总和
$res=DB::table('student')->max('age');  //最大
$res=DB::table('student')->min('age');  //最小
$res=DB::table('student')->avg('age');  //平均数
Eloquent ORM
#首先新建一个模型appModelsStudent.php
namespace AppModels;
use IlluminateDatabaseEloquentModel;
class Student extends Model{
    #指定表名(默认是复数 即默认的表名为students)  表前缀怎么指定的?
    protected $table='student';
    #指定id (Eloquent 默认每张表的主键名为 id)
    protected $primaryKey ='id';
    //注意在默认情况下,在数据库表里需要有 updated_at 和 created_at 两个字段。且默认的插入格式为Y-m-d H:i:s 这样两个字段类型必须为vachar
    //如果您不想设定或自动更新这两个字段,则将类里的 $timestamps 属性设为 false即可
    public $timestamps = false;
    /**
     * 当$timestamps为true 自动更新时间时自定义的时间格式(默认是Y-m-d H:i:s)
     * */
    protected function getDateFormat()
    {
        //将插入的时间换成时间戳
        return time();
    }

    /*
     * 更改返回时间的格式
     * $timestamps为true时 查询调用($res->created_at)的时间默认格式是将时间戳转换成 Y-m-d H:i:s 000000 格式
     * */
    protected function asDateTime($value)
    {
        //将查询的时间换成时间戳(还是数据库保存的时间格式?)
        return $value;
    }
}

#在新建一个控制器appHttpControllersUserStudentController.php
namespace AppHttpControllersUser;
use AppHttpControllersController;
use AppModelsStudent;  //将模型的类引入
class StudentController extends Controller{
    public function index(){

        #ORM查询
        $res=Student::all();//查询所有
        $res=Student::find(3);//根据主键id查找 无数据返回null
        $res=Student::findOrFail(3);//根据主键id查找,无数据抛出致命错误!
        $res=Student::get();//查询所有
        $res=Student::where('id','>','3')
            ->orderBy('age','desc')
            ->first();//根据条件查询一条
        Student::chunk(2,function($res){
            //print_r($res);
        });//分段查询
        $res=Student::count();
        $res=Student::where('id','>',3)->max('age');

        var_dump($res);
        return 'srudentindex';
    }
}

#路由设置:
outesweb.php
Route::any(
    'user/student/index',
    [
        'uses'=>'UserStudentController@index',
        'as'=>'student'
    ]
);
#访问http://localhost/laravel/public/user/student/index即可访问到StudentController
HTTP层: