同事用python抓各大andriod市场的页面分析软件下载量,发现andriod market的数据是通过ajax加载的,而且貌似加密过了,没法直接解析。后来俺发现了phantomjs这个命令行的webkit,在可以在命令行渲染网页,这样不论数据怎么加载,怎么加密,对于标准的浏览器都无能为力了。软件的原理跟以前介绍的一个命令行web截图工具一样,内嵌一个qt4的webkit,然后渲染到xvfb虚拟出的xserver上。不同是这个提供了js的api,用起来方便,可以用来做爬虫,站点监控,服务端截图。
使用方法:
第一步,安装phantomjs
Mac os & windows:
直接下载.dmg或.exe安装包即可:http://code.google.com/p/phantomjs/downloads/list
mac下安装完闭,可执行文件的路径:/Applications/phantomjs.app/Contents/MacOS/phantomjs
ubuntu:
sudo add-apt-repository ppa:jerome-etienne/neoip
sudo apt-get update
sudo apt-get install phantomjs
centos 5.3:
折腾开始了。。由于phantomjs的linux版本是通过pyqt4实现的,所以装起来比较麻烦
首先我们需要安装qt4.7.而yum默认安装的是4.1
rpm -ivh http://software.freivald.com/centos/software.freivald.com-1.0.0-1.noarch.rpm
yum update fontconfig fontconfig-devel
yum install qt4 qt4-devel
#如果已经安装过qt4则执行 yum update qt4 qt4-devel
安装Xvfb
yum install xorg-x11-server-Xvfb xorg-x11-server-Xorg xorg-x11-fonts*
安装python 2.7,自带的为2.4,没法用
wget http://python.org/ftp/python/2.7.2/Python-2.7.2.tar.bz2
tar jxvf Python-2.7.2.tar.bz2
cd Python-2.7.2
./configure --prefix=/opt/python27
make
make install
cd ..
安装setup tools
wget http://pypi.python.org/packages/source/s/setuptools/setuptools-0.6c11.tar.gz#md5=7df2a529a074f613b509fb44feefe74e
tar zxvf setuptools-0.6c11.tar.gz
cd setuptools-0.6c11
/opt/python27/bin/python setup.py install
cd ..
安装sip
wget http://www.riverbankcomputing.com/static/Downloads/sip4/sip-4.12.4.tar.gz
tar zxvf sip-4.12.4.tar.gz
cd sip-4.12.4
/opt/python27/bin/python configure.py
make
make install
cd ..
安装pyqt4
wget http://www.riverbankcomputing.com/static/Downloads/PyQt4/PyQt-x11-gpl-4.8.5.tar.gz
tar zxvf PyQt-x11-gpl-4.8.5.tar.gz
cd PyQt-x11-gpl-4.8.5
/opt/python27/bin/python configure.py -q /usr/lib/qt4/bin/qmake
#对于64位系统
#/opt/python27/bin/python configure.py -q /usr/lib64/qt4/bin/qmake
make
make install
cd ..
最后安装pyphantomjs
mkdir pyphantomjs
cd pyphantomjs
wget http://phantomjs.googlecode.com/files/pyphantomjs-1.2.0-source.zip
unzip pyphantomjs-1.2.0-source.zip
/opt/python27/bin/python setup.py install
折腾到这里,pyphantomjs已经安装到了/opt/python27/bin/pyphantomjs
直接执行/opt/python27/bin/pyphantomjs –help,会发现报错
sip.setapi('QString', 2)
ValueError: API 'QString' has already been set to version 1
解决方法
编辑/opt/python27/bin/pyphantomjs,在开始追加几句
#!/opt/python27/bin/python
# EASY-INSTALL-ENTRY-SCRIPT: 'PyPhantomJS==1.2.0','console_scripts','pyphantomjs'
#fix start
import sip
sip.setapi('QString', 2)
sip.setapi('QVariant', 2)
#fix end
__requires__ = 'PyPhantomJS==1.2.0'第二步:
下载我们用来解析数据的js脚本:android_itc_daliy_report
修改里面的变量:
TIMEOUT = 120;//脚本执行超时时间
ACCOUNT = '';//登陆账号
PASSWORD = '';//密码
第三步:执行抓取脚本
对于Mac os:
#抓取andriod market的安装总量
/Applications/phantomjs.app/Contents/MacOS/phantomjs --load-images=no AndroidMarketDailyReport.js
#抓取ITC的每天的安装量,需要制定日期,而且日期必须是web页面里的日期选择框里有的日期
/Applications/phantomjs.app/Contents/MacOS/phantomjs --load-images=no ITCDailyReport.js 09/06/2011
对于Centos:
#首先保证Xvfb已经启动
Xvfb :0 -screen 0 1024x768x24 &
#抓取andriod market的安装量
DISPLAY=:0 /opt/python27/bin/pyphantomjs --load-images=no --ignore-ssl-errors=yes AndroidMarketDailyReport.js
#抓取ITC的每天的安装量,需要制定日期,而且日期必须是web页面里的日期选择框里有的日期
DISPLAY=:0 /opt/python27/bin/pyphantomjs --load-images=no --ignore-ssl-errors=yes ITCDailyReport.js 09/06/2011
获取输出结果,以Mac os为例:
/Applications/phantomjs.app/Contents/MacOS/phantomjs –load-images=no ITCDailyReport.js 09/06/2011|grep REPORT
REPORT: soft_name 0000
REPORT: soft_name 0000
/Applications/phantomjs.app/Contents/MacOS/phantomjs –load-images=no AndroidMarketDailyReport.js |grep REPORT
REPORT: total 0000
REPORT: real 0000
如果没有输出结果,则说明有异常,账号错误,超时,等等。。
http://github.com/AdamN/python-webkit2png/
一个使用pyqt4里的QtWebkit实现的命令行的web截图软件,可用于服务器端的web截图
貌似是个比较新的项目,以前找过类似的工具,没有多好用的,但是这个真的很好用,看一下参数就知道了
Creates a screenshot of a website using QtWebkit.This program comes with
ABSOLUTELY NO WARRANTY. This is free software, and you are welcome to
redistribute it under the terms of the GNU General Public License v2.

Options:
  --version             show program's version number and exit
  -h, --help            show this help message and exit
  -x WIDTH HEIGHT, --xvfb=WIDTH HEIGHT
                        Start an 'xvfb' instance with the given desktop size.
  -g WIDTH HEIGHT, --geometry=WIDTH HEIGHT
                        Geometry of the virtual browser window (0 means
                        'autodetect') [default: (0, 0)].
  -o FILE, --output=FILE
                        Write output to FILE instead of STDOUT.
  -f FORMAT, --format=FORMAT
                        Output image format [default: png]
  --scale=WIDTH HEIGHT  Scale the image to this size
  --aspect-ratio=RATIO  One of 'ignore', 'keep', 'crop' or 'expand' [default:
                        none]
  -F FEATURE, --feature=FEATURE
                        Enable additional Webkit features ('javascript',
                        'plugins')
  -w SECONDS, --wait=SECONDS
                        Time to wait after loading before the screenshot is
                        taken [default: 0]
  -t SECONDS, --timeout=SECONDS
                        Time before the request will be canceled [default: 0]
  -W, --window          Grab whole window instead of frame (may be required
                        for plugins)
  --style=STYLE         Change the Qt look and feel to STYLE (e.G. 'windows').
  -d DISPLAY, --display=DISPLAY
                        Connect to X server at DISPLAY.
  --debug               Show debugging information.
--log=LOGFILE Select the log output file使用举例:
使用之前安装依赖的包
OK,可以用了,假如在用ubuntu桌面版的话就很简单了
#加上运行权限
chmod +x ./webkit2png.py
#高度设置为0,就可以获得整个页面的截图了
./webkit2png.py -g 1024 0 http://bluehua.org -o test.png
假如运行在服务器上,没有x环境,则需要安装一些额外的依赖包
#安装xvfb用于虚拟X环境
apt-get install xvfb
#安装中文字体
apt-get install xfonts-wqy
#配置字体
fontconfig-voodoo -f -s zh_CN
运行时需要加额外的参数
#x选项用于指定虚拟出来的X桌面的尺寸
./webkit2png.py -x 1024 768 -g 1024 0 http://bluehua.org -o test.png
恩,其实我找这个东西的目的是想在服务器端获取一个页面的实际渲染宽度,目的达成~
———–
post by gmail~
2010.3.6 更新
由于最近的学习充电计划,这个东西暂时搁置了,现在已经可以自动保存了~
———————————
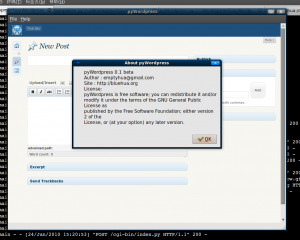
linux平台上一直没有这样一个所见即所得的blog离线编辑器,昨天试着用pyqt4写了一个小脚本,发现原来python做客户端软件是如此容易.然后下定决心要利用n个周末的时间自己写一个.
开始打算用纯qt的ui控件实现,但是感觉没有wordpress的编辑器这么亲切,于是想到一个界面亲切,实现也方便的方案: ui部分直接用web,框在一个pyqt的webkit组件里,逻辑部分用python的cgihttpserver在本地开一个cgi.
这个东西搞到今天雏形已经有了,可以实现跟wordress完全相同的书写体验.

顺带发那个pyqt的练手之作 : emlreader.py 一个可以查看eml附件的脚本
