一、使用注解的DI实现
1.@Resource
使用该注解能够实现引用型属性的DI实现,该注解能够根据属性名和属性类型自动给属性赋值。一般使用@Resource(name="student")的形式明确指定名称,这样就只能根据属性名来填充值了。
步骤:
(1)导入命名空间:命名空间示例


 1 <?xml version="1.0" encoding="UTF-8"?>
 2 <beans xmlns="http://www.springframework.org/schema/beans"
 3        xmlns:xsi="http://www.w3.org/2001/XMLSchema-instance"
 4        xmlns:context="http://www.springframework.org/schema/context"
 5        xsi:schemaLocation="http://www.springframework.org/schema/beans
 6            http://www.springframework.org/schema/beans/spring-beans-2.5.xsd
 7            http://www.springframework.org/schema/context
 8            http://www.springframework.org/schema/context/spring-context-2.5.xsd">
 9
10      <context:annotation-config/>
11
12 </beans>
(2)导入依赖注入的注解解析器
<context:annotation-config></context:annotation-config>
(3)将bean导入进来,例:
    <bean id="person" class="com.kdyzm.spring.di.Person"></bean>
    <bean id="student" class="com.kdyzm.spring.di.Student"></bean>
示例配置文件:
<?xml version="1.0" encoding="UTF-8"?>
<beans xmlns="http://www.springframework.org/schema/beans"
    xmlns:xsi="http://www.w3.org/2001/XMLSchema-instance" xmlns:context="http://www.springframework.org/schema/context"
    xsi:schemaLocation="http://www.springframework.org/schema/beans
           http://www.springframework.org/schema/beans/spring-beans-2.5.xsd
           http://www.springframework.org/schema/context
           http://www.springframework.org/schema/context/spring-context-2.5.xsd
           ">
    <!-- 该标签位置不能改变 -->
    <context:annotation-config></context:annotation-config>
    <!-- 使用该注解的话不需要再在xml文件中进行配置了 -->
    <bean id="person" class="com.kdyzm.spring.di.Person"></bean>
    <bean id="student" class="com.kdyzm.spring.di.Student"></bean>
</beans>
注意事项:如果类中包含标准类型的属性变量,同时需要spring该该属性赋初值,那么该类就不能使用注解的形式给属性赋初值了。
2.@PostConstruct
该注解表名init方法,相当于bean标签的init-method属性的功能。
3.@PreDestroy
该注解表名destroy方法,相当于bean标签的destory-method属性的功能。
4.@Autowired
该注解是spring的注解,能够根据类型自动匹配。
5.@Qualifier(有疑问,注解的使用有问题)
该注解也是spring的注解,能够根据名称自动匹配
也就是说Autowired注解和Qualifier注解两个注解的功能合起来才能够顶的上Resource注解的功能,所以对于这两个注解,只是需要知道就行了,不需要进行掌握。一般使用Resource注解就足够用了。
6.@Component
该注解是spring的注解;用于扫描类并将其纳入spring容器中管理。功能相当于xml中的bean标签。
配置方式:同样需要导入依赖注入的注解解析器
<context:component-scan base-package="com.kdyzm.spring.annotation.scan"></context:component-scan>
@Component可以细分为三个部分:@Repository、@Service、@Controller,对应着持久化层、服务层、控制层,用法和@Component相同,推荐使用后者,原因是被注解的类或许能够更好地被工具处理或者与切面进行关联。
二、spring中的继承
1.使用普通方法的继承创建子类对象之后不能继承父类的成员变量,调用父类的get方法也不能获取父类的成员变量。指定bean的parent属性能够解决该问题。
    <bean id="person" class="com.kdyzm.spring.extend.Person">
        <property name="name" value="Person"></property>
    </bean>
    <bean id="student" class="com.kdyzm.spring.extend.Student" parent="person"></bean>
2.使用abstract属性标记bean为抽象bean,这样spring就不会实例化该bean了。
<bean id="person" class="com.kdyzm.spring.extend.Person" abstract="true">
    <property name="name" value="Person"></property>
</bean>
疑问:abstract属性默认值是true?并不管用,仍然实例化了。
三、动态代理复习:伪模拟hibernate的过程实现
1.动态代理的本质实际上就是方法增强
实现了InvocationHandler接口的类相当于一个“拦截器”。
2.实例。
 1 package com.kdyzm.spring.proxy;
 2
 3 public class Transaction {
 4     public void startTransaction(){
 5         System.out.println("开启事务!");
 6     }
 7     public void commit(){
 8         System.out.println("提交事务!");
 9     }
10 }
 1 package com.kdyzm.spring.proxy;
 2
 3 public class Person {
 4     private String name;
 5
 6     public Person(String name) {
 7         this.name = name;
 8     }
 9
10     public Person() {
11     }
12
13     public String getName() {
14         return name;
15     }
16
17     public void setName(String name) {
18         this.name = name;
19     }
20
21     @Override
22     public String toString() {
23         return "Person [name=" + name + "]";
24     }
25 }
1 package com.kdyzm.spring.proxy;
2
3 public interface PersonDao {
4     public void savePerson();
5     public Person getPerson();
6     public void updatePerson();
7     public void deletePerson();
8 }
 1 package com.kdyzm.spring.proxy;
 2
 3 public class PersonDaoImpl implements PersonDao {
 4
 5     @Override
 6     public void savePerson() {
 7         System.out.println("保存学生!");
 8     }
 9
10     @Override
11     public Person getPerson() {
12         Person p=new Person();
13         p.setName("狗蛋");
14         return p;
15     }
16
17     @Override
18     public void updatePerson() {
19         System.out.println("更新学生信息!");
20     }
21
22     @Override
23     public void deletePerson() {
24         System.out.println("删除学生!");
25     }
26
27 }
最重要的一个类:拦截器类com.kdyzm.spring.proxy.PersonDaoInterceptor.java,实现了InvocationHandler接口
 1 package com.kdyzm.spring.proxy;
 2
 3 import java.lang.reflect.InvocationHandler;
 4 import java.lang.reflect.Method;
 5
 6 /*
 7  * 定义拦截器,这是核心类。
 8  */
 9 public class PersonDaoInterceptor implements InvocationHandler{
10     private Transaction transaction;
11     private Object target;
12     public PersonDaoInterceptor(Object target,Transaction transaction) {
13         this.target=target;
14         this.transaction=transaction;
15     }
16     @Override
17     public Object invoke(Object proxy, Method method, Object[] args)
18             throws Throwable {
19         String methodName = method.getName();
20         Object result=null;
21         if("savePerson".equals(methodName)||"updatePerson".equals(methodName)||"deletePerson".equals(methodName)){
22             this.transaction.startTransaction();
23             result=method.invoke(this.target, args);
24             this.transaction.commit();
25         }
26         else{
27             result=method.invoke(this.target, args);
28         }
29         return result;
30     }
31
32 }
测试类:com.kdyzm.spring.proxy.Test.java
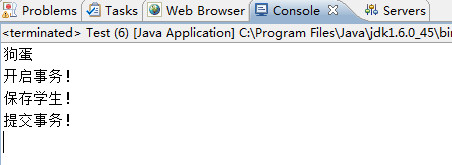
 1 package com.kdyzm.spring.proxy;
 2
 3 import java.lang.reflect.Proxy;
 4
 5 public class Test {
 6     public static void main(String[] args) {
 7         PersonDao target=new PersonDaoImpl();
 8         Transaction transaction =  new Transaction();
 9         PersonDaoInterceptor daoInterceptor = new PersonDaoInterceptor(target, transaction);
10         PersonDao proxy=(PersonDao) Proxy.newProxyInstance(target.getClass().getClassLoader(), target.getClass().getInterfaces(), daoInterceptor);
11         Person p=proxy.getPerson();
12         System.out.println(p.getName());
13         proxy.savePerson();
14     }
15 }
运行结果: