Oracle WebLogic Server (WLS) 11gR1 (10.3.5 and 10.3.6) Installation on Oracle Linux 5 and 6
This article presents a brief overview of installing Oracle WebLogic Server (WLS) 11gR1 (10.3.5 and 10.3.6) on Oracle Linux 5 and 6.
- Assumptions
- Download Software
- Setup
- Installation
- Create Domain
- Post-Installation
- Applying Patch Set Updates (PSUs)
Related articles.
- WebLogic 11g Silent Installation
- Oracle Forms and Reports 11gR2 Installation on Oracle Linux 5
- Oracle Forms and Reports 11gR2 Installation on Oracle Linux 6
- WebLogic Server 11g and 12c : Create, Extend and Remove Domains
- WebLogic Server 11g and 12c : Clustered Domains
- WebLogic Server 11g : ADF Application Development Runtime Upgrade on Oracle Linux
- JRockit Installation on Linux
Assumptions
This article assumes you have an existing server (real or virtual) with either Oracle Linux 5.x or 6.x installed on it. For instruction on how to do this check out the following articles.
- Oracle Linux 5 (OL5) Installation : I did the basic installation with no extra package groups for this installation.
- Oracle Linux 6 (OL6) Installation : I picked the "Desktop" option for this installation, so I would have a graphical interface without having to select separate package groups.
Everything in the installation will be 64-bit.
Software
Download the WebLogic Server 11g software from Oracle Technology Network. Remember, if your installation is to be used for Oracle Forms, you should use Java6.
- Java Development Kit 6 - For WebLogic 10.3.5 installations you need JDK6, but you can also use it for WebLogic 10.3.6 installations. The standard JDK is fine for development environments, but for production environments you should use JRockit.
- JRockit - Use this in place of standard JDK for production servers requiring JDK6.
- Java Development Kit 7 - WebLogic 10.3.6 installations can use either JDK6 or JDK7 depending on your requirements. This is the same JDK7 you will use for development or production servers.
- WebLogic Server 11gr1 - Generic Installer (1G) - You can use 10.3.5 or 10.3.6, but you should really be using 10.3.6, especially if you plan on using this installation as a base for Oracle Forms and Reports 11gR2 Installation on Oracle Linux 6.
Setup
The following actions should be performed by the "root" user.
Make sure the "/etc/hosts" file contains correct entries for both the "localhost" and real host names.
127.0.0.1      localhost localhost.localdomain localhost4 localhost4.localdomain4
192.168.0.198  ol6-forms.localdomain ol6-forms
Create a new group and user.
groupadd -g 1000 oinstall
useradd -u 1100 -g oinstall oracle
passwd oracle
Create the directories in which the Oracle software will be installed.
mkdir -p /u01/app/oracle/product/fmw11g
mkdir -p /u01/app/oracle/config/domains
mkdir -p /u01/app/oracle/config/applications
chown -R oracle:oinstall /u01
chmod -R 775 /u01/
Append the following entries into the "/home/oracle/.bash_profile" file.
export MW_HOME=/u01/app/oracle/product/fmw11g
export WLS_HOME=$MW_HOME/wlserver_10.3
export WL_HOME=$WLS_HOME
# Set to the appropriate JAVA_HOME.
#export JAVA_HOME=/usr/java/jdk1.6.0_33
export JAVA_HOME=/u01/app/oracle/jrockit-jdk1.6.0_45-R28.2.7-4.1.0
#export JAVA_HOME=/u01/app/oracle/jdk1.7.0_17
export PATH=$JAVA_HOME/bin:$PATH
Install the JDK. Instructions for installing JRockit can be found here. This article will assume JRockit is being used. If you want to use HotSpot for JDK6 or JDK7 you might install them like this.
# # Java 6 as root
# rpm -Uvh jdk-6u33-linux-amd64.rpm

Or

$ # Java 7 as Oracle
$ cd /u01/app/oracle/
$ tar -xvzf /tmp/jdk-7u17-linux-x64.tar.gz
As specified in MOS Note [ID 1487773.1], amend the "/etc/security/limits.d/90-nproc.conf" file, making the following change.
# From
*          soft    nproc     1024

#To
* - nproc 16384
Installation
Run the installer as the "oracle" user.
$ $JAVA_HOME/bin/java -Xmx1024m -jar wls1035_generic.jar
$ # Or
$ $JAVA_HOME/bin/java -Xmx1024m -jar wls1036_generic.jar
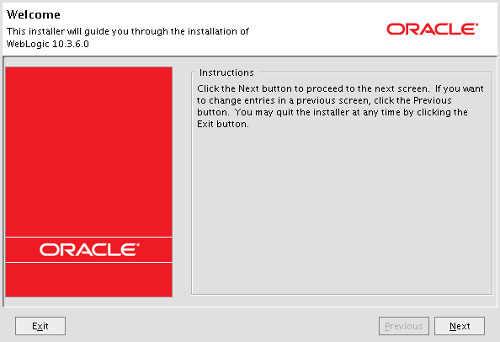
Click the "Next" button on the welcome screen.
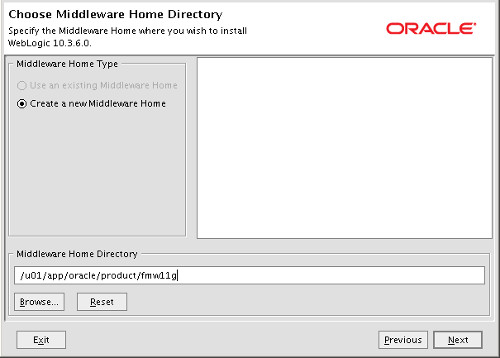
Enter the middleware home ("/u01/app/oracle/product/fmw11g") and click the "Next" button.
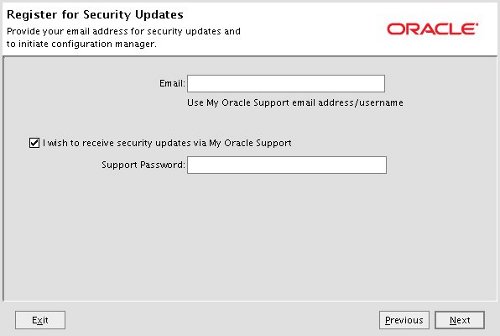
Either enter your support details, or attempt to uncheck the security updates checkbox. The box doesn't actually uncheck, but presents you with a warning dialog. If you click the "Yes" button, indicating you don't want updates, you are returned to the same screen with the box still checked. Click the "Next" button anyway.
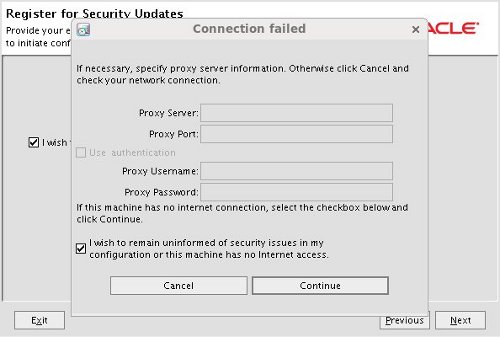
Assuming you don't want security updates, click "Yes" and "Yes" on the subsequent warning dialogs and you are presented with the "Connection Failed" screen. Check the "I wish to remain uninformed..." checkbox and click the "Continue" button. This whole process is very confusing at first. Obviously the developers responsible didn't really expect people to say no to security updates!
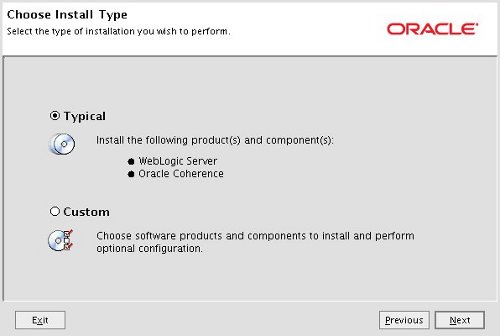
Accept the typical setup by clicking the "Next" button.
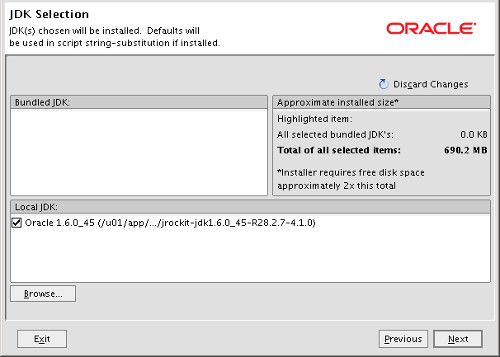
Accept the default JDK selection by clicking the "Next" button.
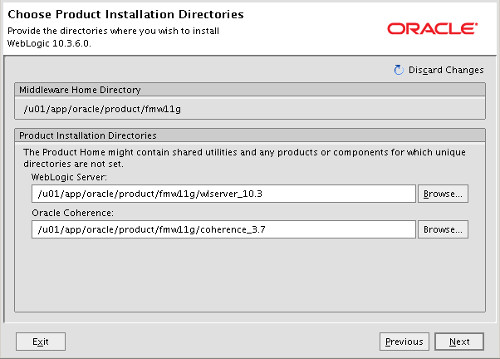
Accept the default product installation directories by clicking the "Next" button.
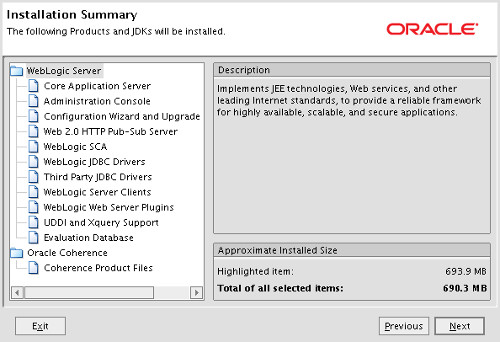
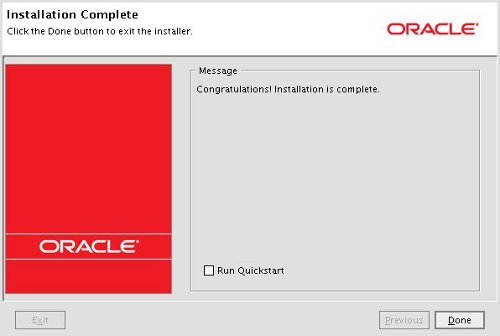
If you are happy with the summary information, click the "Next" button and wait while the installation completes.
On the installation complete screen, uncheck the "Quickstart" checkbox and click the "Done" button.
If you are using this installation as a base for an Oracle Forms and Reports 11gR2 installation, you don't need to do any of the remaining steps. Instead skip to the relevant article.
- Oracle Forms and Reports 11gR2 Installation on Oracle Linux 5
- Oracle Forms and Reports 11gR2 Installation on Oracle Linux 6
Create Domain
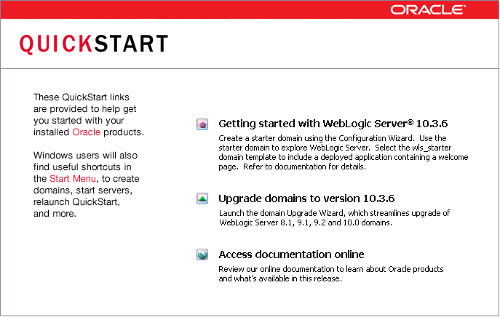
If you are planning to use this installation for something other than Oracle Forms and Reports Services, you will need to create a domain. This can be done using the Quickstart utility.
$ $MW_HOME/utils/quickstart/quickstart.sh
On the Quickstart screen, click the "Getting Started with WebLogic Server 12.1.1" link.
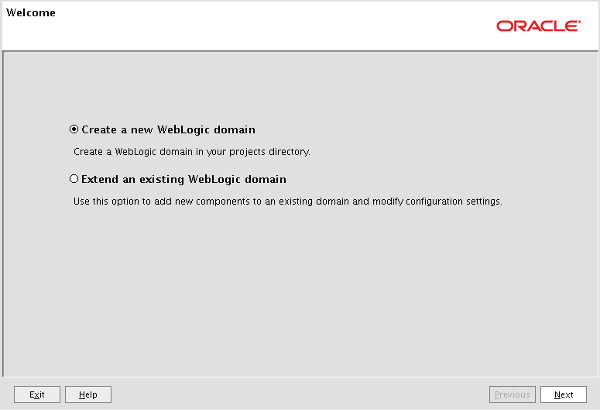
On the welcome screen, accept the "Create a new WebLogic domain" option by clicking the "Next" button.
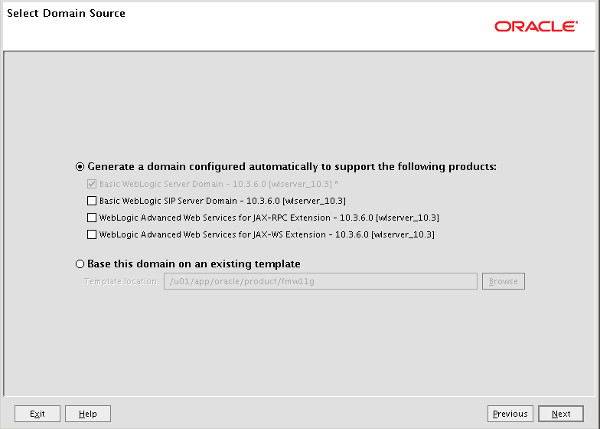
Select the type of domain and click the "Next" button.
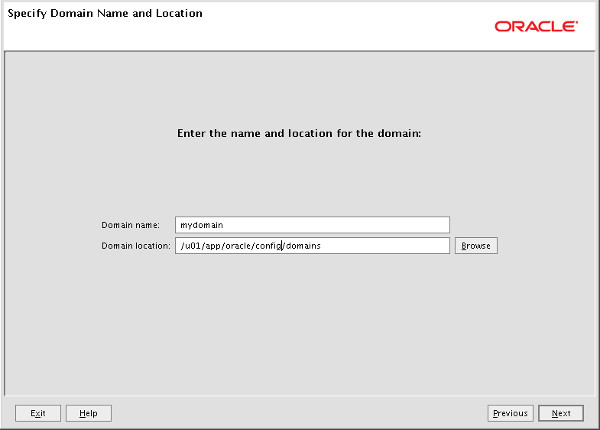
Enter the desired domain name and location, then click the "Next" button.
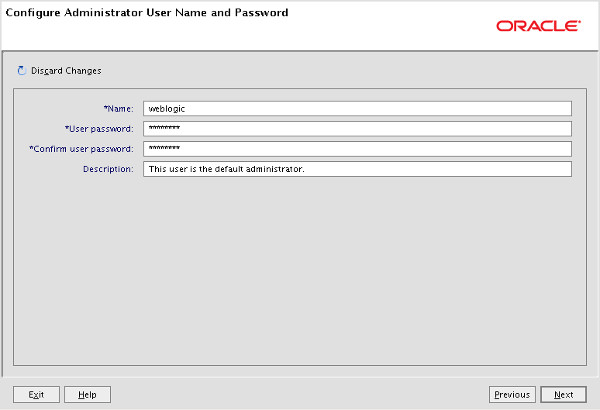
Enter the administrator username and password, then click the "Next" button.
Select the startup mode and JDK, then click the "Next" button.

Select any required optional configuration, then click the "Next" button.

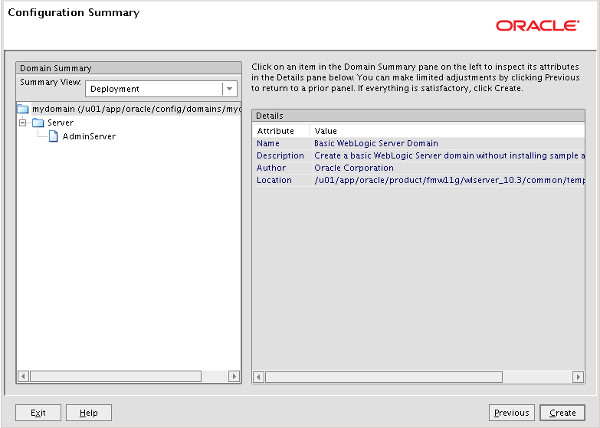
If you are happy with the information on the summary screen, click the "Create" button.
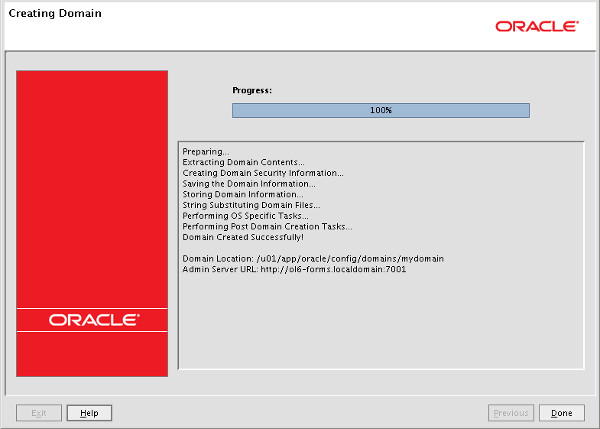
Once the domain is created, click the "Done" button.
Close the Quickstart screen, unless you have any other operations to do.
The "$MW_HOME/user_projects/domains/mydomain" directory now contains a script that can be used to start the server. Remember to use the "&" if you want control of the command line returned.
$ cd /u01/app/oracle/config/domains/mydomain
$ ./startWebLogic.sh
If you want to start the domains without typing in credentials, you need to create a boot identity file after the domain has been started for the first time.
Post-Installation
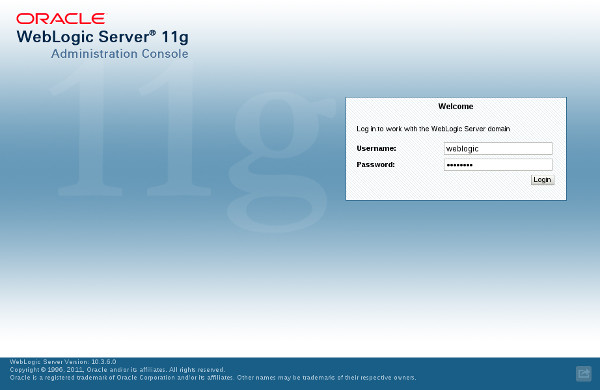
Once the server is started you can access the administrator console using the "http://hostname:7001/console" URL. Log in using the username and password provided in the previous step.
The following scripts are useful.
$ # Start NodeManager
$ nohup $WLS_HOME/server/bin/startNodeManager.sh > /dev/null 2>&1 &


$ # Start WebLogic
$ nohup /u01/app/oracle/config/domains/mydomain/startWebLogic.sh > /dev/null 2>&1 &
$ # or
$ nohup /u01/app/oracle/config/domains/mydomain/bin/startWebLogic.sh > /dev/null 2>&1 &

$ # Stop WebLogic
$ /u01/app/oracle/config/domains/mydomain/bin/stopWebLogic.sh


$ # Start Managed Server
$ nohup /u01/app/oracle/config/domains/mydomain/bin/startManagedWebLogic.sh AdminServer > /dev/null 2>&1 &

$ # Stop Managed Server
$ /u01/app/oracle/config/domains/mydomain/bin/stopManagedWebLogic.sh AdminServer


$ # Start the configuration wizard
$ $WLS_HOME/common/bin/config.sh
Applying Patch Set Updates (PSUs)
The patch set updates (PSUs) come with a "README.txt" file that explains how to apply the patches. You should always follow the patch note, but the basic format is typically as follows.
Unzip the patch into the correct location.
$ mkdir -p $MW_HOME/utils/bsu/cache_dir
$ cd $MW_HOME/utils/bsu/cache_dir
$ unzip /tmp/p14736139_1036_Generic.zip
Apply the patch.
$ cd $MW_HOME/utils/bsu
$ ./bsu.sh -install -patch_download_dir=$MW_HOME/utils/bsu/cache_dir -patchlist=HYKC -prod_dir=$WLS_HOME
If you get conflicts, you may have to remove previous patches, before attempting to apply the patch again.
$ cd $MW_HOME/utils/bsu
$ ./bsu.sh -remove -patchlist=ABCD -prod_dir=$WLS_HOME

$ ./bsu.sh -install -patch_download_dir=$MW_HOME/utils/bsu/cache_dir -patchlist=HYKC -prod_dir=$WLS_HOME
After the patch is successfully applied, restart all WebLogic servers.
Check the version.
$ . $WLS_HOME/server/bin/setWLSEnv.sh
$ java weblogic.version

WebLogic Server 10.3.6.0.3 PSU Patch for BUG14736139 Fri Nov 23 10:16:54 IST 2012
WebLogic Server 10.3.6.0  Tue Nov 15 08:52:36 PST 2011 1441050

Use 'weblogic.version -verbose' to get subsystem information

Use 'weblogic.utils.Versions' to get version information for all modules
$
Oracle WebLogic Server 12c: Creating a Boot Identity File for Easier Server Start Up
Purpose
This tutorial shows how to create a boot identity file to make it easier to start an instance of Oracle WebLogic Server 12c (12.1.1).
Time to Complete
Approximately 15 minutes
Overview
A boot identity file contains the user credentials for starting and stopping an instance of WebLogic Server. An administration server or managed server can refer to this file for user credentials instead of prompting at the command line to provide them. Because the credentials are encrypted, using a boot identity file is more secure than storing plain text credentials in a startup or shutdown script. There can be a different boot identity file for each server in a domain.
If you choose Development Mode when creating a domain by using the Configuration Wizard, a boot identity file is automatically created for the administration server. This tutorial covers creating a boot identity file manually for a Production Mode domain.
If you use Node Manager to start managed servers rather than running start scripts manually, you do not need to create boot identity files for them. Node Manager creates its own boot identity files and stores them under each server's directory in the data/nodemanager subdirectory.
This tutorial covers creating a boot identity file to store the credentials for starting an Oracle WebLogic Server 12c (12.1.1) administration server.
Software Requirements
The following is a list of software requirements:
- Oracle WebLogic Server 12c (12.1.1)
Prerequisites
Before starting this tutorial, you should have completed the Oracle by Example tutorial titled Oracle WebLogic Server 12c: Installing WebLogic Server and Creating a Domain.
Creating a Boot Identity File
To create a boot identity file for the administration server, perform the following steps:
|
1. |
If the administration server of the domain is running, stop it. If it was started with the start script in a Terminal window, you can click Ctrl + C in that window to kill the server. Alternatively, open another Terminal window, navigate to the domain directory, then cd into the bin subdirectory. In this tutorial that directory is /u01/app/oracle/Middleware/user_projects/domains/dizzyworld/bin. Enter the command: $ ./stopWebLogic.sh This runs the script to stop the administration server of the domain When prompted for a username and password, enter the credentials of the domain administrator.
Notice that you were prompted for the username and password. This also happens when you start the administration server by using the startWebLogic.sh script. Creating a boot identify file will allow the start and stop scripts to run without that prompting. |
|---|---|
|
2. |
In a Terminal window, navigate to the domain directory. In this tutorial, that is/u01/app/oracle/Middleware/user_projects/domains/dizzyworld. Then cd into the servers/AdminServer subdirectory. Note: If your administration server has a different name, cd into that directory under servers. Create a subdirectory there called security and cd into it: $ mkdir security
Note: If there is already a security subdirectory under the administration server's directory, you do not need to create it. |
|
3. |
In the security directory, create a text file called boot.properties and edit it. In this tutorial, the gedit editor is used. $ gedit boot.properties
|
|
4. |
In the file, put two lines: username=weblogic Save the file and exit the editor.
Note: The administrator username and password for your domain may be different. Make sure the values following the = are correct for your domain. |
|
5. |
Now restart the administration server. In a Terminal window, navigate to the domain directory, and enter the command: $ ./startWebLogic.sh
Notice that you are not prompted for the username and password. |
|
6. |
To see that the username and password are safe in the file, in a Terminal window, return to the security directory and display the contents of the boot.properties file. $ cat boot.properties
|


