博客园美化
作者:凯鲁嘎吉 - 博客园 http://www.cnblogs.com/kailugaji/
首先应该获得JS权限,之后才能进行如下操作。
1. 小人时间
在“设置”->“博客侧边栏公告(支持HTML代码)(支持JS代码)”中写入
<!--博客侧边栏公告-->
<hr>
<embed allowscriptaccess="never" allownetworking="internal" invokeurls="false" src="https://files.cnblogs.com/files/mmzs/flashDate.swf"
pluginspage="https://files.cnblogs.com/files/mmzs/flashDate.swf" type="application/x-shockwave-flash" quality="high" autostart="0" wmode="transparent" width="220"
height="65" align="middle">
</div>

2. 博主头像以及个人信息
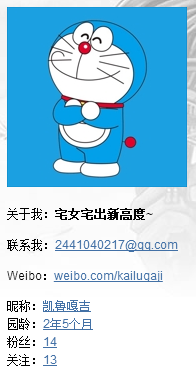
博主头像地址:凯鲁嘎吉的主页 - 博客园中右击鼠标,查看源代码,将头像的地址复制过来即可。
在“设置”->“页面定制CSS代码”中写入
img {
max-90%;
}
在“设置”->“博客侧边栏公告(支持HTML代码)(支持JS代码)”中写入
<img src="//pic.cnblogs.com/avatar/1027447/20180318220610.png" alt="凯鲁嘎吉的头像" class="img_avatar">
<!--联系方式及个人信息-->
<p class="para">关于我:<strong>宅女宅出新高度~</strong></p>
<p class="para">联系我:<a href="mailto:2441040217@qq.com" title="email">2441040217@qq.com</a></p>
<p class="para">Weibo:<a href="http://weibo.com/kailugaji" title="kailugaji's weibo" target="_blank">weibo.com/kailugaji</a></p>
3. 背景鼠标点击动态线条
在“设置”->“博客侧边栏公告(支持HTML代码)(支持JS代码)”中写入
<div style = "display:none;">动态线条</div>
<script>
!function(){
function n(n,e,t){
return n.getAttribute(e)||t
}
function e(n){
return document.getElementsByTagName(n)
}
function t(){
var t=e("script"),o=t.length,i=t[o-1];
return{
l:o,z:n(i,"zIndex",-1),o:n(i,"opacity",.5),c:n(i,"color","0,0,0"),n:n(i,"count",99)
}
}
function o(){
a=m.width=window.innerWidth||document.documentElement.clientWidth||document.body.clientWidth,
c=m.height=window.innerHeight||document.documentElement.clientHeight||document.body.clientHeight
}
function i(){
r.clearRect(0,0,a,c);
var n,e,t,o,m,l;
s.forEach(function(i,x){
for(i.x+=i.xa,i.y+=i.ya,i.xa*=i.x>a||i.x<0?-1:1,i.ya*=i.y>c||i.y<0?-1:1,r.fillRect(i.x-.5,i.y-.5,1,1),e=x+1;e<u.length;e++)n=u[e],
null!==n.x&&null!==n.y&&(o=i.x-n.x,m=i.y-n.y,
l=o*o+m*m,l<n.max&&(n===y&&l>=n.max/2&&(i.x-=.03*o,i.y-=.03*m),
t=(n.max-l)/n.max,r.beginPath(),r.lineWidth=t/2,r.strokeStyle="rgba("+d.c+","+(t+.2)+")",r.moveTo(i.x,i.y),r.lineTo(n.x,n.y),r.stroke()))
}),
x(i)
}
var a,c,u,m=document.createElement("canvas"),
d=t(),l="c_n"+d.l,r=m.getContext("2d"),
x=window.requestAnimationFrame||window.webkitRequestAnimationFrame||window.mozRequestAnimationFrame||window.oRequestAnimationFrame||window.msRequestAnimationFrame||
function(n){
window.setTimeout(n,1e3/45)
},
w=Math.random,y={x:null,y:null,max:2e4};m.id=l,m.style.cssText="position:fixed;top:0;left:0;z-index:"+d.z+";opacity:"+d.o,e("body")[0].appendChild(m),o(),window.onresize=o,
window.onmousemove=function(n){
n=n||window.event,y.x=n.clientX,y.y=n.clientY
},
window.onmouseout=function(){
y.x=null,y.y=null
};
for(var s=[],f=0;d.n>f;f++){
var h=w()*a,g=w()*c,v=2*w()-1,p=2*w()-1;s.push({x:h,y:g,xa:v,ya:p,max:6e3})
}
u=s.concat([y]),
setTimeout(function(){i()},100)
}();
</script>
<div style = "display:none;"> 动态线条end</div>

4. 页首个性签名
在“设置”->“页首Html代码”中写入
<div id="blogTitle">
<div class="title">
<a id="Header1_HeaderTitle" class="headermaintitle" href="http://www.cnblogs.com/kailugaji/">凯鲁嘎吉</a>
</div>
<div class="subtitle">用书写铭记日常,最迷人的不在远方</div>
</div>

5. 鼠标点击彩色字体
在“设置”->“页脚Html代码”中写入
<script type="text/javascript">
/* 鼠标特效 */
var a_idx = 0;
jQuery(document).ready(function($) {
    $("body").click(function(e) {
        var a = new Array("❤凯鲁嘎吉❤","❤爱你❤","❤欢迎您❤","❤光临本园❤","❤加油❤","❤努力❤","❤奋斗❤","❤拼搏❤","❤凯鲁嘎吉❤","❤爱你❤","❤forever❤","❤爱你❤");
        var $i = $("<span></span>").text(a[a_idx]);
        a_idx = (a_idx + 1) % a.length;
        var x = e.pageX,
        y = e.pageY;
        $i.css({
            "z-index": 999999999999999999999999999999999999999999999999999999999999999999999,
            "top": y - 20,
            "left": x,
            "position": "absolute",
            "font-weight": "bold",
            "color": "rgb("+~~(255*Math.random())+","+~~(255*Math.random())+","+~~(255*Math.random())+")"
        });
        $("body").append($i);
        $i.animate({
            "top": y - 180,
            "opacity": 0
        },
        1500,
        function() {
            $i.remove();
        });
    });
});
</script>
详见主页:凯鲁嘎吉 - 博客园 http://www.cnblogs.com/kailugaji/
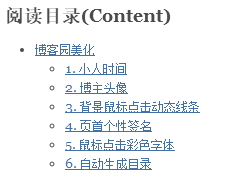
6. 自动生成目录
在“设置”->“页脚Html代码”中写入
<script language="javascript" type="text/javascript">
//生成目录索引列表
function GenerateContentList()
{
    var jquery_h1_list = $('#cnblogs_post_body h1');
    if (jquery_h1_list.length == 0) { return; }
    if ($('#cnblogs_post_body').length == 0) { return; }

    var content = '<a name="_labelTop"></a>';
    content    += '<div id="navCategory">';
    content    += '<p style="font-size:18px"><b>阅读目录(Content)</b></p>';
    // 一级目录 start
    content += '<ul class="first_class_ul">';

    for (var i = 0; i < jquery_h1_list.length; i++)
    {
        var go_to_top = '<div style="text-align: right"><a href="#_labelTop">回到顶部(go to top)</a><a name="_label' + i + '"></a></div>';
        $(jquery_h1_list[i]).before(go_to_top);

        // 一级目录的一条
        var li_content = '<li><a href="#_label' + i + '">' + $(jquery_h1_list[i]).text() + '</a></li>';

        var nextH1Index = i + 1;
        if (nextH1Index == jquery_h1_list.length) { nextH1Index = 0; }
        var jquery_h2_list = $(jquery_h1_list[i]).nextUntil(jquery_h1_list[nextH1Index], "h2");
        // 二级目录 start
        if (jquery_h2_list.length > 0)
        {
            //li_content +='<ul style="list-style-type:none; text-align: left; margin:2px 2px;">';
            li_content += '<ul class="second_class_ul">';
        }
        for (var j = 0; j < jquery_h2_list.length; j++)
        {
            var go_to_top2 = '<div style="text-align: right"><a name="_lab2_'+ i + '_' + j + '"></a></div>';
            $(jquery_h2_list[j]).before(go_to_top2);
            // 二级目录的一条
            li_content +='<li><a href="#_lab2_'+ i +'_' + j + '">' + $(jquery_h2_list[j]).text() + '</a></li>';

            var nextH2Index = j + 1;
            var next;
            if (nextH2Index == jquery_h2_list.length)
            {
                if (i + 1 == jquery_h1_list.length)
                {
                    next = jquery_h1_list[0];
                }
                else
                {
                    next = jquery_h1_list[i + 1];
                }
            }
            else
            {
                next = jquery_h2_list[nextH2Index];
            }
            var jquery_h3_list = $(jquery_h2_list[j]).nextUntil(next, "h3");
            // 三级目录 start
            if (jquery_h3_list.length > 0)
            {
                li_content += '<ul class="third_class_ul">';
            }

            for (var k = 0; k < jquery_h3_list.length; k++)
            {
                var go_to_third_Content = '<div style="text-align: right"><a name="_label3_' + i + '_' + j + '_' + k + '"></a></div>';
                $(jquery_h3_list[k]).before(go_to_third_Content);
                // 三级目录的一条
                li_content += '<li><a href="#_label3_' + i + '_' + j + '_' + k + '">' + $(jquery_h3_list[k]).text() + '</a></li>';
            }

            if (jquery_h3_list.length > 0)
            {
                li_content += '</ul>';
            }
            li_content += '</li>';
            // 三级目录 end
        }
        if (jquery_h2_list.length > 0)
        {
            li_content +='</ul>';
        }
        li_content +='</li>';
        // 二级目录 end

        content += li_content;
    }
    // 一级目录 end
    content += '</ul>';
    content += '</div>';

    $($('#cnblogs_post_body')[0]).prepend(content);
}

GenerateContentList();
</script>
levels of contents
7. 回到顶部
样式一
在“设置”->“页面定制CSS代码”中写入
.returntop{
            height:85px;30px;background:deepskyblue;position: fixed;bottom:0;right:22px;
            text-align: center;color:white;cursor: pointer;border-radius:6px;font-size:16px;display:none;
        }
在“设置”->“博客侧边栏公告(支持HTML代码)(支持JS代码)”中写入
<script>
    var returntop=document.createElement("div");
    returntop.className="returntop";
    returntop.innerText="回到顶部";
    document.body.appendChild(returntop);
    var returntimer=null;
    var isuser=true;

    window.onscroll=function(){
        var scroll=document.documentElement.scrollTop||document.body.scrollTop;
        if(scroll>300){
            returntop.style.display="block";
        }
        if(scroll<300){
            returntop.style.display="none";
        }
        if(!isuser){
            clearInterval(returntimer);
        }
        isuser=false;
    };
    returntop.onclick=function(){
        returntimer=setInterval(function(){
            var scroll=document.documentElement.scrollTop||document.body.scrollTop;
            var speed=Math.floor(-scroll/8);
            if(scroll==0){
                clearInterval(returntimer);
            }
            isuser=true;
            document.documentElement.scrollTop=document.body.scrollTop=scroll+speed;
        },30);
    }
</script>

样式二
在“设置”->“页首Html代码”中写入
<style>
#back-top {
     position: fixed;
     bottom: 10px;
     right: 5px;
     z-index: 99;
}
#back-top span {
      50px;
     height: 64px;
     display: block;
     background:url(http://images.cnblogs.com/cnblogs_com/seanshao/855033/o_rocket.png) no-repeat center center;
}
#back-top a{outline:none}
</style>
<script type="text/javascript">
$(function() {
	// hide #back-top first
	$("#back-top").hide();
	// fade in #back-top
	$(window).scroll(function() {
		if ($(this).scrollTop() > 500) {
			$('#back-top').fadeIn();
		} else {
			$('#back-top').fadeOut();
		}
	});
	// scroll body to 0px on click
	$('#back-top a').click(function() {
		$('body,html').animate({
			scrollTop: 0
		}, 800);
		return false;
	});
});
</script>
<p id="back-top" style="display:none"><a href="#top"><span></span></a></p>

8. 美化博客内容
在“设置”->“页面定制CSS代码”中写入
/* 设置博客正文一二三级标题格式 */
/* 一级标题 */
#cnblogs_post_body h1 {
    font-size: 28px;
    font-weight: bold;
    line-height: 1.5;
    color: black;
    margin: 10px 0;
}
/* 二级标题 */
#cnblogs_post_body h2 {
    font-size: 24px;
    font-weight: bold;
    line-height: 1.5;
    color: whitesmoke;
    background-color: royalblue;
    margin: 10px 0;
}
/* 三级标题 */
#cnblogs_post_body h3 {
    font-size: 20px;
    font-weight: bold;
    line-height: 1.5;
    color: whitesmoke;
    background-color: dimgrey;
}
/*  正文 */
#cnblogs_post_body p {
    font-size: 12pt;
}

9. 屏蔽广告
在“设置”->“页面定制CSS代码”中写入
/* adblock */
#ad_t2 {
    display: none;
}
.c_ad_block {
    display: none;
}
10. 添加版权信息
在“管理”->“博客签名”,进入到制作签名的页面。在“内容”的文本框输入如下信息并替换相应的文字
<div>作者:<a href="http://www.cnblogs.com/kailugaji/" target="_blank">凯鲁嘎吉</a></div>
<div>出处:<a href="http://www.cnblogs.com/kailugaji/" target="_blank">http://www.cnblogs.com/kailugaji/</a></div>
<div>本文版权归作者和博客园共有,欢迎转载,但未经作者同意必须在文章页面给出原文链接,否则保留追究法律责任的权利。 </div>
在“设置”->“页面定制CSS代码”中写入
#MySignature{
 border:solid 1px #E5E5E5;
 padding:10px;
 background:#E5EEF7 url(http://images.cnblogs.com/cnblogs_com/grenet/226272/o_o_o_info.png) no-repeat scroll 15px 50%;
 padding-left:80px;}

#MySignature div{
  line-height: 20px;
}

11. 推荐与反对框
在“设置”->“页面定制CSS代码”中写入
/*推荐和反对 粘在CSS框*/
#div_digg {
    padding: 10px;
    position: fixed;
    _position: absolute;
    z-index: 1000;
    bottom: 5px;
    right: 0;
    _right: 10px;
    border: 1px solid #D9DBE1;
    background-color: #FFFFFF;
    filter: alpha(Opacity=80);
    -moz-opacity: 0.8;
    opacity: 0.8;
}

.icon_favorite {
    background: transparent url('http://files.cnblogs.com/files/jackson0714/kj.gif') no-repeat 0 0;
    padding-left: 5px;
}

#blog_post_info_block a {
    text-decoration: none;
    color: #5B9DCA;
    padding: 3px;
}

12. 隐藏反对框
在“设置”->“页面定制CSS代码”中写入
.buryit {
  display: none;
}
.comment_bury {
  display: none;
}

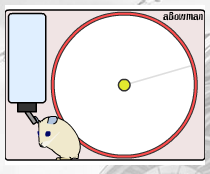
13. 侧边栏小老鼠控件
在“设置”->“博客侧边栏公告(支持HTML代码)(支持JS代码)”中写入
<!-- 小老鼠游戏控件 -->
<div className="sidebarMouse"><object type="application/x-shockwave-flash" style="outline:none;" data="https://files.cnblogs.com/files/jingmoxukong/mouse.swf?up_bodyColor=f0e9cc&up_feetColor=D4C898&up_eyeColor=000567&up_wheelSpokeColor=DEDEDE&up_wheelColor=FFFFFF&up_waterColor=E0EFFF&up_earColor=b0c4de&up_wheelOuterColor=FF4D4D&up_snoutColor=F7F4E9&up_bgColor=F0E4E4&up_foodColor=cba920&up_wheelCenterColor=E4EB2F&up_tailColor=E6DEBE&" width="200" height="160"><param name="movie" value="https://files.cnblogs.com/files/jingmoxukong/mouse.swf?up_bodyColor=f0e9cc&up_feetColor=D4C898&up_eyeColor=000567&up_wheelSpokeColor=DEDEDE&up_wheelColor=FFFFFF&up_waterColor=E0EFFF&up_earColor=b0c4de&up_wheelOuterColor=FF4D4D&up_snoutColor=F7F4E9&up_bgColor=F0E4E4&up_foodColor=cba920&up_wheelCenterColor=E4EB2E&up_tailColor=E6DEBE&"><param name="AllowScriptAccess" value="always"><param name="wmode" value="opaque"></object></div>
14. 天气插件
注册心知天气账户,创建天气

自动生成安装代码
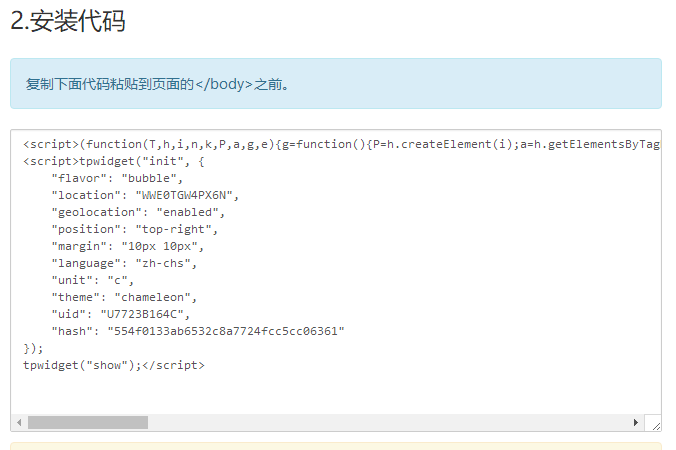
将其复制到“设置”->“页脚Html代码”中
<script>(function(T,h,i,n,k,P,a,g,e){g=function(){P=h.createElement(i);a=h.getElementsByTagName(i)[0];P.src=k;P.charset="utf-8";P.async=1;a.parentNode.insertBefore(P,a)};T["ThinkPageWeatherWidgetObject"]=n;T[n]||(T[n]=function(){(T[n].q=T[n].q||[]).push(arguments)});T[n].l=+new Date();if(T.attachEvent){T.attachEvent("onload",g)}else{T.addEventListener("load",g,false)}}(window,document,"script","tpwidget","//widget.seniverse.com/widget/chameleon.js"))</script>
<script>tpwidget("init", {
    "flavor": "bubble",
    "location": "WWE0TGW4PX6N",
    "geolocation": "enabled",
    "position": "top-right",
    "margin": "10px 10px",
    "language": "zh-chs",
    "unit": "c",
    "theme": "chameleon",
    "uid": "U7723B164C",
    "hash": "554f0133ab6532c8a7724fcc5cc06361"
});
tpwidget("show");</script>

15. 音乐插件
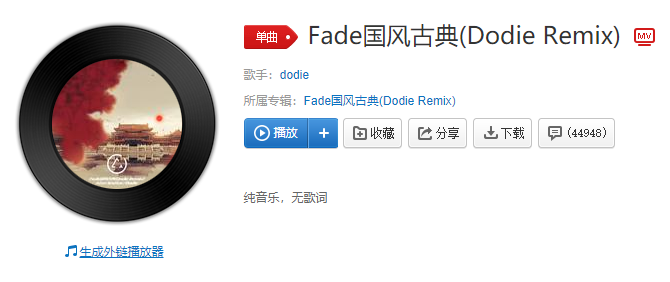
在网易云音乐中搜索一首自己喜欢的音乐,生成外链播放器,复制代码即可。我选取的是Fade国风古典(Dodie Remix)
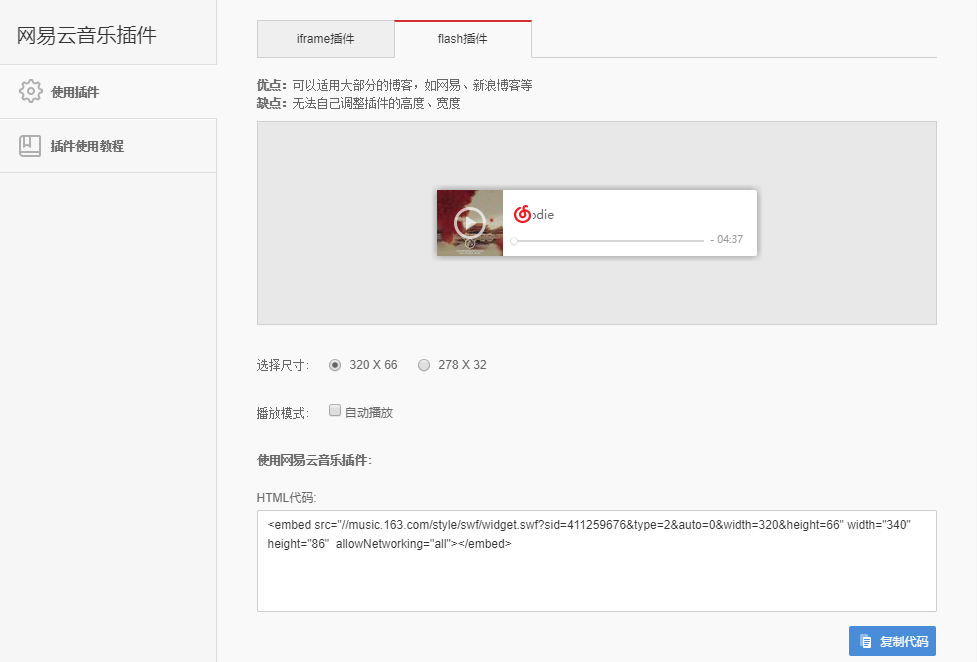
将代码复制到“设置”->“博客侧边栏公告(支持HTML代码)(支持JS代码)”中
<!-- 网易云音乐 -->
<embed src="//music.163.com/style/swf/widget.swf?sid=411259676&type=2&auto=0&width=200&height=66" width="220" height="86"  allowNetworking="all"></embed>
最终效果如下所示,有一个缺陷:网易云音乐这个插件没法调整宽度,显示不完整。

16. 图片弹出放大
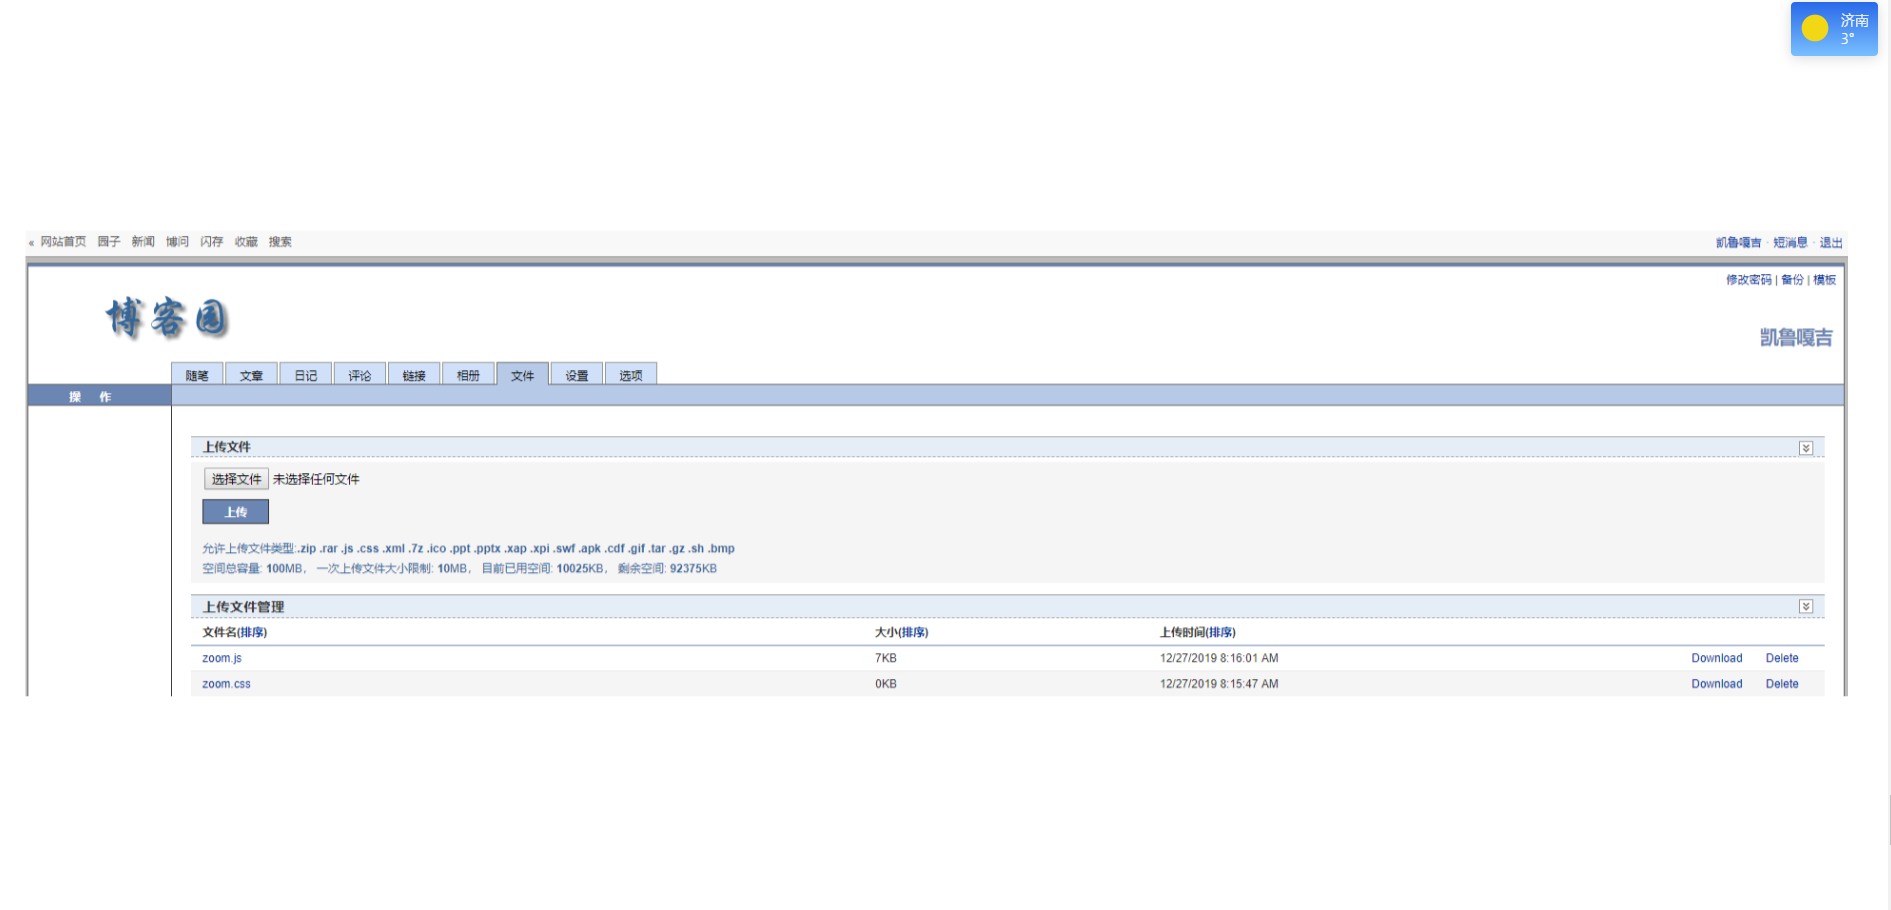
在https://github.com/fat/zoom.js中下载zoom.js与zoom.css文件,上传到“管理”->“文件”中

在“设置”->“页面定制CSS代码”中添加
 /*溢出隐藏设置*/
 #topics, #mainContent {
     overflow: visible;
 }
 #postDesc {
     float: none;
 }
在“设置”->“页脚Html代码”中添加
<!-- zoom.js 的样式 -->
<link rel="stylesheet" type="text/css" href="https://blog-static.cnblogs.com/files/kailugaji/zoom.css">
<!-- jQuery 的 cdn -->
<script src="https://cdn.bootcss.com/jquery/1.8.3/jquery.min.js"></script>
<!-- Bootstrap 的 transition.js cdn(过渡动画插件)-->
<script src="https://cdn.bootcss.com/bootstrap/3.2.0/js/transition.js"></script>
<!-- zoom.js 核心代码 -->
<script src="https://blog-static.cnblogs.com/files/kailugaji/zoom.js"></script>
<script type='text/javascript'>$('#cnblogs_post_body img').attr('data-action', 'zoom');</script>
注意:可以将zoom.css与zoom.js的路径换成自己的。这样就实现了图片的弹出功能,压缩的图片会实现放大功能,原图不会实现放大。
比如上图点击后的结果如下:
