最近在复习spring和mybatis但突然想到spring boot是全注解方式非常方便,于是就去spring-mybatis官网找一下用纯注解的方式实现spring整合Mybatis
需要准备的jar包:
spring-webmvc 5.2.4.RELEASE
spring-jdbc 5.2.4.RELEASE
spring-tx 5.2.4.RELEASE
mysql-connector-java 8.0.19
mybatis-spring 2.0.3
mybatis 3.5.3
c3p0 0.9.5.2
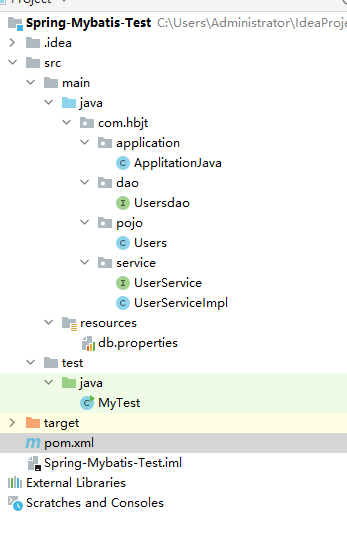
包下载完之后创建目录:
先创建连接数据库的配置文件在resource目录下创建:
driver=com.mysql.cj.jdbc.Driver

url=jdbc:mysql://localhost:3306/自己的库名?useSSL=true&UseUnicode=true&characterEncoding=UTF-8&serverTimezone=UTC

user=自己的账号

pass=自己的密码
数据库配置文件创建好之后就可以编写Application.java文件:
package com.hbjt.application;

import com.hbjt.dao.Usersdao;
import com.mchange.v2.c3p0.ComboPooledDataSource;
import org.apache.ibatis.session.SqlSessionFactory;
import org.mybatis.spring.SqlSessionFactoryBean;
import org.mybatis.spring.SqlSessionTemplate;
import org.mybatis.spring.annotation.MapperScan;
import org.mybatis.spring.mapper.MapperFactoryBean;
import org.springframework.beans.factory.annotation.Configurable;
import org.springframework.beans.factory.annotation.Value;
import org.springframework.context.annotation.Bean;
import org.springframework.context.annotation.ComponentScan;
import org.springframework.context.annotation.Configuration;
import org.springframework.context.annotation.PropertySource;

import java.beans.PropertyVetoException;

/**
 * @Author 于某
 */
//说明是spring配置类代替Xml
@Configuration

//扫描注解
@ComponentScan("com.hbjt")

//引入外部文件相当于:<context:property-placeholder location="classpath::db.properties"/>
@PropertySource("classpath:db.properties")

//这个注解具有与 <mybatis:scan/> 元素一样的工作方式。
//<mybatis:scan/> 元素会发现映射器,它发现映射器的方法与 Spring 内建的 <context:component-scan/> 发现 bean 的方法非常类似。
@MapperScan("com.hbjt.dao")

public class ApplitationJava {

    //引入db.properties的值
    @Value("${driver}")
    private String DRIVER;

    @Value("${url}")
    private String URL;

    @Value("${user}")
    private String USER;

    @Value("${pass}")
    private String PASSWORD;


    //创建数据源这里用的是c3p0
    @Bean
    public ComboPooledDataSource getC3p0(){
        ComboPooledDataSource dataSource = new ComboPooledDataSource();
        try{
            dataSource.setDriverClass(DRIVER);
            dataSource.setJdbcUrl(URL);
            dataSource.setUser(USER);
            dataSource.setPassword(PASSWORD);

        } catch (PropertyVetoException e) {
            e.printStackTrace();
        }
        return dataSource;
    }


    //创建SqlSessionFactory工厂
    //由 Spring 最终创建的 bean 并不是 SqlSessionFactoryBean 本身,而是工厂类(SqlSessionFactoryBean)的 getObject() 方法的返回结果。
    // 这种情况下,Spring 将会在应用启动时为你创建 SqlSessionFactory,并使用 sqlSessionFactory 这个名字存储起来。(官方的大白话)
    @Bean
    public SqlSessionFactory sqlSessionFactory() throws Exception {
        SqlSessionFactoryBean sqlSessionFactory = new SqlSessionFactoryBean();
        sqlSessionFactory.setDataSource(getC3p0());
        return sqlSessionFactory.getObject();
    }


    //如果不想使用SqlSessionTemplate和SqlSessionDaoSupport
    //Mybatis-Spring 为你创建一个线程安全的映射器,这样你就可以直接注入到其它的 bean 中
    //这样就相当于
    //<bean class="org.mybatis.spring.mapper.MapperScannerConfigurer">
    //  <property name="basePackage" value="org.mybatis.spring.sample.mapper" />
    //</bean>

    @Bean
    public MapperFactoryBean<Usersdao> userMapper() throws Exception {
        MapperFactoryBean<Usersdao> factoryBean = new MapperFactoryBean<Usersdao>(Usersdao.class);
        factoryBean.setSqlSessionFactory(sqlSessionFactory());
        return factoryBean;
    }
}
然后编写dao层:
Users.java:
package com.hbjt.dao;


import com.hbjt.pojo.Users;
import org.apache.ibatis.annotations.*;
import org.springframework.context.annotation.DependsOn;

import java.util.List;

//作用和component一样,只是让MapperScan扫描到,让spring知道这是一个dao接口用来实现sql命令
@Mapper
public interface Usersdao {


    @Select("select * from users")
    @Results(id="userMap", value={
            @Result(property="id",column="s_id",id=true),
            @Result(property="name",column="s_name"),
    })
    List<Users> selectUsers();
}
编写service层:
package com.hbjt.service;

import com.hbjt.pojo.Users;

import java.util.List;

/**
 * @Author 于某
 * @Description //TODO $
 * @Date $ $
 * @Param $
 * @return $
 */
public interface UserService {
    List<Users> selectUsers();
}


package com.hbjt.service;

import com.hbjt.dao.Usersdao;
import com.hbjt.pojo.Users;
import org.springframework.beans.factory.annotation.Autowired;
import org.springframework.beans.factory.annotation.Qualifier;
import org.springframework.stereotype.Component;

import java.util.List;

/**
 * @Author 于某
 * @Description //TODO $
 * @Date $ $
 * @Param $
 * @return $
 */
@Component("userServiceImpl")
public class UserServiceImpl implements UserService{


    @Autowired
    @Qualifier("userMapper")
    private Usersdao userdao;

    public List<Users> selectUsers() {
        return userdao.selectUsers();
    }
}
然后测试:
import com.hbjt.application.ApplitationJava;
import com.hbjt.pojo.Users;
import com.hbjt.service.UserServiceImpl;
import org.springframework.context.annotation.AnnotationConfigApplicationContext;

/**
 * @Author 于某
 * @Description //TODO $
 * @Date $ $
 * @Param $
 * @return $
 */
public class MyTest {

    public static void main(String[] args) {
        AnnotationConfigApplicationContext context = new AnnotationConfigApplicationContext(ApplitationJava.class);

        UserServiceImpl userServiceImpl = context.getBean("userServiceImpl", UserServiceImpl.class);
        for (Users selectUser : userServiceImpl.selectUsers()) {
            System.out.println(selectUser);

        }

    }
}