在前文中,基于git介绍了webrev工具。实际上,webrev工具还支持hg和svn。最近的工作中不可避免地要使用svn,故在此总结一下如何基于svn在Linux上创建webrev。顺便吐个槽,没有网页版的代码比对,用svn diff简直就是刀耕火种茹毛饮血啊!技术再娴熟的老司机,也架不住让你在高速公路上开拖拉机Orz!
以前工作上一直用版本管理工具Mercurial (命令为hg), 个人学习的话用Git, 但从来没用过Subversion (命令为svn等) 。所以,下面先简单介绍一下如何搭建一个svn的server然后初始化一个代码仓库。相比之下,基于Mercurial的代码仓库初始化实在是太容易了,只需要一条命令(hg init)就搞定。
1. 搭建一个svn的server
1.1 创建一个项目venus
root# cd /var/tmp && mkdir ducert
root# svnadmin create venus
1.2 配置项目venus
root# tree venus/conf
venus/conf
├── authz            #<-- 权限相关的配置
├── hooks-env.tmpl
├── passwd           #<-- 帐号相关的配置
└── svnserve.conf    #<-- 资源库相关配置

0 directories, 4 files
1.2.1 配置账号 e.g. 添加用户veli, 密码为veli (见第9行)
root# cat -n passwd
     1	### This file is an example password file for svnserve.
     2	### Its format is similar to that of svnserve.conf. As shown in the
     3	### example below it contains one section labelled [users].
     4	### The name and password for each user follow, one account per line.
     5
     6	[users]
     7	# harry = harryssecret
     8	# sally = sallyssecret
     9	veli = veli
1.2.2 配置权限 e.g. 给用户veli的是可以在/下面进行读写 (见第34和35行)
root# cat -n authz
     1  ### This file is an example authorization file for svnserve.
     2  ### Its format is identical to that of mod_authz_svn authorization
     3  ### files.
   ...
    33
    34  [/]
    35  veli=rw
1.2.3 配置资源库 e.g. 设置代码库的根目录(见第48行) (第19,20,27,36行只需要把对应的注释符号去掉即可)
root# cat -n svnserve.conf
     1  ### This file controls the configuration of the svnserve daemon, if you
     2  ### use it to allow access to this repository.  (If you only allow
     3  ### access through http: and/or file: URLs, then this file is
   ...
    19  anon-access = read
    20  auth-access = write
   ...
    27  password-db = passwd
   ...
    36  authz-db = authz
   ...
    48  realm = /var/tmp/ducert/venus
   ...
1.3 启动svn server (e.g. svnserve -d -r venus)
root# cd /var/tmp/ducert && pkill svnserve

root# svnserve -d -r venus

root# ps -ef | grep venus | grep -v grep
root      6960  2233  0 11:29 ?        00:00:00 svnserve -d -r venus
root# netstat -an | grep 3690
tcp        0      0 0.0.0.0:3690            0.0.0.0:*               LISTEN
1.4 测试svn server "venus" 可以正常工作
1.4.1 checkout
veli$ ifconfig -a | egrep "inet addr:.*255.255.255.0"
          inet addr:192.168.228.128  Bcast:192.168.228.255  Mask:255.255.255.0

veli$ svn co svn://192.168.228.128 --username=veli --password=veli
Checked out revision 0.

veli$ ls -A
.svn
1.4.2 add some files
veli$ cd /tmp && mkdir sandbox && cd sandbox
veli$ svn mkdir demo
A         demo

veli$ cd demo
veli$ svn add foo.c
A         foo.c
veli$ svn add bar.py
A         bar.py
veli$ svn add Makefile
A         Makefile

veli$ svn status
A       .
A       Makefile
A       bar.py
A       foo.c
1.4.3 commit
veli$ svn commit -m "05/15/2017: init demo"
Adding         .
Adding         Makefile
Adding         bar.py
Adding         foo.c
Transmitting file data ...
Committed revision 1.
到此为止,一个svn server就搭建好了,并且可以很流畅地工作。接下来,使用webrev工具创建代码比对网页。因为在前一节已经介绍了如何下载webrev工具,这里就不再多说了,直接使用就好。 下载webrev工具用如下命令:
git clone https://github.com/joyent/webrev.git
2. 使用webrev创建代码比对网页
2.1 checkout svn库里的demo代码
veli$ rm -rf /tmp/sandbox && mkdir /tmp/sandbox
veli$ cd /tmp/sandbox

veli$ svn co svn://192.168.228.128 --username=veli --password=veli
A    demo
A    demo/bar.py
A    demo/Makefile
A    demo/foo.c
Checked out revision 1.
2.2 修改文件
veli$ cd /tmp/sandbox/demo

veli$ vi foo.c
veli$ svn diff foo.c
Index: foo.c
===================================================================
--- foo.c       (revision 1)
+++ foo.c       (working copy)
@@ -3,7 +3,7 @@
 int
 main(int argc, char *argv[])
 {
-       (void) printf("Hello World!
");
+       printf("Hello World!
");

        return 0;
 }

veli$ vi bar.py
veli$ svn diff bar.py
Index: bar.py
===================================================================
--- bar.py      (revision 1)
+++ bar.py      (working copy)
@@ -4,9 +4,9 @@

 def main(argc, argv):
         print "Hello World!"
+
         return 0

 if __name__ == '__main__':
-        argv = sys.argv
-        argc = len(sys.argv)
+        argc, argv = len(sys.argv), sys.argv
         sys.exit(main(argc, argv))

veli$ vi Makefile
veli$ svn diff Makefile
Index: Makefile
===================================================================
--- Makefile    (revision 1)
+++ Makefile    (working copy)
@@ -1,7 +1,7 @@
 CC     = gcc
 CFLAGS = -g -Wall -m32

-all: foo
+all: foo bar

 foo: foo.o
        $(CC) $(CFLAGS) -o $@ $<
@@ -9,7 +9,12 @@
 foo.o: foo.c
        $(CC) $(CFLAGS) -c $<

+bar: bar.py
+       cp $< $@
+       chmod +x $@
+
 clean:
        rm -f *.o
 clobber: clean
-       rm -f foo
+       rm -f foo bar
+cl: clobber
2.3 创建webrev
veli$ export PATH=/var/tmp/webrev/bin:$PATH
veli$ webrev
WARNING: codereview(1) not found.
   SCM detected: subversion
 File list from: svn status ...  Done.
      Workspace: /tmp/sandbox
Compare against:
      Output to: /tmp/sandbox/webrev
   Output Files:
        demo/Makefile
                 patch cdiffs udiffs wdiffs sdiffs frames old new
        demo/bar.py
                 patch cdiffs udiffs wdiffs sdiffs frames old new
        demo/foo.c
                 patch cdiffs udiffs wdiffs sdiffs frames old new
 Generating PDF: Skipped: no output available
     index.html: Done.

veli$ cp -r /tmp/sandbox/webev /var/tmp/tmp.sandbox.webrev
2.4 通过浏览器查看
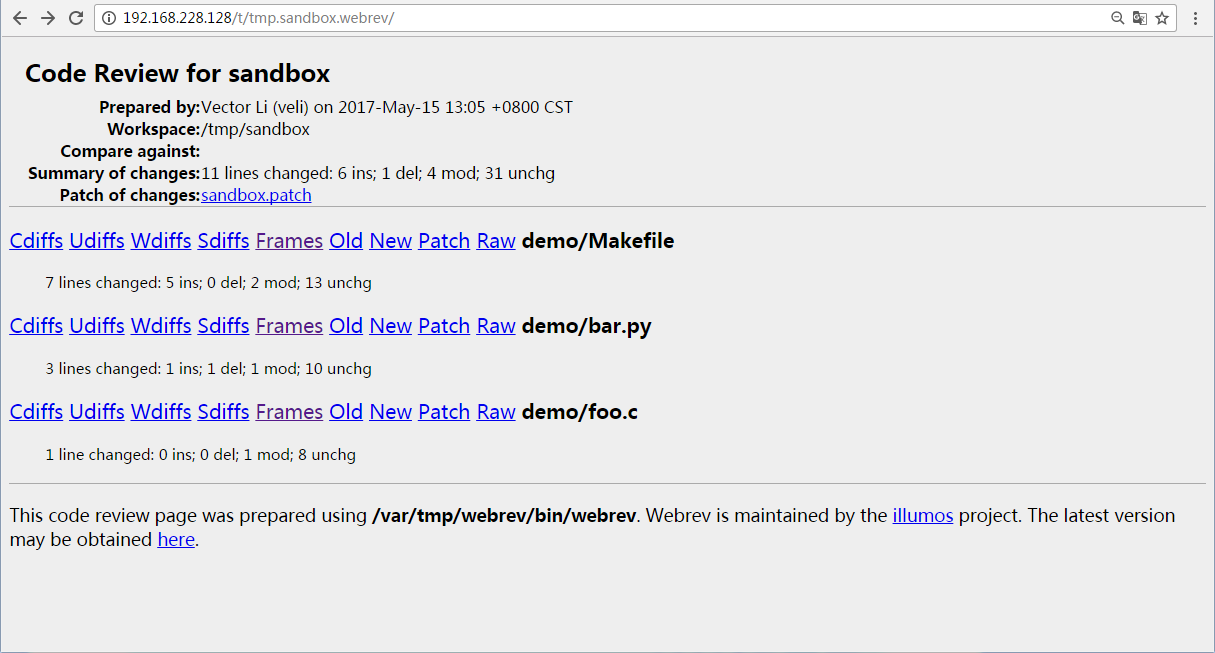
o 扉页
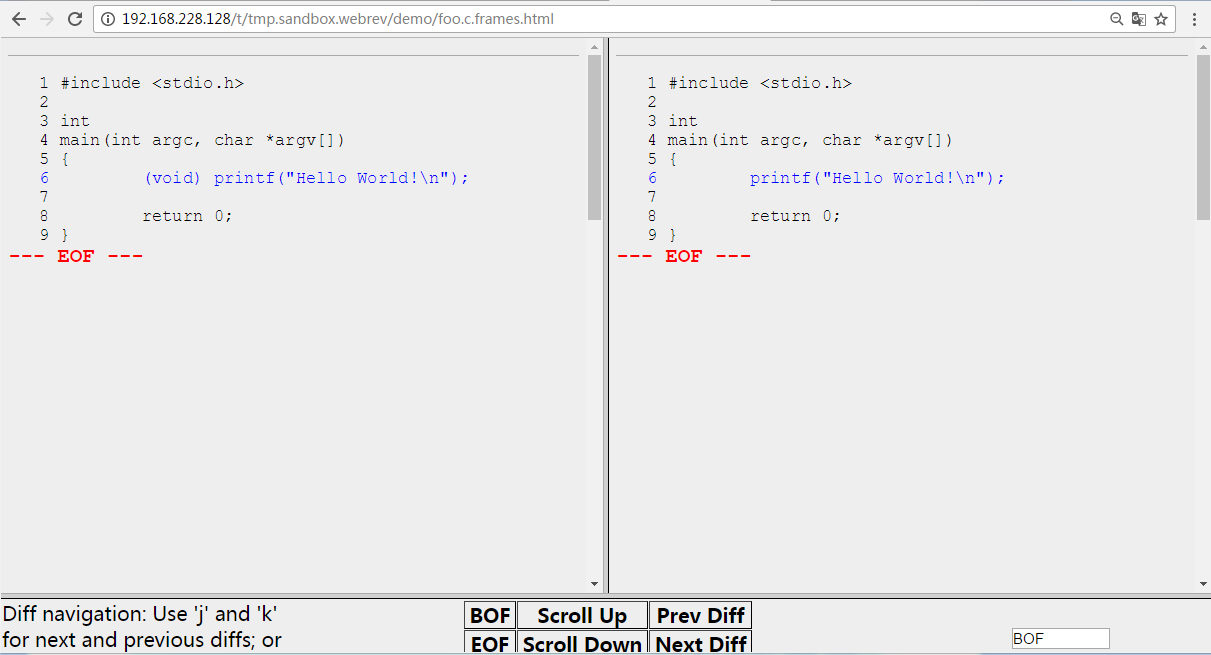
o foo.c.frames.html
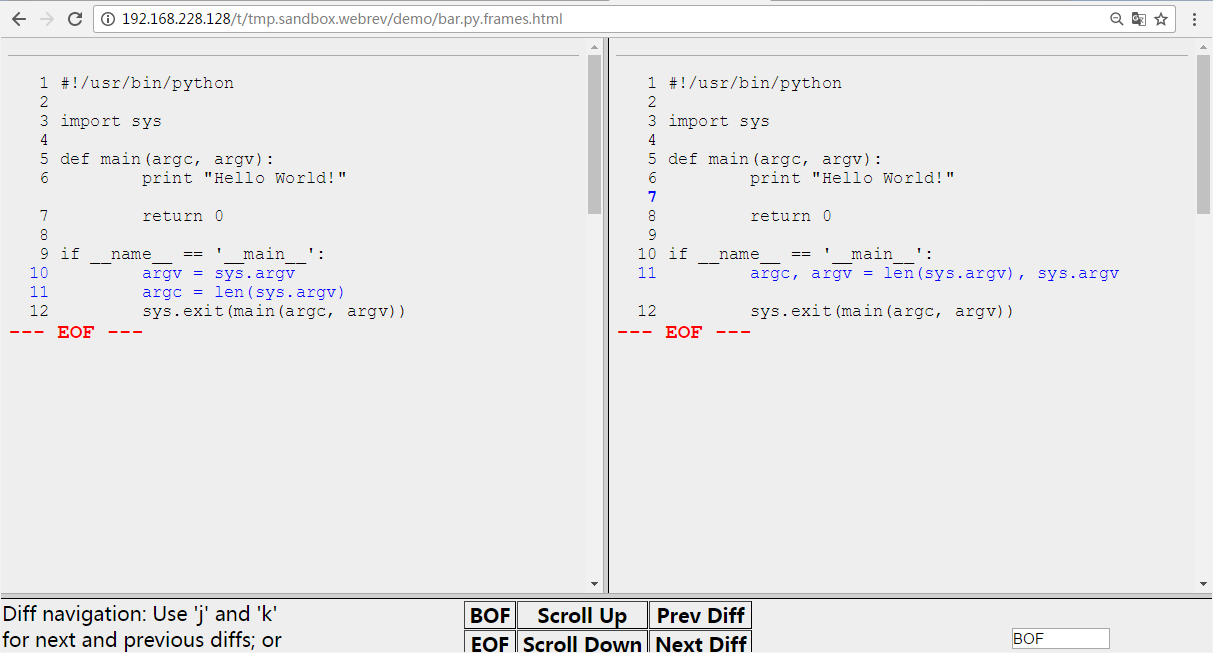
o bar.py.frames.html
o Makefile.frames.html

有了网页版的代码比对,是不是高大上了许多?!必须地。还有更高大上的,那就是利用meld工具查看webrev/raw_files。
2.5 通过meld查看
veli$ cd /var/tmp/tmp.sandbox.webrev/raw_files && ls
new  old
veli$ meld old new
o 扉页
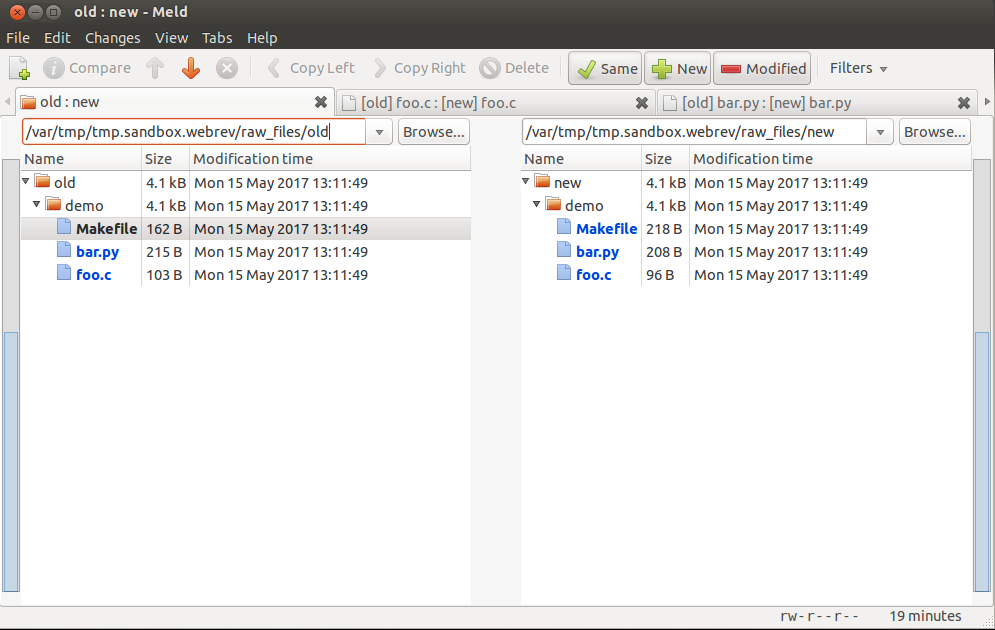
o foo.c
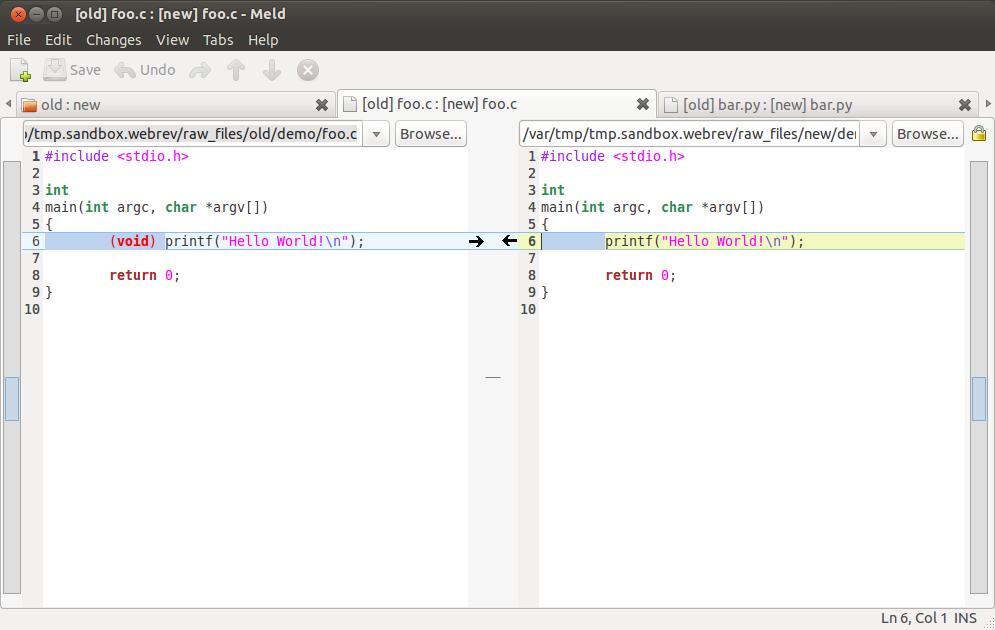
o bar.py
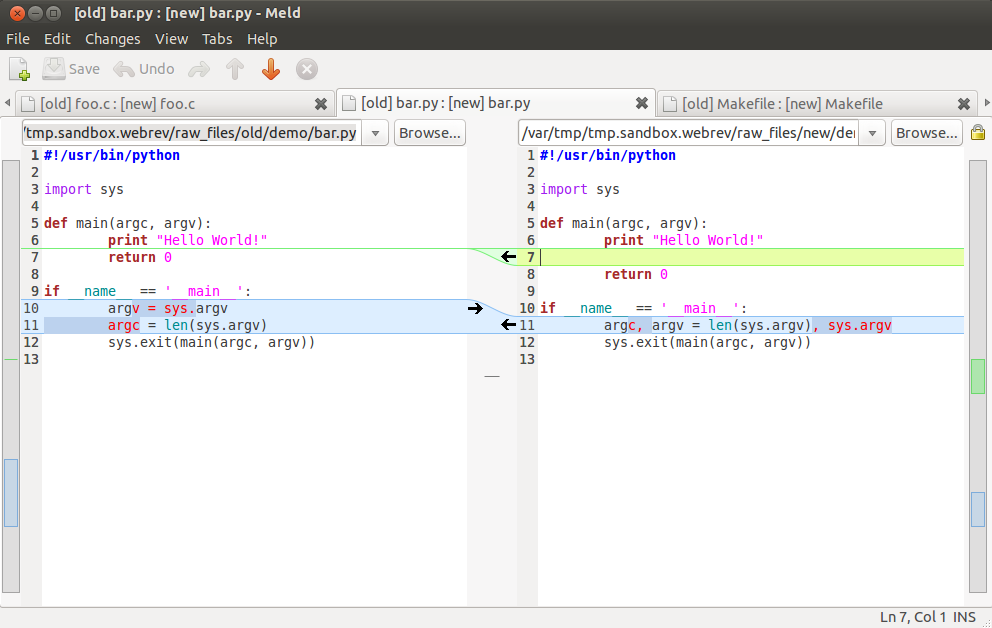
o Makefile
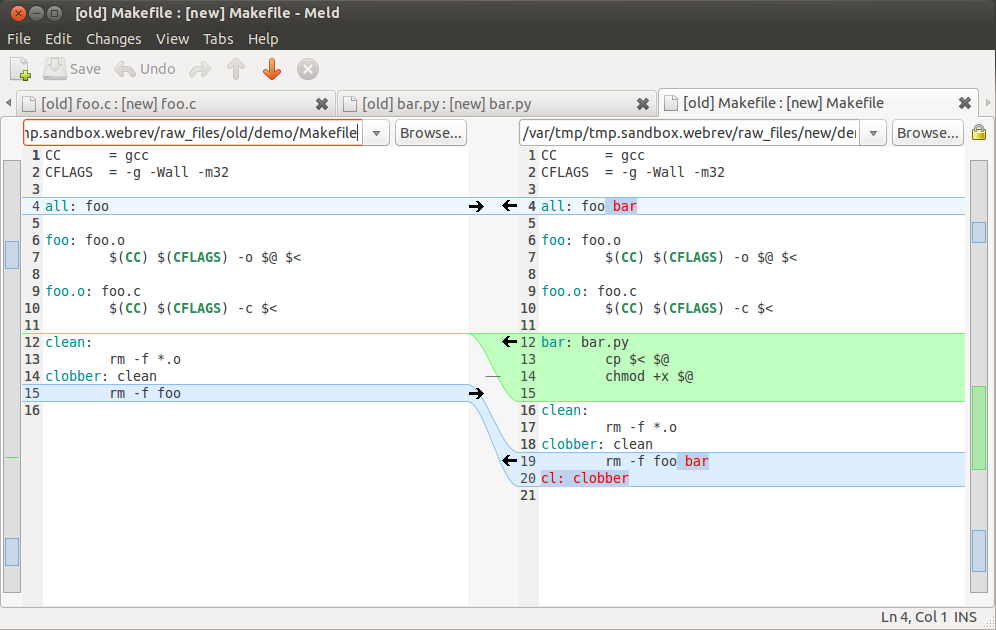
结束语: 如果说"svn diff"是东风牌农用拖拉机的话(穷矮丑),那么"利用webrev创建的比对网页"就是路虎SUV(高富帅),而"基于webrev的meld对比"则是加长版的林肯(相当拉风)。 一句话,是高手就要开好车,是英雄就要用快刀!