一、反爬与反反爬
反爬措施(服务器)
- 通过客户端请求头字段来判断是不是爬虫。
- 通过在url中拼接加密字段,一般通过js动态生成。
- 通过判断一个IP在一个时间段内访问频率。
- 验证码。
- 不直接在页面中显示数据,通过js进行数据渲染。
反反爬措施(你)
- 封装常用请求头,列如:user-agent,Referer。
- 通过 js逆向,或在页面中获得加密字段,。
- 使用IP池,设置爬取策略
- 验证码识别
- 字母验证码,可以通过打码平台识别/自己识别,再输入。
- 滑动/点击验证码,可通过打码平台识别位置后,通过selenium模拟人工滑动/点击,进行验证。
- js渲染可通过以下方法获取数据
- 有些网站数据放置在js代码中,例如36kr。
- 通过selenium+phantomjs(无界面浏览器)、selenium+chrome来获取数据
- 找到数据来源的接口(ajax接口)
- splash获取数据。Splash是一个javascript渲染服务。。
二、ajax
1、什么是ajax
Ajax 不是一种新的编程语言,而是一种用于创建更好更快以及交互性更强的Web应用程序的技术。
使用 JavaScript 向服务器提出请求并处理响应而不阻塞用户核心对象XMLHttpRequest。通过这个对象,您的 JavaScript 可在不重载页面的情况与 Web 服务器交换数据,即在不需要刷新页面的情况下,就可以产生局部刷新的效果。Ajax 在浏览器与 Web 服务器之间使用异步数据传输(HTTP 请求),这样就可使网页从服务器请求少量的信息,而不是整个页面。Ajax可使因特网应用程序更小、更快,更友好。
总结下来:ajax是通过XMLHttpRequest对象,在不刷新页面的情况下异步发送请求,接受响应,的一种网络技术。
三、selenium与浏览器驱动安装。
1、安装 selenium 模块
pip install selenium
2、下载浏览器驱动并且安装。
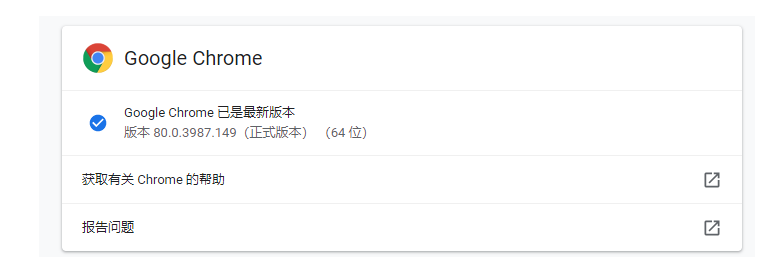
下载 chromedrive,首先需要查看自己的浏览器版本
chromedrive下载地址:https://chromedriver.storage.googleapis.com/index.html?path=80.0.3987.106/
phantomjs下载地址:https://bitbucket.org/ariya/phantomjs/downloads/phantomjs-2.1.1-windows.zip
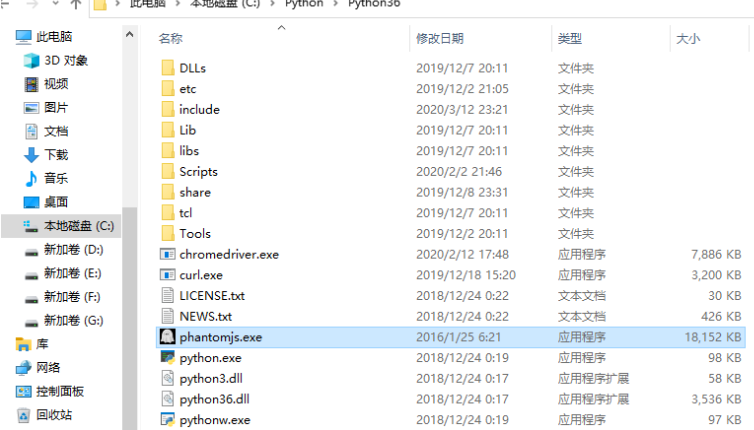
下载完成后解压,移动到python.exe所在的目录,你也可以进行单独环境变量配置,不过这种方法是最简单的
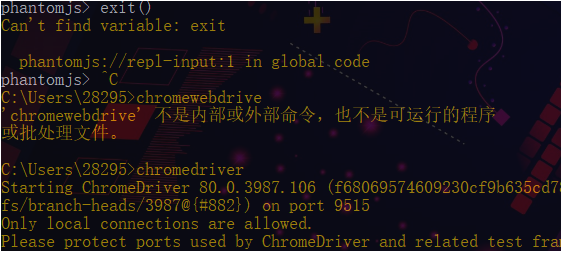
是否成功,在cmd命令行中输入相关命令
四、selenium简单使用
4.1、常用方法如下
from selenium import webdriver
chrome = webdriver.Chrome()
# 访问url
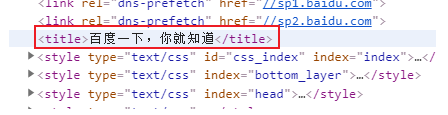
chrome.get('https://www.baidu.com')
# 元素选择
input_1 = chrome.find_element_by_id('kw') # 通过id选择
input_2 = chrome.find_element_by_xpath("//input[@id='su']") # 通过xpath
input_3 = chrome.find_element_by_css_selector('#su') # 通过css选择器
input_4 = chrome.find_element_by_class_name('bg s_btn') # 通过类名
# 往输入框内发送内容,并且点击
input_1.send_keys('spider')
button = chrome.find_element_by_xpath('//input[@id="su"]')
# 获取某对象的png bytes数据
content_bytes = button.screenshot_as_png
# 获取元素的位置
print(button.location)
button.click()
# 全屏截图
chrome.save_screenshot('1.png')
# 元素大小
print(button.size)
chrome.close()
# 关闭选项卡
chrome.close()
# 退出浏览器
chrome.quit()
4.2、selenium提取cookies字典
from selenium import webdriver

chrome = webdriver.Chrome()
chrome.get('http://www.baidu.com')

cookies = chrome.get_cookies()

cok_dic = {i.get('name'): i.get('value') for i in cookies}
print(cok_dic)

chrome.close()
chrome.quit()
4.3、selenium中的三种等待
代码执行的速度是非常快的,但是我们通过selenium+浏览器驱动去驱动一个浏览器执行某些动作,但是浏览器执行的速度很慢。我们进行数据提取时,浏览器页面并没有加载完毕,我们可能会提取不到数据,所以需要设置等待。
强制等待:shitime.sleep(1) #程序暂停1秒
隐式等待:chrome.implicitly_wait(5) #最多等待5秒,在5秒内,加载完成就不会报错。
显示等待:指定时间情况下,指定某些元素或者状态是否加载完成。加载完成就不会报错。
from selenium.webdriver.common.by import By #通过什么方式判断:id、xpath、cssselect、等
from selenium.webdriver.support.ui import WebDriverWait
from selenium.webdriver.support import expected_conditions as EC
next_page = WebDriverWait(self.browser, 5).until(
                EC.presence_of_element_located((By.XPATH, '//div[contains(@class,"paginator")]/a[last()]'))) #等待a标签是否加载成功。
            next_url = next_page.get_attribute('href')

#EC这个类中提供了很多判断条件,下面是常用判断条件
title_is    #title标签内容是..
title_contains #title标签包含。
presence_of_element_located  #元素加载完成
visibility_of_element_located  #元素可视
text_to_be_present_in_element #元素内的内容加载完成
element_to_be_clickable  #元素可点击
element_to_be_selected  #元素可选择
五、相关案例
5.1、豆瓣图书
from selenium import webdriver
import time
import random
from selenium.webdriver.common.by import By
from selenium.webdriver.support.ui import WebDriverWait
from selenium.webdriver.support import expected_conditions as EC
from lxml import etree
import xlwt


class Douband():
    def __init__(self, kw, page):
        self.base_url = 'https://book.douban.com/'
        self.browser = webdriver.Chrome()
        self.page_url = ''
        self.kw = kw
        self.page = page
        self.cont_list = []

    def get_index(self, url):
        self.browser.get(url)
        try:
            next_page = WebDriverWait(self.browser, 5).until(
                EC.presence_of_element_located((By.XPATH, '//div[contains(@class,"paginator")]/a[last()]')))
            next_url = next_page.get_attribute('href')
            self.page_url = next_url
            return self.browser.page_source
        except Exception:
            self.browser.quit()

    def parser_index(self, content):
        html = etree.HTML(content)
        item_list = html.xpath('//div[contains(@class,"sc-bZQynM" )]')
        for item in item_list:
            title = item.xpath('.//div[@class="detail"]/div[@class="title"]/a/text()')
            rating = item.xpath('.//div[@class="detail"]/div[contains(@class,"rating")]/span[2]/text()')
            times = item.xpath('.//div[@class="detail"]/div[contains(@class,"rating")]/span[3]/text()'),
            info = item.xpath('.//div[@class="detail"]/div[@class="meta abstract"]/text()'),
            item = {
                'title': title[0] if title else None,
                'rating': rating[0] if rating else None,
                'times': times[0] if times else None,
                'info': info[0] if info else None,
            }
            print(item)
            self.cont_list.append(item)

    def search(self):
        self.browser.get(self.base_url)
        self.browser.find_element_by_id('inp-query').send_keys(self.kw)
        time.sleep(random.random())
        self.browser.find_element_by_xpath('//div[@class="inp-btn"]/input').click()

    def write_to_excel(self, filename, sheetname):
        # 创建workbook
        file = xlwt.Workbook()

        # 添加sheet表
        sheet = file.add_sheet(sheetname)

        # 设置表头
        head = [i for i in self.cont_list[0].keys()]
        for i in range(len(head)):
            sheet.write(0, i, head[i])
        # 写内容
        i = 1
        for item in self.cont_list:
            for j in range(len(head)):
                sheet.write(i, j, item[head[j]])
            i += 1
        # 保存
        file.save(filename)
        print('写入excle成功!')

    def run(self):
        self.search()
        count = 0
        self.page_url = self.browser.current_url
        while count < self.page:
            content = self.get_index(self.page_url)
            self.parser_index(content)
            count += 1
        self.browser.quit()
        self.write_to_excel('python.xls', 'book')


if __name__ == '__main__':
    db = Douband('python', 10)
    db.run()
5.2、腾讯招聘
import requests
from jsonpath import jsonpath
from excle_wirte import ExcelUtils
import os


def get_content(url):
    headers = {
        'user-agent': 'Mozilla/5.0 (Windows NT 10.0; Win64; x64) AppleWebKit/537.36 (KHTML, like Gecko) Chrome/80.0.3987.149 Safari/537.36',
        'referer': 'https://careers.tencent.com/search.html'
    }

    res = requests.get(url, headers=headers).json()
    jp = jsonpath(res, '$.*.Posts.*')
    print(jp)
    return jp


def write_excel(filename, item_list, sheetname):
    if not os.path.exists(filename):
        ExcelUtils.write_to_excel(filename, item_list, sheetname)
    else:
        ExcelUtils.append_to_excel(filename, item_list)


if __name__ == '__main__':
    base_url = 'https://careers.tencent.com/tencentcareer/api/post/Query?timestamp=1585401795646&countryId=&cityId=&bgIds=&productId=&categoryId=&parentCategoryId=&attrId=&keyword=&pageIndex={}&pageSize=20&language=zh-cn&area=cn'
    for i in range(1, 11):
        content = get_content(base_url.format(i))
        write_excel('tencent.xls',content,'hr')
在这里用到了写入excel的一些方法,我这里直接引用了别人封装的方法。
import xlwt
import xlrd
from xlutils.copy import copy as C


class ExcelUtils(object):
    @staticmethod
    def write_to_excel(filename, item_list, sheetname):
        try:
            # 创建workbook
            workbook = xlwt.Workbook(encoding='utf-8')
            # 给工作表添加sheet表单
            sheet = workbook.add_sheet(sheetname)
            # 设置表头
            head = []
            for i in item_list[0].keys():
                head.append(i)
            # print(head)
            # 将表头写入excel
            for i in range(len(head)):
                sheet.write(0, i, head[i])
            # 写内容
            i = 1
            for item in item_list:
                for j in range(len(head)):
                    sheet.write(i, j, item[head[j]])
                i += 1
            # 保存
            workbook.save(filename)
            print('写入excle成功!')
        except Exception as e:
            print(e)
            print('写入失败!')

    @staticmethod
    def append_to_excel(filename, item_list):
        # 打开excle文件
        work_book = xlrd.open_workbook(filename)
        # 获取工作表中的所有sheet表单名称
        sheets = work_book.sheet_names()
        # 获取第一个表单
        work_sheet = work_book.sheet_by_name(sheets[0])
        # 获取已经写入的行数
        old_rows = work_sheet.nrows
        # 获取表头的所有字段
        keys = work_sheet.row_values(0)
        # 将xlrd对象转化成xlwt,为了写入
        new_work_book = C(work_book)
        # 获取表单来添加数据
        new_sheet = new_work_book.get_sheet(0)
        i = old_rows
        for item in item_list:
            for j in range(len(keys)):
                new_sheet.write(i, j, item[keys[j]])
            i += 1

        new_work_book.save(filename)
        print('追加成功!')