本文例程下载:https://files.cnblogs.com/files/heyang78/myBank_thymeleaf_210906.rar
本文将带您重返石器时代,品尝下本质依旧是jsp/servlet的所谓SpringBoot/thymeleaf新酒。
正文开始:
第一步:在pom.xml里添加SpringBoot的web支持。
    <dependencies>
        ......

        <!-- Web support -->
        <dependency>
            <groupId>org.springframework.boot</groupId>
            <artifactId>spring-boot-starter-web</artifactId>
        </dependency>

        <dependency>
            <groupId>org.springframework.boot</groupId>
            <artifactId>spring-boot-starter-tomcat</artifactId>
            <scope>provided</scope>
        </dependency>

        <!-- thymeleaf -->
        <dependency>
            <groupId>org.springframework.boot</groupId>
            <artifactId>spring-boot-starter-thymeleaf</artifactId>
        </dependency>

        <!-- Hot deployment 可选 -->
        <dependency>
            <groupId>org.springframework.boot</groupId>
            <artifactId>spring-boot-devtools</artifactId>
        </dependency>
    </dependencies>
以上四项里,Web support里面的两项是必要的,thymeleaf也是必要的,devtools热部署是可选的,但有了这一项可以运行起来改变控制器的页面指向,加上方便一些。
第二步:准备网页。
在recources目录下准备一个templates目录,里面放入一个html的页面。

如上图,我就放入一个名为sample.html的页面,里面内容很随意:
<!DOCTYPE html>
<html xmlns:th="http://www.thymeleaf.org">
<head>
<meta charset="UTF-8">
<title>Sample page</title>
</head>
<body>
    <h1>Welcome to the thymeleaf world.</h1>
</body>
</html>
大家仿制就好。
第三步:制作Controller
package com.hy.mybank.ctrl;

import org.springframework.stereotype.Controller;
import org.springframework.web.bind.annotation.RequestMapping;

@Controller
public class ActionController {

    @RequestMapping("/sample")
    public String showSamplePage() {
        return "sample";
    }
}
制作一个控制器类,这个类将根据地址栏输入的内容转到合适的网页,首先它要引入@Control的注解,表示它将接管页面跳转;其次负责处理的函数需要引入@RequestMapping注解,表示什么样的路径由这个函数处理;在函数结尾处,返回字符串sample,程序将根据这个字符串找到resources/template/sample.html,这就是我们刚才草就的网页了。
为什么路径部分和扩展名部分程序能自己补充呢?这就是约定。一看到Controller返回字符串,SpringBoot程序就默认文件在resources/template下,扩展名是html。当然这些也可以配置,但保持现状也挺好。
第四步,把带main函数的类运行起来,你会发现SpringBoot程序不像以往跑一遍就停了,而是保持活跃状态。

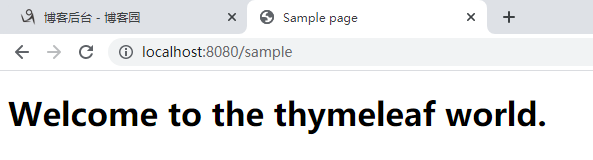
第五步,打开浏览器,输入http://localhost:8080/sample,网页就显现出来了。
整个过程到这里就结束了,让SpringBoot程序显示网页就这么简单,就这还用得着买本死贵死贵,动辄四五十块钱的书来看吗?
-END-