进到这个公司一直就是winform和Silverlight,实在是没有实战web项目的机会。大D也辞职了,去搞web app了。自己也该闲暇时间多学习学习,每天进步一点点。
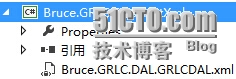
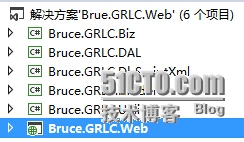 OK,不多说了,看一下Solution的截图
基本上一看就明白了,控制器调用Biz层,Biz层调用DAL层,DAL层进行数据的CURD。Utility是一些公用的类库。ok,为什么程序集的命名都是以Bruce开头呢,因为我在公司的英文名叫这个。废话不多说,我们先看一下页面
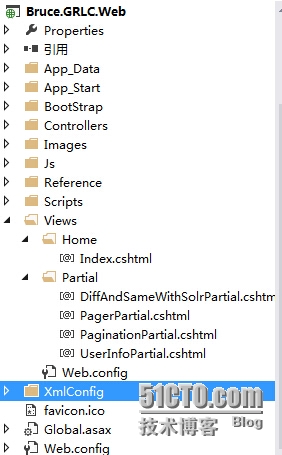
我们引入了BootStrap,主要是为了页面布局。在Views中Partial下面放的都是部分页。
我们先看一下运行效果,今天主要是讲页面初始化部分。
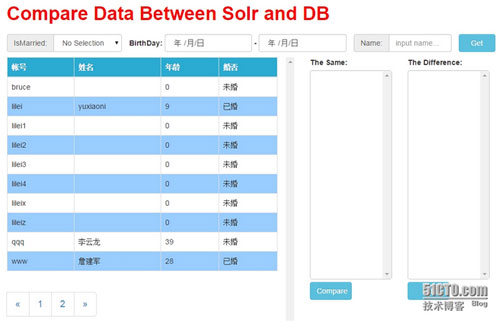
其实查询条件就是婚否,出生日期,姓名的模糊查询。我们先看一下页面Index.cshtml的代码
- <!DOCTYPE html>
- <html>
- <head>
- <meta charset="utf-8" />
- <meta http-equiv="X-UA-Compatible" content="IE=edge" />
- <meta name="viewport" content="width=device-width;initial-scale=1" />
- <title>Compare data between Solr and DB</title>
- <link rel="stylesheet" type="text/css" href="~/BootStrap/css/bootstrap-theme.css" />
- <link rel="stylesheet" type="text/css" href="~/BootStrap/css/bootstrap.css" />
- @*@Styles.Render("~/css")*@
- @Scripts.Render("~/bundles/BootStrap")
- @Scripts.Render("~/bundles/Scripts")
- <style type="text/css">
- .pre-Scrollable {
- max-height: 700px;
- overflow-y: scroll;
- }
- </style>
- </head>
- <body>
- <div class="container">
- <form id="formsync">
- <div class="row">
- <div class="col-md-12">
- <h1 style="color:red"><b>Compare Data Between Solr and DB</b></h1>
- </div>
- </div>
- <div class="row" id="divloding" style="display:none;text-align:center">
- <div class="col-md-6">
- <img src="~/Images/ajaxLoading.gif" alt="load failed" />
- <label>getting,please wait......</label>
- </div>
- </div>
- <div class="row" id="divcompare" style="display:none;text-align:center">
- <div class="col-md-6">
- <img src="~/Images/ajaxLoading.gif" alt="load failed" />
- <label>comparing,please wait......</label>
- </div>
- </div>
- <div class="row" id="divfix" style="display:none;text-align:center">
- <div class="col-md-6">
- <img src="~/Images/ajaxLoading.gif" alt="load failed" />
- <label>fixing,please wait......</label>
- </div>
- </div>
- <div class="row" style="margin-top:10px">
- <div class="col-md-12 form-inline">
- <div class="form-group input-group">
- <span class="input-group-addon">IsMarried:</span>
- @Html.DropDownList("ddlMarried", ViewBag.MarriedList as SelectList, null, new { id = "ddlMarried", @class = "form-control" })
- </div>
- <div class="form-group" style="margin-left:10px">
- <label class="control-label">BirthDay:</label>
- <input type="date" id="txtdatestart" class="form-control">
- <label class="control-label">-</label>
- <input type="date" id="txtdateend" class="form-control">
- </div>
- <div class="form-group input-group" style="margin-left:10px">
- <span class="input-group-addon">Name:</span>
- <input id="txtusername" type="text" class="form-control" placeholder="input name..." style="120px" />
- </div>
- <div class="form-group" style="margin-left:10px">
- <input id="btnsearch" type="button" class="btn btn-info" value="Get" style="70px" />
- </div>
- </div>
- </div>
- <div class="row" style="margin-top:10px">
- <div id="divresult" class="col-md-7 form-inline pre-Scrollable">
- @{Html.RenderPartial("~/Views/Partial/UserInfoPartial.cshtml");}
- </div>
- <div class="col-md-5">
- @{Html.RenderPartial("~/Views/Partial/DiffAndSameWithSolrPartial.cshtml");}
- </div>
- </div>
- </form>
- </div>
- </body>
- </html>
我们使用html5+BootStrap布局,这里用到了BootStrap的网格系统,将浏览器平分为12份,即12列,很容易构造出响应式布局系统。那么什么是BootStrap的网格系统,看如下的解释

OK,我们怎么看是否是响应式的布局呢,我们打开谷歌浏览器,现将浏览器缩小到一定程度。
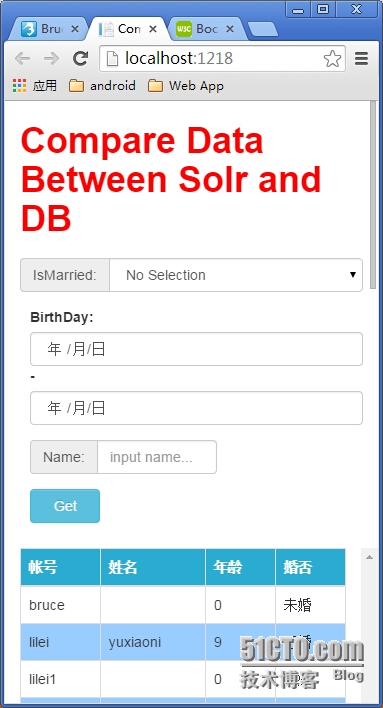
看到了吧,即使设备浏览器这么小,我们还是能用。那我们在手机模拟器中测试一下,打开谷歌浏览器,按F12,点击手机模拟器样的东西,然后Device选择iphone6。

我们看到iphone6下面的效果是这样的。说到这里我最近很讨厌两个广告,一个是“这个是iphone6,这个是iphone6 plus,它们都有一个叫健康的东西.....但是好吃啊”,还有一个是“当牛魔王变成一个饺子,我愿意变成一双筷子”。看到这两个广告,我想砸电视。
那为什么不同的设备不同的浏览器都是可以正常浏览的呢,原因就在于这段代码
- <meta name="viewport" content="width=device-width;initial-scale=1" />
这段代码的意思是网页宽度默认等于屏幕宽度,缩放比例默认为1(网页初始比例占屏幕的100%)。
ok,我们接下来看head部分css和js的引用,这里有个新东西叫Bundle,用来打包压缩js或者css的。通过它打包压缩的js或者css客户端只需要下载一次包即可,而且可以在客户端缓存起来,当检测到有更新时,才会重新下载。
下面是Bundle.cs的代码
- using System.Web;
- using System.Web.Optimization;
- namespace Brue.GRLC.Web
- {
- public class BundleConfig
- {
- // 有关 Bundling 的详细信息,请访问 http://go.microsoft.com/fwlink/?LinkId=254725
- public static void RegisterBundles(BundleCollection bundles)
- {
- bundles.Add(new ScriptBundle("~/bundles/BootStrap").Include(
- "~/Scripts/jquery-1.11.1.js","~/BootStrap/js/bootstrap.js"));
- bundles.Add(new ScriptBundle("~/bundles/Scripts").Include("~/Js/Index.js"));
- bundles.Add(new StyleBundle("~/css").Include("~/BootStrap/css/bootstrap-theme.css"
- , "~/BootStrap/css/bootstrap.css"));
- }
- }
- }
注意,在这里引用js的时候不要引用压缩过的js,比如xxx.min.js。当Bundle在遇到这种js命名文件的时候,直接就忽略掉了。那么我们在Head中只需要使用如下代码来引用即可。
- @Scripts.Render("~/bundles/BootStrap")
- @Scripts.Render("~/bundles/Scripts")
OK,在这我碰到一个问题,就是我的css通过这种方式引用,始终提示Index out of range。如果哪位大牛知道原因的话麻烦留个言,谢谢!
OK,我们接下来看一下控制器代码,页面刚进来,会走Home/Index。
- public ActionResult Index()
- {
- List<object> marriedList = GRLCBiz.GetInstance().GetMarriedList();
- SelectList selectList = new SelectList(marriedList, "MarriedID", "DisplayContent", "-1");
- ViewBag.MarriedList = selectList;
- DataResponse<UserDBEntity> dataResponse = GRLCBiz.GetInstance().GetUserInfoEntityList();
- UserInfoViewModel userInfoViewModel = new UserInfoViewModel();
- userInfoViewModel.DataResponse = dataResponse;
- userInfoViewModel.DataResponse.PageIndex = ConstValues.CONN_DefaultPageIndex;
- userInfoViewModel.DataResponse.PageSize = ConstValues.CONN_DefaultPageSize;
- userInfoViewModel.DataResponse.StartPageIndex = 1;
- return View(userInfoViewModel);
- }
首先我们构造了一个SelectList用于下拉列表,Biz层的代码很简单
- public dynamic GetMarriedList()
- {
- IList<object> marriedList = new List<object>();
- marriedList.Add(new { MarriedID = -1, DisplayContent = "No Selection" });
- marriedList.Add(new { MarriedID = 0, DisplayContent = "Married" });
- marriedList.Add(new { MarriedID = 1, DisplayContent = "UnMarried" });
- return marriedList;
- }
用匿名类去构造一个List。接下来就是DataReponse的获取,Biz层的代码如下
- public DataResponse<UserDBEntity> GetUserInfoEntityList(UserInfoRequest request = null)
- {
- if(request==null)
- {
- request = new UserInfoRequest();
- request.PageIndex = ConstValues.CONN_DefaultPageIndex;
- request.PageSize = ConstValues.CONN_DefaultPageSize;
- }
- int totalCount=0;
- List<UserDBEntity> userDBEntityList = GRLCDAL.GetInstance().GetUserInfoEntityList(request, out totalCount);
- DataResponse<UserDBEntity> dataResponse = new DataResponse<UserDBEntity>();
- dataResponse.DataList = userDBEntityList;
- dataResponse.TotalCount = totalCount;
- return dataResponse;
- }
没什么可说的,ConstValues类中是一些静态只读属性
- public class ConstValues
- {
- public static readonly string CON_DBConnection = ConfigurationManager.ConnectionStrings["DB_ConnectionStr"].ToString();
- public static readonly string CON_DbScriptXmlFolder = ConfigurationManager.AppSettings["DbScriptXmlFolder"];
- public static readonly int CONN_DefaultPageSize = int.Parse(ConfigurationManager.AppSettings["DefaultPageSize"]);
- public static readonly int CONN_DefaultPageIndex = 1;
- public static readonly int CONN_PagerDisplayCount = int.Parse(ConfigurationManager.AppSettings["PagerDisplayCount"]);
- }
看一下DAL层。
- public List<UserDBEntity> GetUserInfoEntityList(UserInfoRequest request, out int totalCount)
- {
- totalCount = 0;
- string sqlScript = string.Empty;
- try
- {
- sqlScript = DBScriptManager.GetScript(this.GetType(), "GetUserInfo");
- SqlParameter[] sqlParameters =
- {
- new SqlParameter("@IsMarried",SqlDbType.Char,1),
- new SqlParameter("@StartDate",SqlDbType.DateTime),
- new SqlParameter("@EndDate",SqlDbType.DateTime),
- new SqlParameter("@UserName",SqlDbType.NVarChar,20),
- new SqlParameter("@PageIndex",SqlDbType.Int),
- new SqlParameter("@PageSize",SqlDbType.Int),
- new SqlParameter("@TotalCount",SqlDbType.Int)
- };
- sqlParameters[0].Value = request.IsMarried;
- sqlParameters[1].Value = request.StartDate;
- sqlParameters[2].Value = request.EndDate;
- sqlParameters[3].Value = request.UserName;
- sqlParameters[4].Value = request.PageIndex;
- sqlParameters[5].Value = request.PageSize;
- sqlParameters[6].Direction = ParameterDirection.Output;
- DataSet ds = SqlHelper.ExecuteDataset(ConstValues.CON_DBConnection, CommandType.Text, sqlScript, sqlParameters);
- if (ds != null && ds.Tables.Count > 0)
- {
- totalCount = Convert.ToInt32(sqlParameters[6].Value);
- return ds.Tables[0].ToEntityList<UserDBEntity>();
- }
- return new List<UserDBEntity>();
- }
- catch (Exception ex)
- {
- LogHelper.WriteExceptionLog(MethodBase.GetCurrentMethod(), ex);
- return null;
- }
- }
OK,我们看一下这个GetUserInfo脚本,在Bruce.GRLC.DbScriptXml程序集下。
- <?xml version="1.0" encoding="utf-8" ?>
- <Scripts>
- <Script Key="GetUserInfo">
- <![CDATA[
- DECLARE @UserTempTable TABLE
- (
- ID INT IDENTITY(1,1) NOT NULL,
- UserNo CHAR(25) NOT NULL
- )
- INSERT INTO @UserTempTable
- (
- UserNo
- )
- SELECT
- A.UseNo
- FROM Bonus.dbo.[User] A WITH(NOLOCK)
- LEFT JOIN Bonus.dbo.UerInfo B WITH(NOLOCK)
- ON A.UseNo = B.UseNo
- WHERE (@IsMarried IS NULL OR @IsMarried = '' OR B.Temper = @IsMarried)
- AND
- (
- @StartDate IS NULL
- OR @EndDate IS NULL
- OR B.BirthDay BETWEEN @StartDate AND @EndDate
- )
- AND
- (
- @UserName IS NULL
- OR @UserName = ''
- OR B.Name LIKE '%' + @UserName + '%'
- )
- ORDER BY A.UseNo ASC
- SELECT @TotalCount = COUNT(1) FROM @UserTempTable
- SELECT
- UseNo,
- Name,
- Age,
- Married
- FROM(
- SELECT
- ID = ROW_NUMBER() OVER(ORDER BY UseNo ASC),
- A.UseNo,
- B.Name,
- B.Age,
- Married = CASE WHEN B.Temper = '1'
- THEN '已婚'
- ELSE '未婚'
- END
- FROM Bonus.dbo.[User] A WITH(NOLOCK)
- LEFT JOIN Bonus.dbo.UerInfo B WITH(NOLOCK)
- ON A.UseNo = B.UseNo
- INNER JOIN @UserTempTable C
- ON C.UserNo = A.UseNo
- ) N
- WHERE ID BETWEEN (@PageIndex - 1)* @PageSize + 1 AND @PageIndex * @PageSize
- ]]>
- </Script>
- </Scripts>
脚本很简单,就是传入参数查分页数据。
在DAL层我们将DataTable通过ToEntityList转化为了实体List,在Utility中我们定义了一个扩展用来转化。
- public static class DataTableToEntityExtension
- {
- public static List<T> ToEntityList<T>(this DataTable dt) where T : class,new()
- {
- List<T> entityList = new List<T>();
- Type entityType = typeof(T);
- PropertyInfo[] propertys = entityType.GetProperties();
- DataMappingAttribute mappingAttribute = null;
- foreach (DataRow dr in dt.Rows)
- {
- T tEntity = new T();
- foreach (PropertyInfo pi in propertys)
- {
- mappingAttribute = pi.GetCustomAttribute(typeof(DataMappingAttribute)) as DataMappingAttribute;
- if (mappingAttribute != null && dt.Columns.Contains(mappingAttribute.mappingName))
- {
- if (!pi.CanWrite) continue;
- object value = dr[mappingAttribute.mappingName];
- if (value != DBNull.Value)
- pi.SetValue(tEntity, value, null);
- }
- }
- entityList.Add(tEntity);
- }
- return entityList;
- }
- }
值那么转化的时候是怎么让DataTable的列和实体匹配起来,你可以将列别名和实体定义成一样的,还有一种你可以使用Attribute。那我们使用后者,因为后者更灵活。
- [AttributeUsage(AttributeTargets.Property)]
- public class DataMappingAttribute : Attribute
- {
- public string mappingName;
- public DbType dbType;
- public DataMappingAttribute()
- { }
- public DataMappingAttribute(string mappingName, DbType dbType)
- {
- this.mappingName = mappingName;
- this.dbType = dbType;
- }
- }
定义好Attribute之后,我们设置其能使用的目标只能是Property。然后我们在实体类里面的属性上加上这个Attribute。
- namespace Bruce.GRLC.Model.Entity
- {
- public class UserDBEntity
- {
- [DataMapping("UseNo", DbType.AnsiString)]
- public string UserID { get; set; }
- [DataMapping("Name", DbType.AnsiString)]
- public string UserName { get; set; }
- [DataMapping("Age", DbType.Int32)]
- public int Age { get; set; }
- [DataMapping("Married", DbType.String)]
- public string Married { get; set; }
- }
- }
在DataTableToEntityExtension这个扩展中我们得到属性的Attribute去和DataTable的列名去匹配,反射赋值。
OK,拿到数据后,我们在控制器构造viewModel,传递给界面来绑定。我们看一下部分页UserInfoPartial.cshtml的代码
- @using Bruce.GRLC.Model.ViewModel;
- @model UserInfoViewModel
- <table id="tabuserinfo" class="table table-bordered table-hover">
- <thead>
- <tr style="background-color: #2aabd2;color:white">
- <th>帐号</th>
- <th>姓名</th>
- <th>年龄</th>
- <th>婚否</th>
- </tr>
- </thead>
- <tbody>
- @if (Model != null && Model.DataResponse != null && Model.DataResponse.DataList != null)
- {
- foreach (var userEntity in Model.DataResponse.DataList)
- {
- <tr>
- <td>
- @userEntity.UserID
- </td>
- <td>
- @userEntity.UserName
- </td>
- <td>
- @userEntity.Age
- </td>
- <td>
- @userEntity.Married
- </td>
- </tr>
- }
- }
- </tbody>
- </table>
- <div id="divpagination">
- @{Html.RenderPartial("~/Views/Partial/PaginationPartial.cshtml", Model.DataResponse);}
- </div>
其实也就是一个应用了BoootStrap样式的表格,有边框和鼠标经过的样式。关于BootStrap的样式的使用,请参考BootStrap官网。代码很简单,就是循环遍历,展示数据。