一. 介绍
Django包含一个contenttypes应用程序(app), 可以跟踪Django项目中安装的所有模型(Model), 提供用于处理模型的高级通用接口.
Contenttypes应用的核心是ContentType模型, 位于django.contrib.contenttypes.models.ContentType. ContentType的实例表示并保存项目中安装的模型的信息, 每当有新的模型时会自动创建新的ContentType实例.
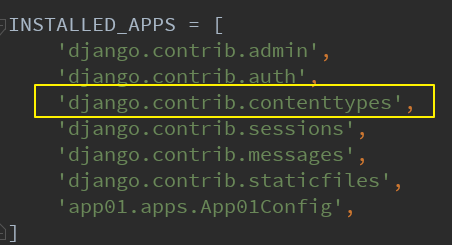
只要使用django-admin startproject命令创建的Django项目(PyCharm创建Django项目同理), 默认都会在settings.py的INSTALLED_APPS列表中安装好django.contrib.contenttypes.
我们执行了数据迁移命令之后, 会自动在数据库中创建一个名为django_content_type的表.
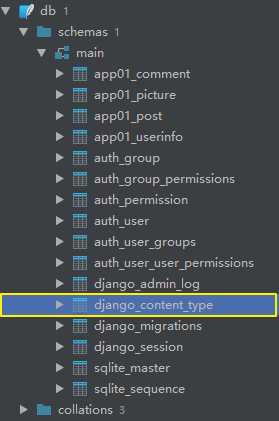
表结构如下所示:
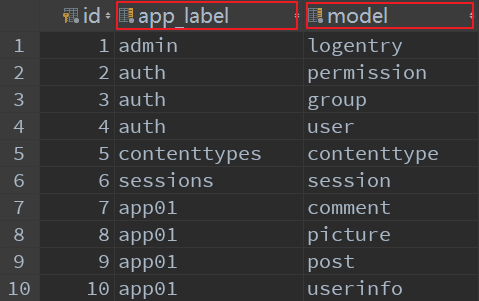
其中, app_label字段存储了APP的名称, model字段存储了APP下的具体的模型类的名称.
二. 应用场景
1. 表结构设计的演变
举个简单的例子, 我们可以在某个平台单独发文章, 也可以单独发图片, 每一篇文章或每一张图片都可以被不同的用户评论. 如此一来, 我们就可以设计出以下表结构:
app01/models.py文件:
from django.db import models

class UserInfo(models.Model):
    """用户表"""
    id = models.AutoField(primary_key=True)
    username = models.CharField(max_length=32)
    password = models.CharField(max_length=32)

class Post(models.Model):
    """帖子表"""
    author = models.ForeignKey(to='UserInfo')
    title = models.TextField()

class Picture(models.Model):
    """图片表"""
    author = models.ForeignKey(to='UserInfo')
    image = models.CharField(max_length=128)

class Comment(models.Model):
    """评论表"""
    author = models.ForeignKey(to='UserInfo')
    content = models.TextField()

    post = models.ForeignKey(to='Post', null=True, blank=True, on_delete=models.CASCADE)
    picture = models.ForeignKey(to='Picture', null=True, blank=True, on_delete=models.CASCADE)
图示说明:
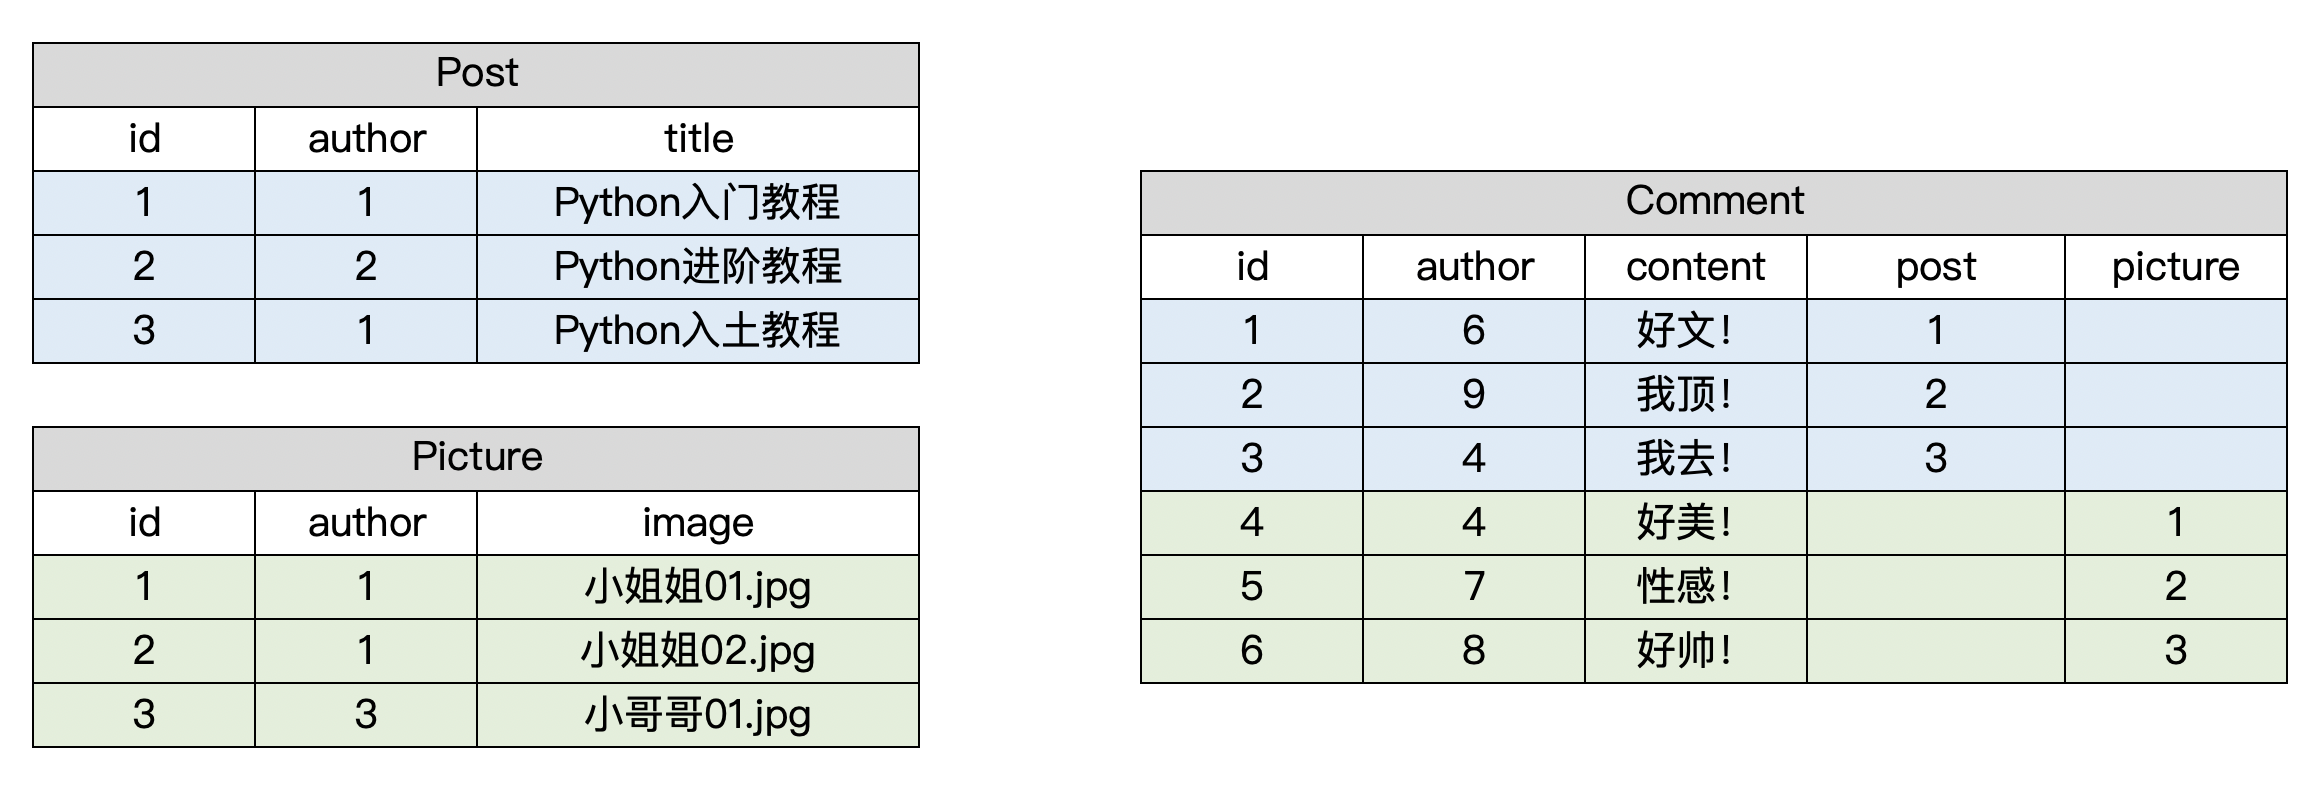
从上表可以看出, Comment表的post字段和picture字段下的数据有较多的空余, 造成了数据库空间的浪费. 于是, 我们尝试进行这样的改进:
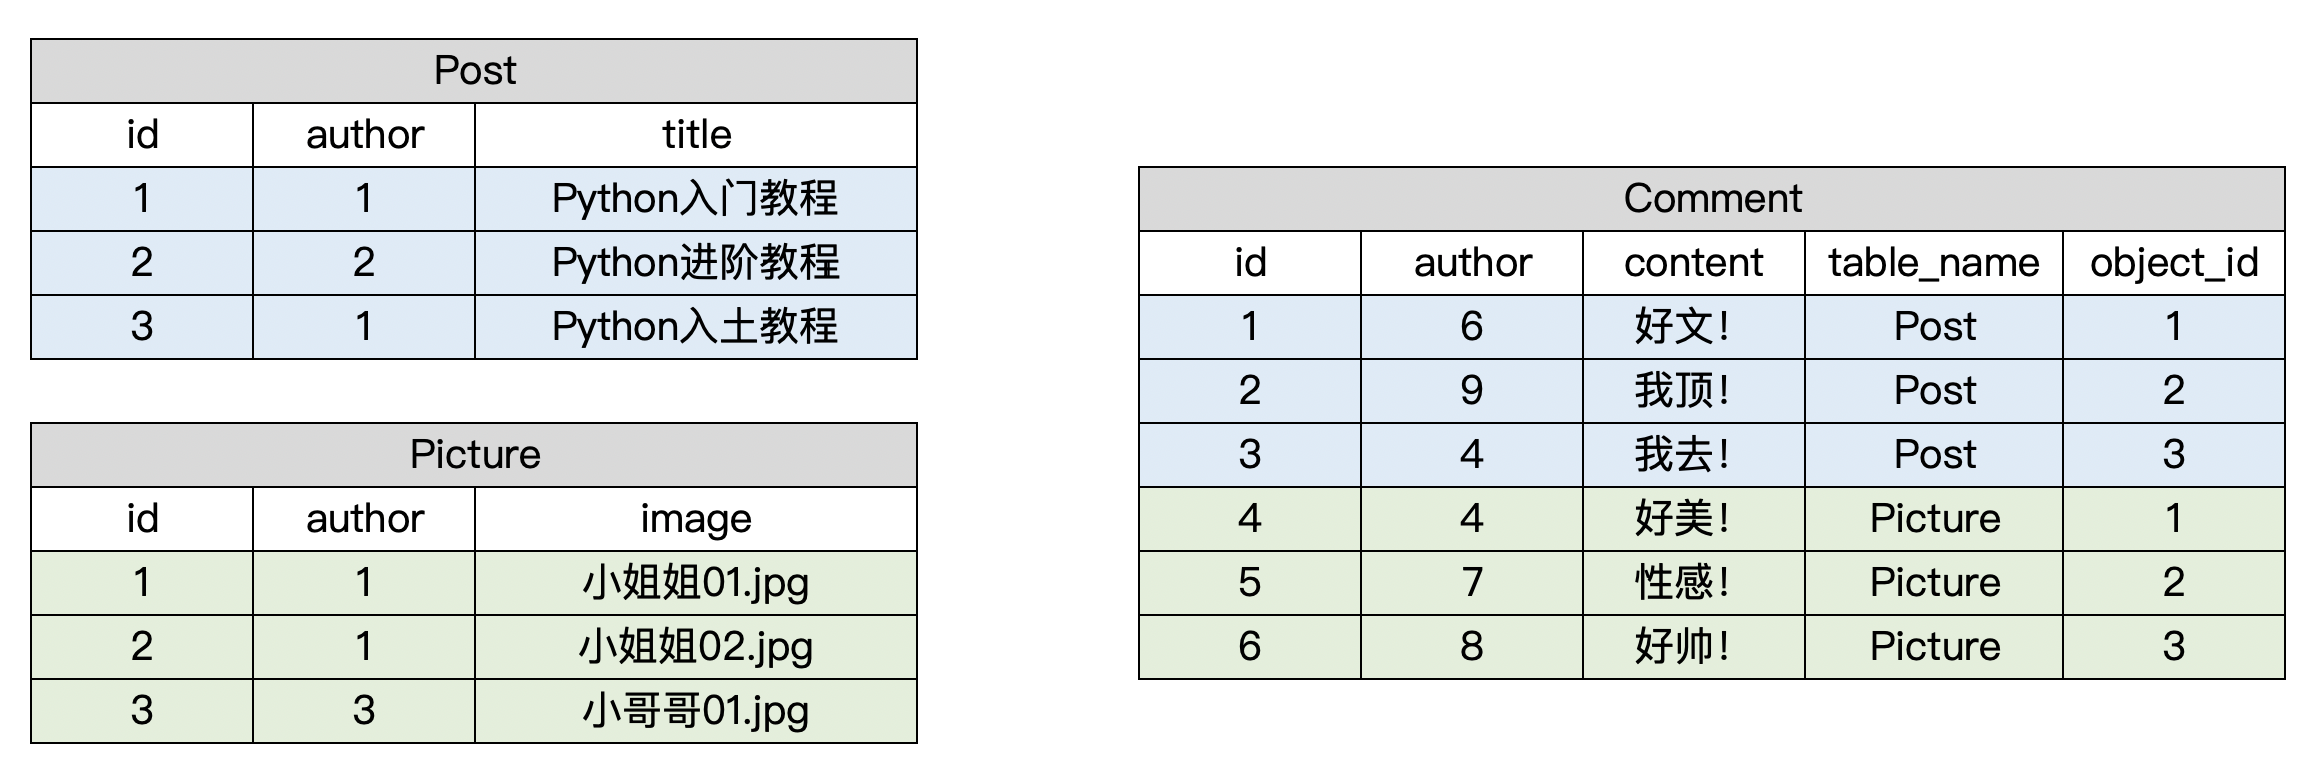
其中, table_name指该条评论对应的表名(帖子?图片?), object_id指该表名对应的表中某条记录的id.
如此一来, 进一步思考, 我们不妨再设计一个表django_content_type, 里面专门存放表名, 用Comment表关联django_content_type表, 把原先的table_name换成表名对应的id.
2. GenericForeignKey和GenericRelation
这个时候我们就用上了前面讲到的contenttypes, 借助contenttypes我们就能够在创建Comment的时候再决定和Post关联还是和Picture关联.
在app01/models.py中:
- 使用
django.contrib.contenttypes中提供的特殊字段GenericForeignKey来实现表与表之间的关联(不会再数据库中创建新的字段). - 使用
GenericRelation进行反向查询.
from django.db import models
from django.contrib.contenttypes.models import ContentType
from django.contrib.contenttypes.fields import GenericForeignKey, GenericRelation


class UserInfo(models.Model):
    """用户表"""
    id = models.AutoField(primary_key=True)
    username = models.CharField(max_length=32)
    password = models.CharField(max_length=32)


class Post(models.Model):
    """帖子表"""
    author = models.ForeignKey(to='UserInfo')
    title = models.TextField()

    comments = GenericRelation('Comment')  # 支持反向查找评论数据(不会在数据库中创建字段)

class Picture(models.Model):
    """图片表"""
    author = models.ForeignKey(to='UserInfo')
    image = models.CharField(max_length=128)

    comments = GenericRelation('Comment')  # 支持反向查找评论数据(不会在数据库中创建字段)

class Comment(models.Model):
    """评论表"""
    author = models.ForeignKey(to='UserInfo')
    content = models.TextField()
    # content_type是关联的表名
    content_type = models.ForeignKey(to=ContentType)  # 外键关联django的ContentType表
    # object_id是关联表中具体的数据id
    object_id = models.PositiveIntegerField()  # 关联数据的主键
    # 通过GenericForeignKey把以上二者(表名, 该表中具体数据id)动态关联起来
    content_object = GenericForeignKey('content_type', 'object_id')
3. 测试
在Django项目根目录下创建一个用于测试的文件text.py:
import os

if __name__ == "__main__":
    os.environ.setdefault("DJANGO_SETTINGS_MODULE", "about_contenttype.settings")
    import django

    django.setup()
	#### 以上代码是Django环境的准备 ####

    from app01 import models

    # 准备测试数据
    user_1 = models.UserInfo.objects.create(username='aaa', password='123')
    user_2 = models.UserInfo.objects.create(username='bbb', password='123')
    user_3 = models.UserInfo.objects.create(username='ccc', password='123')
    post_1 = models.Post.objects.create(author=user_1, title='Python入门教程')
    post_2 = models.Post.objects.create(author=user_2, title='Python进阶教程')
    post_3 = models.Post.objects.create(author=user_1, title='Python入土教程')
    picture_1 = models.Picture.objects.create(author=user_1, image='小姐姐01.jpg')
    picture_2 = models.Picture.objects.create(author=user_1, image='小姐姐02.jpg')
    picture_3 = models.Picture.objects.create(author=user_3, image='小哥哥01.jpg')

    # 给帖子创建评论数据
    comment_1 = models.Comment.objects.create(author=user_1, content='好文!', content_object=post_1)
    # 给图片创建评论数据
    comment_2 = models.Comment.objects.create(author=user_2, content='好美!', content_object=picture_1)
    # 查询示例
    post_1 = models.Post.objects.first()
    ret = post_1.comments.values()
    print(ret)