### 准备
## 目标
了解 Spring AMQP 核心代码
## 前置知识
RabbitMQ 入门
## 相关资源
Quick Tour for the impatient:<http://docs.spring.io/spring-amqp/docs/1.7.3.RELEASE/reference/html/_introduction.html#quick-tour>
Sample code:<https://github.com/gordonklg/study>,rabbitmq module
## 测试代码
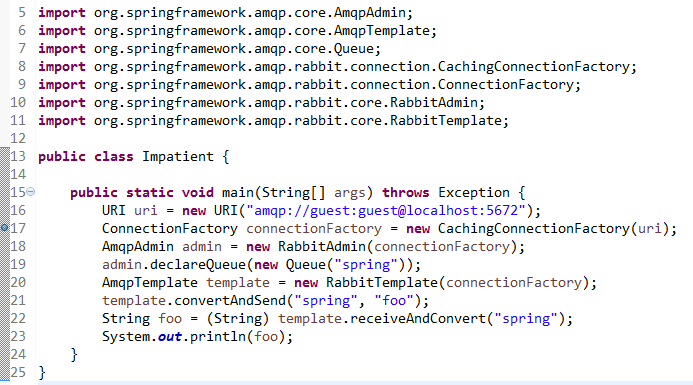
gordon.study.rabbitmq.springamqp.Impatient.java

### 分析
## ConnectionFactory分析
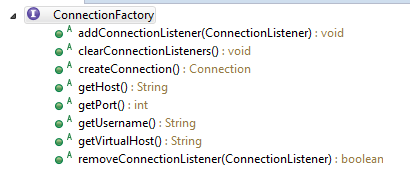
org.springframework.amqp.rabbit.connection.ConnectionFactory 是 Spring AMQP 定义的连接工厂接口,负责创建连接。注意 RabbitMQ client 也有一个同名的连接工厂,这儿用的是 Spring AMQP 定义的。
org.springframework.amqp.rabbit.connection.CachingConnectionFactory 是 ConnectionFactory 的一个实现类。它的属性 com.rabbitmq.client.ConnectionFactory rabbitConnectionFactory 引用了一个真正的 RabbitMQ 连接工厂,一般会在构造函数中被创建出来。后面所有的实际连接都是通过这个 rabbitConnectionFactory 创建的,CachingConnectionFactory 只是管理这些连接。
不同于官网示例代码,第16行定义了 URI,表明通过 guest 用户访问 localhost:5672 的 RabbitMQ 服务。原因是我在本机运行时通过 Spring AMQP 自动解析出来的 host 是机器名而不是 localhost,导致 guest 用户没有权限连接,会抛出异常,因此我需要主动将 host 的值设置为 localhost。除了示例代码中用到的通过 URI 指定的方法外,还有以下几种方法:
1. 通过可以指定 hostname 的构造函数。适用面窄,不能设置用户名等其它连接工厂属性
ConnectionFactory connectionFactory = new CachingConnectionFactory("localhost");
2. 自己创建 com.rabbitmq.client.ConnectionFactory
com.rabbitmq.client.ConnectionFactory rabbitConnFactory = new com.rabbitmq.client.ConnectionFactory();
rabbitConnFactory.setHost("localhost");
rabbitConnFactory.setAutomaticRecoveryEnabled(false);
ConnectionFactory connectionFactory = new CachingConnectionFactory(rabbitConnFactory);
3. 通过 AbstractConnectionFactory 获取到内部 rabbitConnectionFactory
AbstractConnectionFactory connectionFactory = new CachingConnectionFactory();
connectionFactory.getRabbitConnectionFactory().setHost("localhost");
4. 通过 AbstractConnectionFactory 封装的方法间接操作 rabbitConnectionFactory
AbstractConnectionFactory connectionFactory = new CachingConnectionFactory();
connectionFactory.setHost("localhost");
## AmqpAdmin分析
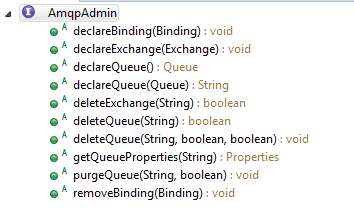
org.springframework.amqp.core.AmqpAdmin 接口定义了 AMQP 基础管理操作,主要是对各种资源(交换机、队列、绑定)的申明和删除操作。
org.springframework.amqp.rabbit.core.RabbitAdmin 实现了 AmqpAdmin 接口。通过构造函数传入前面创建的 ConnectionFactory 实例,设置到 RabbitAdmin 的 ConnectionFactory connectionFactory 属性中,同时还在构造函数中创建了一个 RabbitTemplate 实例,设置到 RabbitTemplate rabbitTemplate 属性中。
declareQueue 方法用来申明队列。org.springframework.amqp.core.Queue 是 Spring AMQP 对队列的封装,其属性与 RabbitMQ Java client 中定义的 Queue 的属性基本一致,new Queue("spring"); 相当于 RabbitMQ Java client 中 channel.queueDeclare("spring", true, false, false, null); 指定的队列特性,即队列是持久化、非排他性、非自动删除的。
declareQueue 调用 rabbitTemplate 的 execute(ChannelCallback) 方法,在 ChannelCallback 的回调方法 doInRabbit(com.rabbitmq.client.Channel) 中通过入參 channel 调用 RabbitMQ Java client 提供的 channel.queueDeclare 方法申明队列。代码中有个细节:所有 "amq." 开头的队列会被 Spring AMQP 框架忽略,不会触发 channel.queueDeclare 方法调用。RabbitTemplate 细节下文分析。
## AmqpTemplate分析
org.springframework.amqp.core.AmqpTemplate 接口定义了 AMQP 基础操作,主要为同步的消息收发方法。
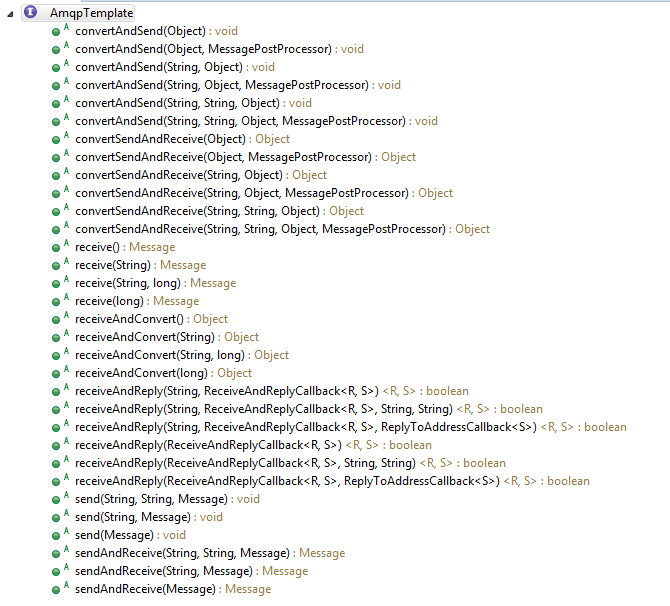
org.springframework.amqp.rabbit.core.RabbitTemplate 实现了 AmqpTemplate 接口。类似于 RabbitAdmin,RabbitTemplate 也需要引用外部的 ConnectionFactory 用于创建连接。
顾名思义,RabbitTemplate 就是 RabbitMQ 收发消息的模板方法,类似于 JdbcTemplate 的设计。所以,RabbitTemplate 要实现创建连接、获取信道、收发消息(等实际操作)、消息格式转换、关闭信道与连接等模板代码。
例如,对于 convertAndSend(String routingKey, Object message)方法,首先通过 convertMessageIfNecessary 方法将 Object message 转化为 org.springframework.amqp.core.Message 实例。Message 类是 Spring AMQP 对消息的封装。convertMessageIfNecessary 方法通过获取在 RabbitTemplate 构造函数中创建的 org.springframework.amqp.support.converter.SimpleMessageConverter,调用其 toMessage 方法完成 Message 实例的创建(即消息转化)。
接下来,借助 execute(ChannelCallback action, ConnectionFactory connectionFactory) 方法,在 ChannelCallback 接口的匿名实现类的 doInRabbit(Channel) 方法中实现发送消息功能,代码截图如下:

execute(ChannelCallback action, ConnectionFactory connection) 方法与 ChannelCallback 接口合作,成功地将消息发送(等实际操作)与获取连接和信道这两部分代码隔离开。execute 方法中通过传入的 ConnectionFactory 获取连接和信道,ChannelCallback 接口的 doInRabbit(Channel channel) 方法作为回调函数,通过 channel 参数接受 execute 方法中获取的信道,完成消息发送的具体业务。代码实现很简单,在 execute 方法获取到信道 channel 后,调用 action.doInRabbit(channel); 即可。
调用栈信息:

业务操作完成后,execute 方法会回收连接和信道资源,整个消息发送模板功能完成。
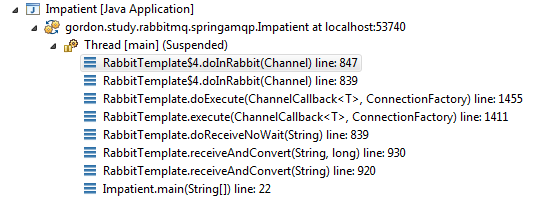
receiveAndConvert 方法实现思路与 convertAndSend 基本一致,调用栈如下:
