自定义配置的目的:通过自定义属性,注入到程序中使用,可以灵活的更改配置信息,修改自定义属性值,达到修改程序的目的。
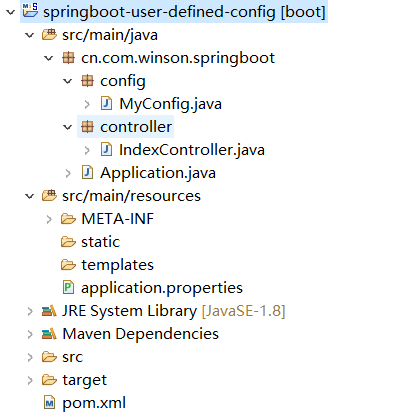
一、新建一个SpringBoot工程,目录结构如下:

其中MyConfig.java文件内容为:@Component与@ConfigurationProperties(prefix="winson")注解的使用
package cn.com.winson.springboot.config;

import org.springframework.boot.context.properties.ConfigurationProperties;
import org.springframework.stereotype.Component;

/**
 * 自定义配置类
 *
 * @date 2018年12月7日
 * @time 下午8:05:43
 */
/*@Component注解:通过此注解,该类成为Spring的bean,方便注入到其它类中使用*/
/*@ConfigurationProperties注解:声明此类为一个自定义配置属性类,prefix为属性的前缀*/
@Component
@ConfigurationProperties(prefix="winson")
public class MyConfig {

    private Integer age;

    private String name;

    public Integer getAge() {
        return age;
    }

    public void setAge(Integer age) {
        this.age = age;
    }

    public String getName() {
        return name;
    }

    public void setName(String name) {
        this.name = name;
    }

}
IndexController.java文件中的内容为:注入自定义配置类
package cn.com.winson.springboot.controller;

import org.springframework.beans.factory.annotation.Autowired;
import org.springframework.stereotype.Controller;
import org.springframework.web.bind.annotation.GetMapping;
import org.springframework.web.bind.annotation.ResponseBody;

import cn.com.winson.springboot.config.MyConfig;

@Controller
public class IndexController {

    /*注入自定义配置类的bean*/
    @Autowired
    private MyConfig myConfig;

    /*添加@ResponseBody注解与返回值类型String组合使用,返回的是json字符串,而不是页面*/
    @GetMapping("/getInfo")
    @ResponseBody
    public String getInfo() {
        return "自定义属性的age为:" + myConfig.getAge() + ";name为:" + myConfig.getName() + "";
    }

}
最重要的核心配置文件application.properties文件内容为:声明属性和值
#自定义属性
winson.age=20
winson.name=winson
运行启动类,访问结果为:

总结:以上就是通过自定义配置类来实现自定义属性的步骤,代码可以直接复用。还有一种自定义配置的方式是通过@Value注解,直接在使用的时候,注入到程序中就可以使用,该方法见下篇讲解。
代码地址:https://gitee.com/top_one/springboot-user-defined-config.git