环境及规划
[root@nginx-node01 ~]# cat /etc/redhat-release
CentOS Linux release 7.6.1810 (Core)
| ID | 主机名 | ip | 系统配置 | 软件版本 | 操作系统 |
|---|---|---|---|---|---|
| 01 | nginx-node01 | 192.168.56.104 | 1C 1G | 1.16.0稳定版 | CentOS 7.6.1810 |
编译依赖检查
-
gcc编译环境
-
pcre & pcre-dev
-
zlib & zlib-dev
-
openssl & openssl-dev
[root@nginx-node01 nginx]# cat checkinstall.sh
#!/bin/bash
#auto install packages nginx required

function checkInstall(){
  echo "Checking $1 installed or not"
  #rpm -q $1 >/dev/null 2>&1
  rpm -q $1
  if [ $? -eq 0 ]; then
        echo "$1 installed "
  else
        echo "$1 not installed, will install $1 "
        yum -y install $1
        if [ $? -ne 0 ];then
          echo "Install $1" /bin/false
          exit 1
        fi
  fi
}

##环境及依赖检查
#gcc
checkInstall gcc-c++

#pcre & pcre-devel
checkInstall pcre && checkInstall pcre-devel

#zlib & zlib-devel
checkInstall zlib && checkInstall zlib-devel

#openssl & openssl-devel
checkInstall openssl && checkInstall openssl-devel
安装步骤
-
检查并添加nginx用户和组
-
解压软件包、创建相关目录
-
执行预编译配置
-
执行编译、执行安装
[root@nginx-node01 ~]# useradd -g nginx nginx
[root@nginx-node01 ~]# id nginx
uid=1000(nginx) gid=1000(nginx) groups=1000(nginx)
cat nginx_install.sh
#!/bin/bash
#auto install nginx

#set -n
#set -v

#用户及组
NX_GROUP='nginx'
NX_USER='nginx'

#源码包位置
NX_TMP_DIR='/tmp/nginx/'

#源码版本
NX_VER=1.16.0
NX_FILE="nginx-$NX_VER.tar.gz"
NX_FILE_ABS=$NX_TMP_DIR$NX_FILE


#解压后源码位置
NX_DIR=`echo $NX_FILE |sed 's/.tar.*//g'`
NX_SRC_ABS=${NX_TMP_DIR}${NX_DIR}

#Nginx home 目录
NX_HOME='/home/nginx'
NX_LOG=$NX_HOME/log
NX_TARGET=${NX_HOME}/${NX_VER}

#解压源码
if [ -d $NX_SRC_ABS ];then
    echo "$NX_SRC_ABS already exists"
else
    tar -xvzf $NX_FILE
fi

##配置目录、预编译
cd $NX_SRC_ABS

##设置安装目录
#添加log目录
if [ ! -d $NX_LOG ]; then
   mkdir -p $NX_LOG
fi
#Nginx 安装目录
if [ ! -d ${NX_TARGET} ]; then
   mkdir -p ${NX_TARGET}
fi

#预编译配置
./configure
--user=$NX_USER
--group=$NX_GROUP
--prefix=${NX_TARGET}
--sbin-path=${NX_TARGET}/nginx
--conf-path=${NX_TARGET}/nginx.conf
--pid-path=${NX_LOG}/nginx.pid
--error-log-path=${NX_LOG}/error.log
--http-log-path=${NX_LOG}/access.log
--with-http_ssl_module
--with-http_stub_status_module
--with-http_gzip_static_module

#编译 && 安装
make && make install
安装验证
[root@nginx-node01 ~]# /home/nginx/1.16.0/nginx -V
nginx version: nginx/1.16.0
built by gcc 4.8.5 20150623 (Red Hat 4.8.5-39) (GCC)
built with OpenSSL 1.0.2k-fips  26 Jan 2017
TLS SNI support enabled
configure arguments: --user=nginx --group=nginx --prefix=/home/nginx/1.16.0 --sbin-path=/home/nginx/1.16.0/nginx --conf-path=/home/nginx/1.16.0/nginx.conf --pid-path=/home/nginx/log/nginx.pid --error-log-path=/home/nginx/log/error.log --http-log-path=/home/nginx/log/access.log --with-http_ssl_module --with-http_stub_status_module --with-http_gzip_static_module
启动验证
[root@nginx-node01 ~]# netstat -ntlp |grep -aiw 80
tcp        0      0 0.0.0.0:80              0.0.0.0:*               LISTEN      21949/nginx: master
[root@nginx-node01 ~]# ps -ef |grep nginx
root     21949     1  0 11:58 ?        00:00:00 nginx: master process ./nginx
nginx    21950 21949  0 11:58 ?        00:00:00 nginx: worker process
服务验证
[root@nginx-node01 ~]# curl localhost:80
<!DOCTYPE html>
<html>
<head>
<title>Welcome to nginx!</title>
<style>
    body {
         35em;
        margin: 0 auto;
        font-family: Tahoma, Verdana, Arial, sans-serif;
    }
</style>
</head>
<body>
<h1>Welcome to nginx!</h1>
<p>If you see this page, the nginx web server is successfully installed and
working. Further configuration is required.</p>

<p>For online documentation and support please refer to
<a href="http://nginx.org/">nginx.org</a>.<br/>
Commercial support is available at
<a href="http://nginx.com/">nginx.com</a>.</p>

<p><em>Thank you for using nginx.</em></p>
</body>
</html>
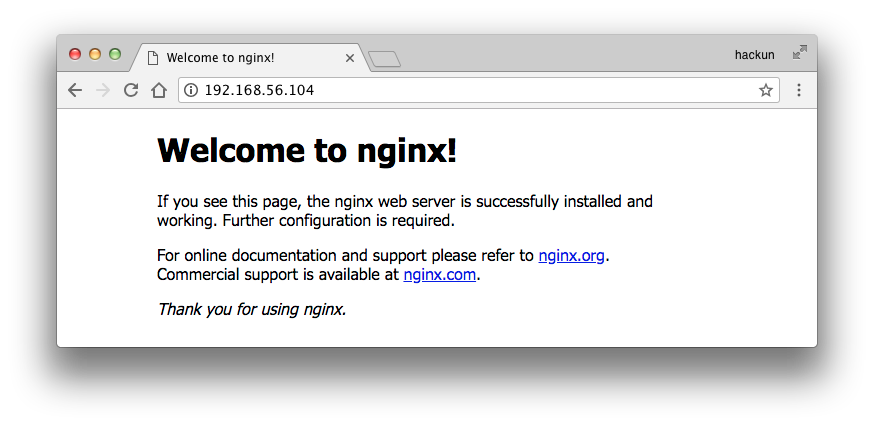
对外服务验证
#关闭防火墙
systemctl stop firewalld.service
更改属性配置
更改属性权限后,重新测试运行
chown -R nginx:nginx /home/nginx/1.16.0		#更改为nginx用户和组
chown root /home/nginx/1.16.0/nginx		#更改归属于root
chmod u+s nginx				        #更改添加s权限