spring boot项目启动时默认的图案、艺术字
如何修改默认的图案:
在项目src/main/resources/目录下新建一个banner.txt文件
spring boot pom文件解析
spring-boot-devtools 使用
application.yml文件编码修改
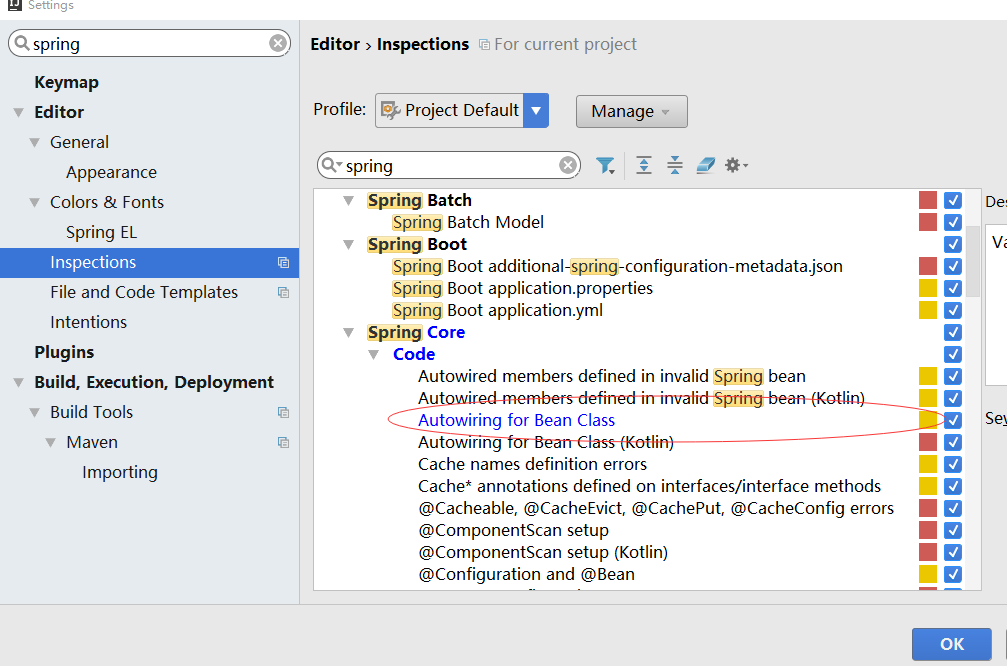
idea报错,但其实没问题的,设置一下就行

Spring boot 打包package报错
报错原因:surefire report directory出错
需要配置中增加:详见,http://tianya23.blog.51cto.com/1081650/386012/
spring boot易问点
Spring Boot 基于 Spring 框架,使应用程序开发人员可以快速创建生产级应用程序,而不需要进行太多配置。它会尝试根据您添加的 Jar 来自动配置应用程序。
1.在idea里面启动main函数和java -jar xxx.jar方式启动main函数,整体启动流程是完全不一样的
2.mvnw = maven warrap
3.spring boot 如何进行同一版本的管理,parent,dependencyManagement
parent只能有一个,maven不支持多个。
IntelliJ IDEA2017 + tomcat 即改即生效 实现热部署
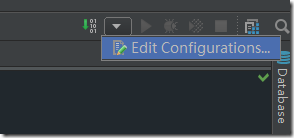
1.点击idea中tomcat设置

2.点击deployment查看Deploy at the server startup 中tomcat每次所运行的包是 xxxx:war 还是其他,如果是xxxx:war包,请更换.点击旁边绿色加号,选择 xxxx:war exploded ,然后将 xxxx:war 点击红色删除掉

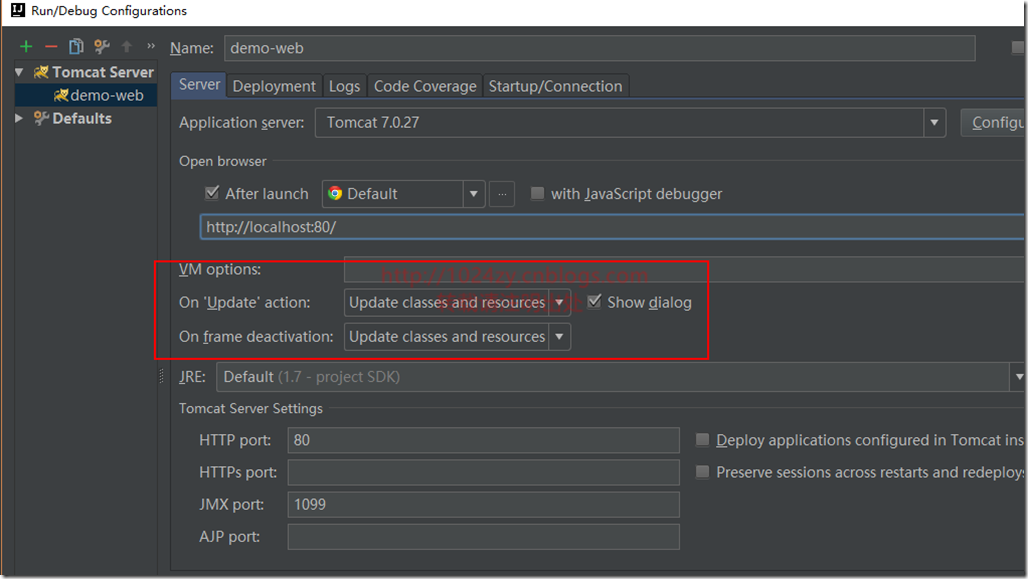
3.然后在server中 将 "On Update action"、"On frame deactivation" 都选择 update classes and resources

4.大功告成,已亲测,不用因为每次修改代码而重启了!
spring boot热部署
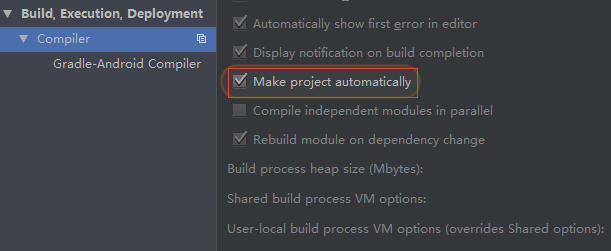
一、开启idea自动make功能
1、CTRL + SHIFT + A --> 查找make project automatically --> 选中

2、CTRL + SHIFT + A --> 查找Registry 按回车--> 找到并勾选compiler.automake.allow.when.app.running

最后重启idea
二、使用spring-boot-1.3开始有的热部署功能
1、加maven依赖
<dependency>
    <groupId>org.springframework.boot</groupId>
    <artifactId>spring-boot-devtools</artifactId>
    <optional>true</optional>
</dependency>
2、开启热部署
<build>
    <plugins>
        <plugin>
            <groupId>org.springframework.boot</groupId>
            <artifactId>spring-boot-maven-plugin</artifactId>
            <configuration>
                <fork>true</fork>
            </configuration>
        </plugin>
    </plugins>
</build>
三、Chrome禁用缓存
F12(或Ctrl+Shift+J或Ctrl+Shift+I)--> NetWork --> Disable Cache(while DevTools is open)

至此,在idea中就可以愉快的修改代码了,修改后可以及时看到效果,无须手动重启和清除浏览器缓存
Spring中controller层:注解解释 @Controller和@RestController之间的区别
1. Controller, RestController的共同点
都是用来表示spring某个类的是否可以接收HTTP请求
2. Controller, RestController的不同点
@Controller标识一个Spring类是Spring MVC controller处理器
@RestController: a convenience annotation that does nothing more than adding the@Controller and@ResponseBody annotations。 @RestController是@Controller和@ResponseBody的结合体,两个标注合并起来的作用。
示例如下:
- @Controller
- @ResponseBody
- public class MyController { }
- @RestController
- public class MyRestController { }
3.@Value("${data}") 获取springboot 配置文件中data的值
4.详解springmvc之json数据交互controller方法返回值为简单类型
http://www.jb51.net/article/113095.htm
@json的形式进行数据传输需注意的地方
Spring boot
注意:具备必要的前置知识,java和maven的版本保持一致(java8.0、maven3.3.9)
1.利用maven构建项目:maven配置,使用了阿里云的maven镜像,速度更快(setting.xml文件)
2.spring注解
3.RESTful API
三种启动方式:
1.直接idea启动
2.命令行maven启动:进入项目的目录下→mvn spring-boot:run命令来启动
3.命令行启动:进入项目的目录下→mvn install编译程序→进入target目录下→java -jar xxx.jar文件
特点:(spring mvc的升级)
1.简化配置
2.下一代最流行的框架
3.微服务的入门级框架(spring boot → sring cloud → 微服务框架)
自定义属性配置(application.properties/application.yml)
server.port=8081 区别 server:
server.context-path=/girl port: 8082
context-path: /girl
配置里面使用配置
cupSize=B
age=18
content="cupSize: ${cupSize},age:${age}"
java文件:可获取配置文件中的值
@Value(“${cupSize}”)
private String cupSize;
@Value(“${content}”)
private String content;
java文件
新建类GirlProperties
@Component
@ConfigurationProperties(prefix="girl")
建get/set方法
使用:
@Autowired
controller的使用
@RestController等同于@Controller和@ResponseBody("JSON形式")
@RequestMapping(value={“/hello”,“/hi”})两种方式访问,url映射
@GetMapping/PostMapping
处理url中的参数
@PathVariable(“id”)获取url中的数据
获取url=“/say/{id}”中id的值
@RequestParam(value=“id”,required=false,defaultValue="0")
获取url=/say?id=20中id的值。。
@GetMapping组合注解:相当于RequestMapping(value={“/hello”,“/hi”},method = RequestMethod.GET)
spring-data-jpa
JPA(Java Persistence API)定义了一系列对象持久化的标准,目前实现这个规范的有Hibernate/TopLink等
jpa.hibernate.ddl-auto=update/create


