前一篇讲述了一些基本样式的修改方法,并搭建了Style层的基本框架,本篇将进一步修改ListBox的样式。
1. 首先选中ListBox控件,在美工板导航栏中点击ListBox,选择 编辑其他模板-编辑项的布局-编辑副本,起名为PeopleListItemsPanelTemplate,选择该文档选项,点击确定,进入项布局编辑模式。
此时,美工板导航栏变为
2. 在文档大纲面板中选择VirtualizingStackPanel,右键点击,选择 更改布局类型-WrapPanel,点击返回上一层,退出项布局编辑模式。
3. 选择ListBox控件,在属性面板中,点击布局组的展开更多按钮,展开更多属性后,把ScrollViewer.HorizontalScrollBarVisibility改为Disabled。
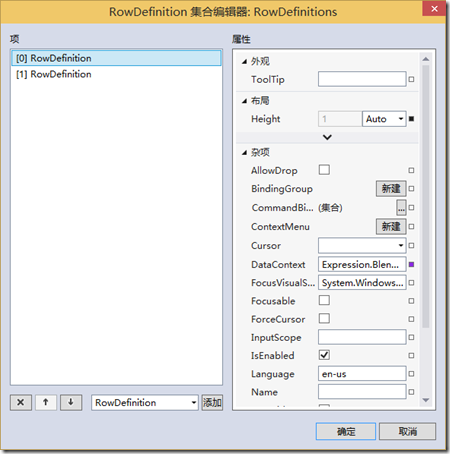
4. 选择ListBox控件,点击美工板导航栏中的ListBox,选择 编辑其他模板-编辑生成的项-编辑当前项。在文档大纲面板中选择Grid,在属性面板中把Width和Height改为200和100。在文档大纲面板中,在Grid上点击右键,选择 分组-Grid。可以看到树中变为两层Grid,选择外层Grid,在属性面板中,点击RowDefinitions属性的...按钮,在弹出的对话框中点击两次添加按钮,把Grid改为两行,把第一行的Height属性改为Auto,第二行的Height属性保留Star,如下图所示,
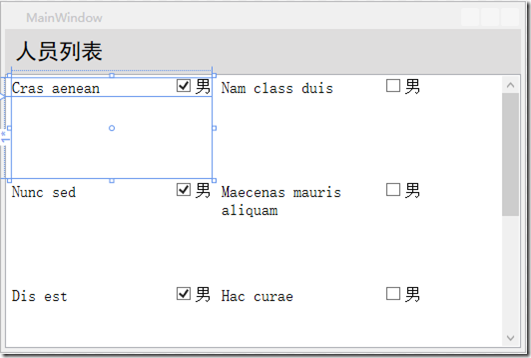
美工板如下图所示,
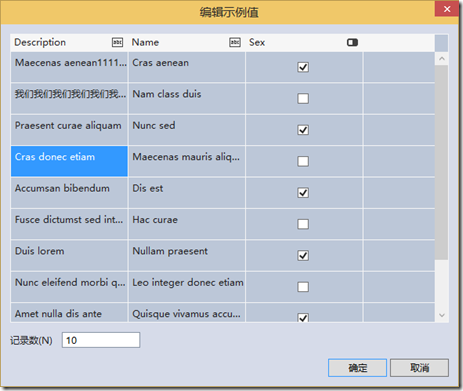
5. 在美工板中按T键,选择TextBlock工具,在Grid的第二行的位置上绘制一个TextBlock并重置其布局。在数据面板中,点击树中的Persons项的加号按钮,看到新添加了一个属性,起名为Description。在美工板中选择刚才添加的TextBlock,在属性面板中,点击Text属性的小方块,选择 创建数据绑定,选择Description属性。在数据面板中,点击Persons项的编辑示例值按钮,弹出如下对话框,把某些Description改长点。
6. 在文档大纲面板中,在内层Grid上右键点击,选择 分组-Border。在文档大纲面板中的Border上右键点击,选择 编辑样式-创建空样式,起名为SubtitleStyle。在属性面板中把背景色改为浅蓝色,Padding改为5,5,5,5。 在文档大纲面板中,点击返回上一层按钮,退出样式编辑模式。
7. 在美工板中选择第二行的TextBlock控件,修改Margin为5,5,5,5。在文档大纲面板中,点击返回上一层按钮,退出模板编辑模式。
8. 在选择ListBox控件的条件下,点击美工板导航栏的ListBox,选择 编辑其他模板-编辑生成的项目容器-编辑副本,起名为PeopleListItemStyle,进入模板编辑模式。点击美工板导航栏中间的画板图标按钮,进入样式编辑模式,如下图。
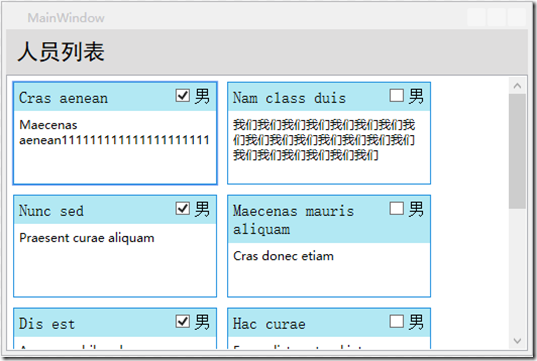
在属性面板中把Padding修改为0,0,0,0。Margin修改为5,5,5,5。BorderBrush改为蓝色。效果如下图,
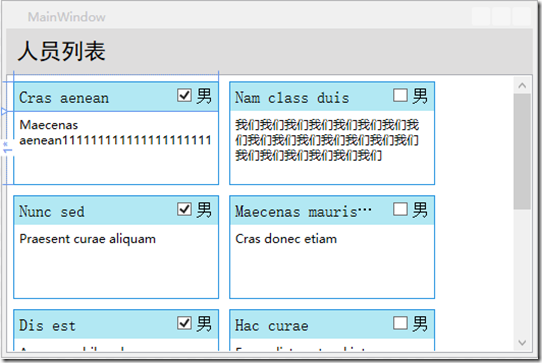
列表项的标题不应该有换行。点击美工板导航栏的ListBox部分,再点击一次,选择 编辑其他模板-编辑生成的项-编辑当前项。选择标题部分的TextBlock,在属性面板中把文本组展开,把TextWrapping属性改为NoWrap,把TextTrimming属性改为WordEllipsis。点击ToolTip属性的小方块,选择创建数据绑定,选择Name属性。效果如下图。
此时完整的代码如下,
<Window
        xmlns="http://schemas.microsoft.com/winfx/2006/xaml/presentation"
        xmlns:x="http://schemas.microsoft.com/winfx/2006/xaml"
        xmlns:d="http://schemas.microsoft.com/expression/blend/2008"
        xmlns:mc="http://schemas.openxmlformats.org/markup-compatibility/2006"
        xmlns:local="clr-namespace:BlendDemo"
        xmlns:System="clr-namespace:System;assembly=mscorlib" x:Class="BlendDemo.MainWindow"
        mc:Ignorable="d"
        Title="MainWindow" Height="350" Width="525" d:DataContext="{d:DesignData /SampleData/SampleDataSource/SampleDataSource.xaml}">
    <Window.Resources>
        <DataTemplate x:Key="PeopleListDataTemplate">
            <Grid Height="100" Width="200">
                <Grid.RowDefinitions>
                    <RowDefinition Height="Auto"/>
                    <RowDefinition/>
                </Grid.RowDefinitions>
                <Border Style="{DynamicResource SubtitleStyle}">
                    <Grid>
                        <Grid.ColumnDefinitions>
                            <ColumnDefinition Width="*"/>
                            <ColumnDefinition Width="Auto"/>
                        </Grid.ColumnDefinitions>
                        <TextBlock Height="Auto" TextWrapping="NoWrap" Text="{Binding Name}" Width="Auto" Style="{DynamicResource CoreTextStyle}" TextTrimming="WordEllipsis" ToolTip="{Binding Name}"/>
                        <CheckBox Content="男" Grid.Column="1" Height="Auto" Width="Auto" IsChecked="{Binding Sex}" Style="{DynamicResource CheckBoxBaseStyle}"/>
                    </Grid>
                </Border>
                <TextBlock Grid.Row="1" TextWrapping="Wrap" Text="{Binding Description}" Margin="5"/>
            </Grid>
        </DataTemplate>
        <Style x:Key="TitleStyle" TargetType="{x:Type Border}">
            <Setter Property="Padding" Value="10"/>
            <Setter Property="Background" Value="#FFDEDDDD"/>
        </Style>
        <ItemsPanelTemplate x:Key="PeopleListItemsPanelTemplate">
            <WrapPanel IsItemsHost="True"/>
        </ItemsPanelTemplate>
        <Style x:Key="SubtitleStyle" TargetType="{x:Type Border}">
            <Setter Property="Background" Value="#FFB2E8F3"/>
            <Setter Property="Padding" Value="5"/>
        </Style>
        <Style x:Key="FocusVisual">
            <Setter Property="Control.Template">
                <Setter.Value>
                    <ControlTemplate>
                        <Rectangle Margin="2" SnapsToDevicePixels="true" Stroke="{DynamicResource {x:Static SystemColors.ControlTextBrushKey}}" StrokeThickness="1" StrokeDashArray="1 2"/>
                    </ControlTemplate>
                </Setter.Value>
            </Setter>
        </Style>
        <SolidColorBrush x:Key="Item.MouseOver.Background" Color="#1F26A0DA"/>
        <SolidColorBrush x:Key="Item.MouseOver.Border" Color="#a826A0Da"/>
        <SolidColorBrush x:Key="Item.SelectedInactive.Background" Color="#3DDADADA"/>
        <SolidColorBrush x:Key="Item.SelectedInactive.Border" Color="#FFDADADA"/>
        <SolidColorBrush x:Key="Item.SelectedActive.Background" Color="#3D26A0DA"/>
        <SolidColorBrush x:Key="Item.SelectedActive.Border" Color="#FF26A0DA"/>
        <Style x:Key="PeopleListItemStyle" TargetType="{x:Type ListBoxItem}">
            <Setter Property="SnapsToDevicePixels" Value="True"/>
            <Setter Property="Padding" Value="0"/>
            <Setter Property="HorizontalContentAlignment" Value="{Binding HorizontalContentAlignment, RelativeSource={RelativeSource AncestorType={x:Type ItemsControl}}}"/>
            <Setter Property="VerticalContentAlignment" Value="{Binding VerticalContentAlignment, RelativeSource={RelativeSource AncestorType={x:Type ItemsControl}}}"/>
            <Setter Property="Background" Value="Transparent"/>
            <Setter Property="BorderBrush" Value="#FF2391DE"/>
            <Setter Property="BorderThickness" Value="1"/>
            <Setter Property="FocusVisualStyle" Value="{StaticResource FocusVisual}"/>
            <Setter Property="Template">
                <Setter.Value>
                    <ControlTemplate TargetType ="{x:Type ListBoxItem}">
                        <Border x:Name="Bd" BorderBrush="{TemplateBinding BorderBrush}" BorderThickness="{TemplateBinding BorderThickness}" Background="{TemplateBinding Background}" Padding="{TemplateBinding Padding}" SnapsToDevicePixels="true">
                            <ContentPresenter HorizontalAlignment="{TemplateBinding HorizontalContentAlignment}" SnapsToDevicePixels="{TemplateBinding SnapsToDevicePixels}" VerticalAlignment="{TemplateBinding VerticalContentAlignment}"/>
                        </Border>
                        <ControlTemplate.Triggers>
                            <MultiTrigger>
                                <MultiTrigger.Conditions>
                                    <Condition Property="IsMouseOver" Value="True"/>
                                </MultiTrigger.Conditions>
                                <Setter Property="Background" TargetName="Bd" Value="{StaticResource Item.MouseOver.Background}"/>
                                <Setter Property="BorderBrush" TargetName="Bd" Value="{StaticResource Item.MouseOver.Border}"/>
                            </MultiTrigger>
                            <MultiTrigger>
                                <MultiTrigger.Conditions>
                                    <Condition Property="Selector.IsSelectionActive" Value="False"/>
                                    <Condition Property="IsSelected" Value="True"/>
                                </MultiTrigger.Conditions>
                                <Setter Property="Background" TargetName="Bd" Value="{StaticResource Item.SelectedInactive.Background}"/>
                                <Setter Property="BorderBrush" TargetName="Bd" Value="{StaticResource Item.SelectedInactive.Border}"/>
                            </MultiTrigger>
                            <MultiTrigger>
                                <MultiTrigger.Conditions>
                                    <Condition Property="Selector.IsSelectionActive" Value="True"/>
                                    <Condition Property="IsSelected" Value="True"/>
                                </MultiTrigger.Conditions>
                                <Setter Property="Background" TargetName="Bd" Value="{StaticResource Item.SelectedActive.Background}"/>
                                <Setter Property="BorderBrush" TargetName="Bd" Value="{StaticResource Item.SelectedActive.Border}"/>
                            </MultiTrigger>
                            <Trigger Property="IsEnabled" Value="False">
                                <Setter Property="TextElement.Foreground" TargetName="Bd" Value="{DynamicResource {x:Static SystemColors.GrayTextBrushKey}}"/>
                            </Trigger>
                        </ControlTemplate.Triggers>
                    </ControlTemplate>
                </Setter.Value>
            </Setter>
            <Setter Property="Margin" Value="5"/>
        </Style>
    </Window.Resources>
    <Grid>
        <Grid.RowDefinitions>
            <RowDefinition Height="Auto"/>
            <RowDefinition/>
        </Grid.RowDefinitions>
        <Border Style="{DynamicResource TitleStyle}" >
            <TextBlock Text="人员列表" Style="{DynamicResource TitleTextStyle}"/>
        </Border>
        <ListBox Grid.Row="1" ItemsSource="{Binding Persons}" ItemTemplate="{DynamicResource PeopleListDataTemplate}" HorizontalContentAlignment="Stretch" ItemsPanel="{DynamicResource PeopleListItemsPanelTemplate}" ScrollViewer.HorizontalScrollBarVisibility="Disabled" ItemContainerStyle="{DynamicResource PeopleListItemStyle}"/>
    </Grid>
</Window>
9. 设计视图可以显示设计的效果,但观察动态效果较难。
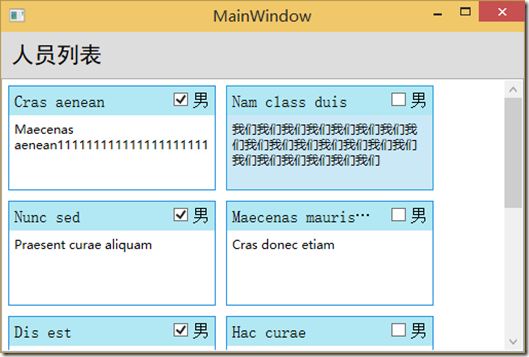
解决方法是,在文档大纲面板中,退出样式或模板编辑模式,选择Window,在属性面板中找到DataContext属性,点击小方块,选择 本地资源-SampleDataSource。这时运行程序,可以看到效果。
这时鼠标移动到ListBox中的项目上时,或点击选中时,是有交互效果的。
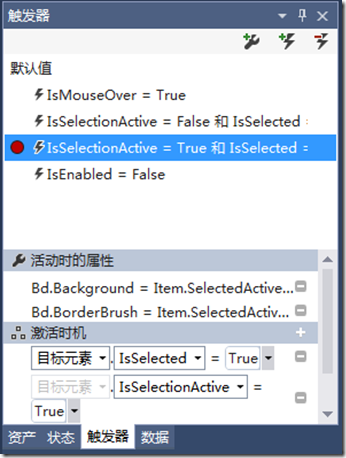
10. 如果不满意动态交互效果,可以到触发器面板中编辑。选中ListBox控件,点击美工板导航栏中的ListBox,选择 编辑其他模板-编辑生成的项目容器-编辑当前项,在触发器面板中选择第三项,如下图。
在属性面板中把Background改为其他颜色。修改的方法为,在属性面板中找到Background属性,此时小方块是绿色的,表面是引用的资源。点击小方块,选择编辑资源,在弹出的对话框中编辑新的颜色即可。
完成后别忘了重置Window的DataContext属性,为下一步后端开发人员开发留出余地。
下一篇将修改性别显示那一部分的样式,重点演示控件模板的修改方法,敬请关注。
