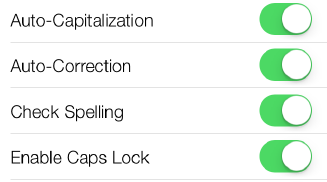
Creating and Using Switches with UISwitch
You would like to give your users the ability to turn an option on or off.
effect as follow:

Solution
Use the UISwitch class.
Some steps to implment:
1. Let’s create a property of type UISwitch and call it mainSwitch
ViewController.m:
#import "ViewController.h"
@interface ViewController ()

@property (nonatomic, strong) UISwitch *mainSwitch;

@end

@implementation ViewController

...
2. the viewDidLoad method in your view controller’s implementation file,
Let’s create our switch and place it on our view controller’s view
- (void)viewDidLoad{
  [super viewDidLoad];

  /* Create the switch */
  self.mySwitch = [[UISwitch alloc] initWithFrame:
                     CGRectMake(100, 100, 0, 0)];
  [self.mySwitch setOn:YES];
  [self.view addSubview:self.mySwitch];

  [self.mySwitch addTarget:self
                 action:@selector(switchIsChanged:)
            forControlEvents:UIControlEventValueChanged];}
Note that the parameter that we have to pass to this method is
of type CGRect. A CGRect denotes the boundaries of a rectangle using the (x,y) position
of the top-left corner of the rectangle and its width and height.
After we’ve created the switch, we simply add it to our view controller’s view.
// set the switch on
[self.mainSwitch setOn:YES];
you can read from the on property of the switch to find out whether the
switch is on or off at the moment.
Alternatively, you can use the isOn method of the switch.
eg:
if ([self.mainSwitch isOn]){
  NSLog(@"The switch is on.");
} else {
  NSLog(@"The switch is off.");
}
If you want to get notified when the switch gets turned on or off, you will need to add
your class as the target for the switch, using the addTarget:action:forControlEvents:
method of UISwitch
eg:
[self.mainSwitch addTarget:self
       action:@selector(switchIsChanged:)
       forControlEvents:UIControlEventValueChanged];
Then implement the switchIsChanged: method.
- (void) switchIsChanged:(UISwitch *)paramSender{
  NSLog(@"Sender is = %@", paramSender);

  if ([paramSender isOn]){
    NSLog(@"The switch is turned on.");
  } else {
    NSLog(@"The switch is turned off.");
  }
}
Run Result:
Sender is = <UISwitch: 0x6e13500;
frame = (100 100; 79 27);
layer = <CALayer: 0x6e13700>>
The switch is turned off.
Customizing the UISwitch
There are two main ways of customizing a switch:
Tint Colors
Tint colors are colors that you can apply to a UI component such as a UISwitch.
The tint color will be applied on top of the current color of the component. For
instance, in a normal UISwitch, you will be able to see different colors. When you
apply the tint color on top, the normal color of the control will be mixed with the
tint color, giving a flavor of the tint color on the UI control.
Images
A switch has two images:
On Image
The image that represents the on state of the switch. The width of this image is
77 points, and its height is 22.
Off Image
The image that represents the switch in its off state. This image, like the on state
of the switch, is 77 points in width and 22 points in height.
tintColor
This is the tint color that will be applied to the off state of the switch.
Unfortunately, Apple has not taken the time to name this property offTintColor instead of tint
Color to make it more explicit.
thumbTintColor
This is the tint color that will be applied to the little knob on the switch.
onTintColor
This tint color will be applied to the switch in its on state.
// simple code snippet that will change the on-mode tint color of the switch to
// red, the off-mode tint color to brown, and the knob’s tint color to green.
- (void)viewDidLoad
{
  [super viewDidLoad];

  /* Create the switch */
  self.mainSwitch = [[UISwitch alloc] initWithFrame:CGRectZero];
  self.mainSwitch.center = self.view.center;
  [self.view addSubview:self.mainSwitch];

  /* Customize the switch */

  /* Adjust the off-mode tint color */
  self.mainSwitch.tintColor = [UIColor redColor];

  /* Adjust the on-mode tint color */
  self.mainSwitch.onTintColor = [UIColor brownColor];

  /* Also change the knob's tint color */
  self.mainSwitch.thumbTintColor = [UIColor greenColor];
}
Let’s move on to customizing the appearance of the switch using its on and off images
prepare a new set of on and off images.
As mentioned before, both the on and the off images in a switch should be 77 points wide and 22 points tall.
- (void)viewDidLoad
{
  [super viewDidLoad];

  /* Create the switch */
  self.mainSwitch = [[UISwitch alloc] initWithFrame:CGRectZero];
  self.mainSwitch.center = self.view.center;

  /* Make sure the switch won't appear blurry(模糊) on iOS Simulator */
  self.mainSwitch.frame
    = [self roundedValuesInRect:self.mainSwitch.frame];

  [self.view addSubview:self.mainSwitch];

  /* Customize the switch */
  self.mainSwitch.onImage = [UIImage imageNamed:@"On"];
  self.mainSwitch.offImage = [UIImage imageNamed:@"Off"];
}
eg: