本篇文章同步微信公众号
欢迎大家关注我的微信公众号:「醉翁猫咪」
今天安卓入门第九讲,讲讲Android应用程序目录结构和应用程序分析,以及清单文件对其进行总结。
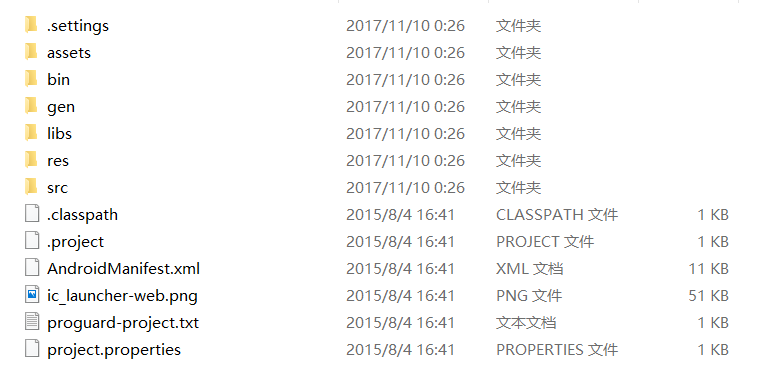
Android应用程序目录结构
assets目录:在assets目录中存放的是工程中用到的相关文件资源,比如我们可能用到的音频文件,文本文件,这些文件都不进行编译的原生文件。
bin目录:在bin目录下存放的是可执行的相关文件,这个目录为空时,代表项目没有进行执行,不为空时,就会在该目录下产生可执行文件。
gen目录:在该目录下的文件只有读模式,不能进行修改。
libs目录:在该目录下存放的是相关的导入包,文件以.jar结尾。
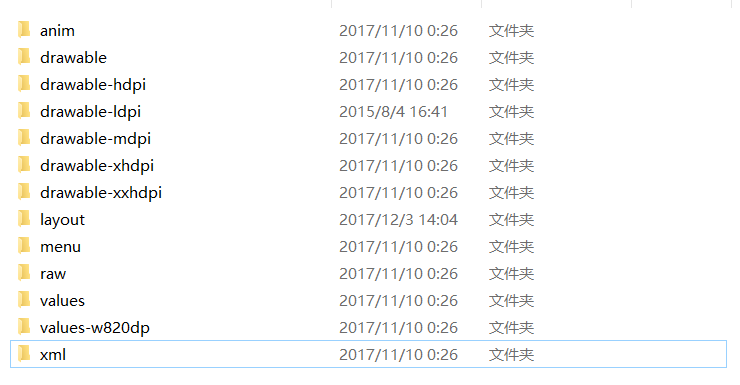
res目录:在该目录下存放了这些文件,比如图片资源文件,布局资源文件,菜单文件等等。对于layout文件,主要.xml格式文件,界面效果文件。
src目录:在该目录下存放的的相关的Java代码。
proguard-project.txt文件:该文件时混淆代码的脚本配置文件。
project.properties文件:该文件时项目的配置文件信息。
应用程序分析
我们来讲讲我们常见:string.xml文件,该文件放在res/values目录中,该文件中可以看到string元素,我们来看看这个:<string name="hello_world">Hello world!</string>,那么我们在代码中如何使用该代码,就需要使用字符串资源的ID和getString()方法来获取。
闲谈“@+id”和“@id”的区别
<RelativeLayout
   xmlns:android="http://schemas.android.com/apk/res/android"
   xmlns:tools="http://schemas.android.com/tools"
   android:layout_width="match_parent"
   android:layout_height="match_parent"
   android:background="@drawable/launch_bg"
   tools:context=".SplashActivity" >

   <ProgressBar
       android:id="@+id/progressBar1"
       android:layout_width="wrap_content"
       android:layout_height="wrap_content"
       android:layout_centerVertical="true"
       android:layout_centerHorizontal="true"
       />

   <TextView
       android:id="@+id/tv_splash_version"
       android:layout_width="wrap_content"
       android:layout_height="wrap_content"
       android:layout_centerHorizontal="true"
       android:layout_below="@+id/progressBar1"
       android:layout_marginTop="10dp"
       android:shadowColor="#ffff00"
       android:textColor="#A2A2A2"
       android:shadowDx="1"
       android:shadowDy="1"
       android:shadowRadius="2"
       android:text="版本号:1.0"
       android:textSize="16sp" />

</RelativeLayout>
“@+id/”这个表示在R文件中生成一个资源id,而后面的变量名,就随便取了,但是也不能够太随便了,尽量见名知意的好。“@+id/”只能在R.java中生成一次,如果这个变量的值已经存在了,就不会再生成。
“@id”这个是一旦建立好资源id文件,就引用该定义好的id。
对于px,nm,in,pt,dp,sp等等,是不很乱呢?
px像素,dp与密度无关的像素,1dp=1px,之间的换算也可能改变,mm毫米,in英寸,pt榜,我们常用的sp,用于字体显示大小。
AndroidManifest.xml文件
<?xml version="1.0" encoding="utf-8"?>
<manifest
   xmlns:android="http://schemas.android.com/apk/res/android"
   package="com.example.jack.myapplication">

   <application
       android:allowBackup="true"
       android:icon="@mipmap/ic_launcher"
       android:label="@string/app_name"
       android:roundIcon="@mipmap/ic_launcher_round"
       android:supportsRtl="true"
       android:theme="@style/AppTheme">
       <activity android:name=".MainActivity">
           <intent-filter>
               <action android:name="android.intent.action.MAIN" />

               <category android:name="android.intent.category.LAUNCHER" />
           </intent-filter>
       </activity>
   </application>

</manifest>
build.gradle(Module:app)
apply plugin: 'com.android.application'

android {
   compileSdkVersion 26
   defaultConfig {
       applicationId "com.example.jack.myapplication"
       minSdkVersion 19 //表示Android SDK的最低版本
       targetSdkVersion 26 //表示应用程序的目标版本
       versionCode 1 //表示应用程序的相应版本
       versionName "1.0" //版本信息
       testInstrumentationRunner "android.support.test.runner.AndroidJUnitRunner"
   }
   buildTypes {
       release {
           minifyEnabled false
           proguardFiles getDefaultProguardFile('proguard-android.txt'), 'proguard-rules.pro'
       }
   }
}

dependencies {
   implementation fileTree(dir: 'libs', include: ['*.jar'])
   implementation 'com.android.support:appcompat-v7:26.1.0'
   implementation 'com.android.support.constraint:constraint-layout:1.0.2'
   testImplementation 'junit:junit:4.12'
   androidTestImplementation 'com.android.support.test:runner:1.0.1'
   androidTestImplementation 'com.android.support.test.espresso:espresso-core:3.0.1'
}网络权限:
<uses-permission android:name="android.permission.INTERNET">
</uses-permission>
权限是放在AndroidManifest.xml中声明的。
如果觉得不错,可以分享哦,你的鼓励是我最大的进步!
从入门到熟悉!
坚决不放弃!


