本文介绍 Pod 中容器健康检查相关的内容、配置方法以及实验测试,实验环境为 Kubernetes 1.11,搭建方法参考kubeadm安装kubernetes V1.11.1 集群
0. 什么是 Container Probes
我们先来看一下Kubernetes的架构图,每个Node节点上都有 kubelet ,Container Probe 也就是容器的健康检查是由 kubelet 定期执行的。
Kubelet通过调用Pod中容器的Handler来执行检查的动作,Handler有三种类型。
- ExecAction,在容器中执行特定的命令,命令退出返回0表示成功
- TCPSocketAction,根据容器IP地址及特定的端口进行TCP检查,端口开放表示成功
- HTTPGetAction,根据容器IP、端口及访问路径发起一次HTTP请求,如果返回码在200到400之间表示成功
每种检查动作都可能有三种返回状态。 - Success,表示通过了健康检查
- Failure,表示没有通过健康检查
- Unknown,表示检查动作失败
在创建Pod时,可以通过liveness和readiness两种方式来探测Pod内容器的运行情况。liveness可以用来检查容器内应用的存活的情况来,如果检查失败会杀掉容器进程,是否重启容器则取决于Pod的重启策略。readiness检查容器内的应用是否能够正常对外提供服务,如果探测失败,则Endpoint Controller会将这个Pod的IP从服务中删除。
1. 应用场景
我们都知道Kubernetes会维持Pod的状态及个数,因此如果你只是希望保持Pod内容器失败后能够重启,那么其实没有必要添加健康检查,只需要合理配置Pod的重启策略即可。更适合健康检查的场景是在我们根据检查结果需要主动杀掉容器并重启的场景,还有一些容器在正式提供服务之前需要加载一些数据,那么可以采用readiness来检查这些动作是否完成。
2. liveness 检查实例
2.1 Container Exec
apiVersion: v1
kind: Pod
metadata:
  labels:
    test: liveness
  name: liveness-exec
spec:
  containers:
  - name: liveness
    image: docker.io/alpine
    args:
    - /bin/sh
    - -c
    - touch /tmp/healthy; sleep 30; rm -rf /tmp/healthy; sleep 600
    livenessProbe:
      exec:
        command:
        - cat
        - /tmp/healthy
      initialDelaySeconds: 5
      periodSeconds: 5
本例创建了一个容器,通过检查一个文件是否存在来判断容器运行是否正常。容器运行30秒后,将文件删除,这样容器的liveness检查失败从而会将容器重启。
2.2 HTTP Health Check
apiVersion: v1
kind: Pod
metadata:
  labels:
    test: liveness
    app: httpd
  name: liveness-http
spec:
  containers:
  - name: liveness
    image: docker.io/httpd
    ports:
    - containerPort: 80
    livenessProbe:
      httpGet:
        path: /index.html
        port: 80
        httpHeaders:
        - name: X-Custom-Header
          value: Awesome
      initialDelaySeconds: 5
      periodSeconds: 5
本例通过创建一个Apache服务器,通过访问 index 来判断服务是否存活。通过手工删除这个文件的方式,可以导致检查失败,从而重启容器。
[root@devops-101 ~]# kubectl exec -it liveness-http /bin/sh
#
# ls
bin  build  cgi-bin  conf  error  htdocs  icons  include  logs	modules
# ps -ef
UID        PID  PPID  C STIME TTY          TIME CMD
root         1     0  0 11:39 ?        00:00:00 httpd -DFOREGROUND
daemon       6     1  0 11:39 ?        00:00:00 httpd -DFOREGROUND
daemon       7     1  0 11:39 ?        00:00:00 httpd -DFOREGROUND
daemon       8     1  0 11:39 ?        00:00:00 httpd -DFOREGROUND
root        90     0  0 11:39 ?        00:00:00 /bin/sh
root        94    90  0 11:39 ?        00:00:00 ps -ef
#
# cd /usr/local/apache2
# ls
bin  build  cgi-bin  conf  error  htdocs  icons  include  logs	modules
# cd htdocs
# ls
index.html
# rm index.html
# command terminated with exit code 137
[root@devops-101 ~]# kubectl describe pod liveness-http
Events:
  Type     Reason     Age               From                 Message
  ----     ------     ----              ----                 -------
  Normal   Scheduled  1m                default-scheduler    Successfully assigned default/liveness-http to devops-102
  Warning  Unhealthy  8s (x3 over 18s)  kubelet, devops-102  Liveness probe failed: HTTP probe failed with statuscode: 404
  Normal   Pulling    7s (x2 over 1m)   kubelet, devops-102  pulling image "docker.io/httpd"
  Normal   Killing    7s                kubelet, devops-102  Killing container with id docker://liveness:Container failed liveness probe.. Container will be killed and recreated.
  Normal   Pulled     1s (x2 over 1m)   kubelet, devops-102  Successfully pulled image "docker.io/httpd"
  Normal   Created    1s (x2 over 1m)   kubelet, devops-102  Created container
  Normal   Started    1s (x2 over 1m)   kubelet, devops-102  Started container
2.3 TCP Socket
这种方式通过TCP连接来判断是否存活,Pod编排示例。
apiVersion: v1
kind: Pod
metadata:
  labels:
    test: liveness
    app: node
  name: liveness-tcp
spec:
  containers:
  - name: goproxy
    image: docker.io/googlecontainer/goproxy:0.1
    ports:
    - containerPort: 8080
    readinessProbe:
      tcpSocket:
        port: 8080
      initialDelaySeconds: 5
      periodSeconds: 10
    livenessProbe:
      tcpSocket:
        port: 8080
      initialDelaySeconds: 15
      periodSeconds: 20
3. readiness 检查实例
另一种 readiness配置方式和liveness类似,只要修改livenessProbe改为readinessProbe即可。
4. 配置参数
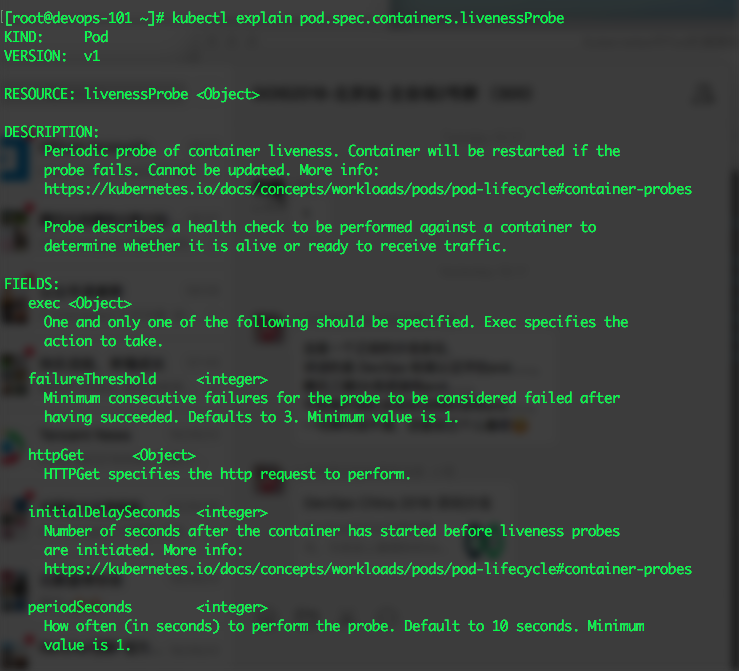
我们可以通过kubectl explain命令来查看具体的配置属性,在这里还是简单列一下主要的属性。

- initialDelaySeconds:检查开始执行的时间,以容器启动完成为起点计算
- periodSeconds:检查执行的周期,默认为10秒,最小为1秒
- timeoutSeconds:检查超时的时间,默认为1秒,最小为1秒
- successThreshold:从上次检查失败后重新认定检查成功的检查次数阈值(必须是连续成功),默认为1
- failureThreshold:从上次检查成功后认定检查失败的检查次数阈值(必须是连续失败),默认为1
- httpGet的属性
- host:主机名或IP
- scheme:链接类型,HTTP或HTTPS,默认为HTTP
- path:请求路径
- httpHeaders:自定义请求头
- port:请求端口
