滤镜在图片处理里面有很多的运用,尤其是相机使用了大量的滤镜,通过对颜色通道的调和,可以呈现出各种各样的效果
对图像进行一定的过滤加工处理,使用Paint设置滤镜效果
很多高级UI使用时候需要关闭硬件加速,不关闭的话,有些API无法支持
Alpha滤镜处理
MaskFilter处理类
paint.setMaskFilter(maskfilter)
以下两种处理基于下面的初始化
//关闭硬件加速
setLayerType(View.LAYER_TYPE_SOFTWARE, null);
Paint paint = new Paint();
paint.setColor(Color.RED);
paint.setAntiAlias(true);
Bitmap bitmap = BitmapFactory.decodeResource(getResources(), R.drawable.test);
模糊遮罩滤镜(BlurMaskFilter类)
构造函数原型
public BlurMaskFilter(float radius, Blur style)
使用例子
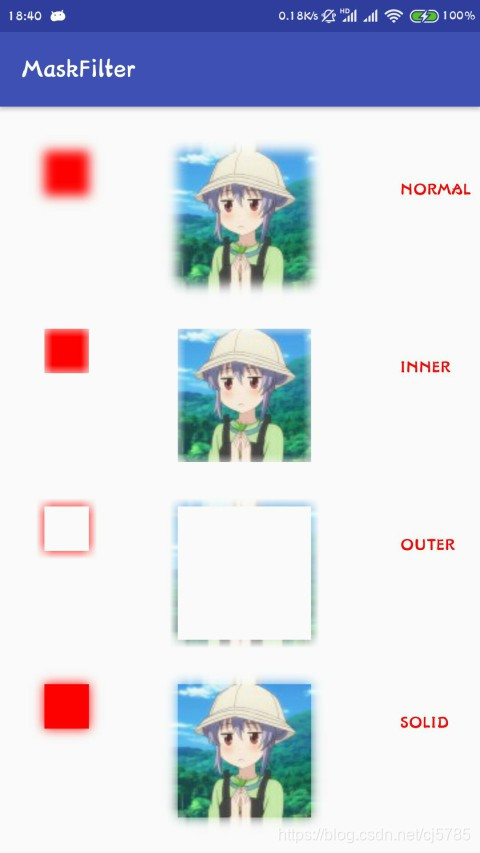
paint.setMaskFilter(new BlurMaskFilter(20, BlurMaskFilter.Blur.NORMAL));
RectF rectF = new RectF(100, 100, 200, 200);
canvas.drawRect(rectF, paint);
canvas.drawBitmap(bitmap, 400, 100, paint);
设置参数是,有四个参数:NORMAL,INNER,OUTER,SOLID
其参数效果如下
浮雕遮罩滤镜(EmbossMaskFilter类)
其构造函数原型为
public EmbossMaskFilter(float[] direction, float ambient, float specular, float blurRadius)
direction:指定长度为xxx的数组标量[x,y,z],用来指定光源的位置
ambient:指定周边背景光源(0~1)
specular:指镜面反射系数
blurRadius:指定模糊半径
使用例子
float[] direction = {100, 100, 100};
paint.setMaskFilter(new EmbossMaskFilter(direction, 0.6F, 8, 20));
rectF = new RectF(100, 100, 300, 300);
canvas.drawRect(rectF, paint);
canvas.drawBitmap(bitmap, 500, 100, paint);
得到的效果如下图所示
颜色RGB的滤镜处理
ColorMatrix处理类
滤镜的所有处理效果都是通过颜色矩阵的变换实现的。
比如:美颜相机实现的特效(高光、复古、黑白)
关于RGB滤镜处理是基于矩阵变换的,那么色彩信息矩阵是怎么表示的呢
四阶表示
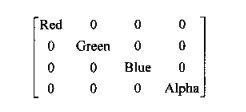
如果想将色彩(0,255,0,255)更改为半透明时,可以使用下面的的矩阵运算来表示

而在真正的运算时,采用的是五阶矩阵
考虑下面这个变换:
1、红色分量值更改为原来的2倍;
2、绿色分量增加100;
则使用4阶矩阵的乘法无法实现,所以,应该在四阶色彩变换矩阵上增加一个"哑元坐标",来实现所列的矩阵运算:
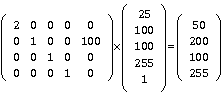
这个矩阵中,分量值用的是100
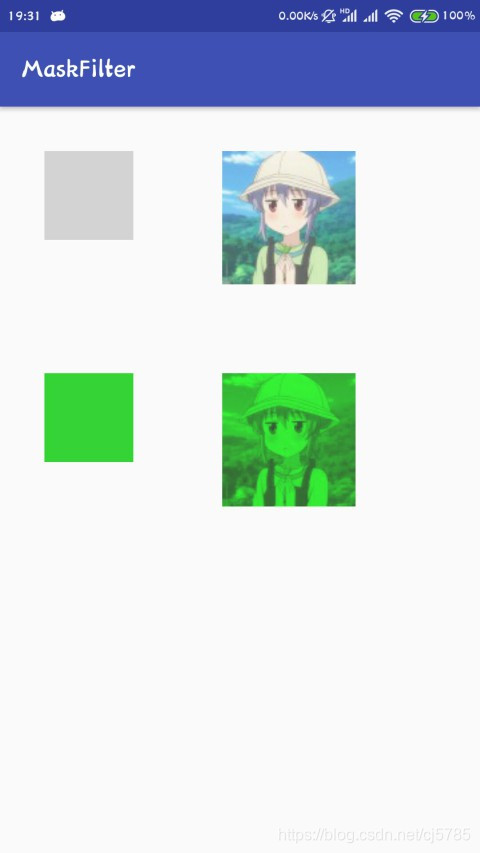
例如提取颜色,这里只显示绿色和透明度
public class RGBFliterView extends View {
private RectF rectF;
public RGBFliterView(Context context) {
super(context);
}
@Override
protected void onDraw(Canvas canvas) {
super.onDraw(canvas);
//关闭硬件加速
setLayerType(View.LAYER_TYPE_SOFTWARE, null);
Paint paint = new Paint();
paint.setColor(Color.argb(200,200,200,200));
paint.setAntiAlias(true);
Bitmap bitmap = BitmapFactory.decodeResource(getResources(), R.drawable.test);
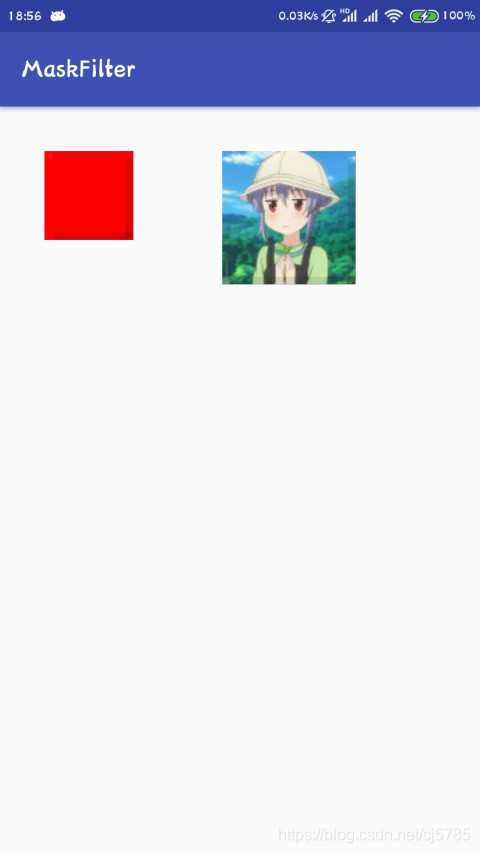
//过滤前
rectF = new RectF(100, 100, 300, 300);
canvas.drawRect(rectF, paint);
canvas.drawBitmap(bitmap, 500, 100, paint);
//这个矩阵代表要提出绿色和透明度
ColorMatrix matrix = new ColorMatrix(new float[]{
0, 0, 0, 0, 0,
0, 1, 0, 0, 0,
0, 0, 0, 0, 0,
0, 0, 0, 1, 0
});
//设置颜色过滤器
paint.setColorFilter(new ColorMatrixColorFilter(matrix));
//过滤后
rectF = new RectF(100, 600, 300, 800);
canvas.drawRect(rectF, paint);
canvas.drawBitmap(bitmap, 500, 600, paint);
}
}
得到的效果图如下
常见的色彩处理有这样一些运用
- 色彩的平移运算(加法运算)
- 色彩的缩放运算(乘法运算)
颜色增强:
反相效果:
黑白效果(R+G+B=1):
去色原理:只要把RGB三通道的色彩信息设置成一样;即:R=G=B,那么图像就变成了灰色,并且,为了保证图像亮度不变,同一个通道中的R+G+B=1:如:0.213+0.715+0.072=1; RGB=0.213, 0.715, 0.072;三个数字是根据色彩光波频率及色彩心理学计算出来的
发色效果(比如红色和绿色交换,把第一行和第二行交换):
复古风格:
以上是使用矩阵自己去变换,但在实际中还是有一些可用的API的
此时使用的话,按照如下方法使用
ColorMatrix matrix = new ColorMatrix();
matrix.set(src)
有可以直接使用的方法
- 设置色彩的缩放函数
matrix.setScale(1.2F, 1.2F, 1.2F, 1);
- 设置饱和度,饱和度设置(1,是原来不变;0灰色;>1增加饱和度)
matrix.setSaturation(value);`
- 色彩旋转函数
//axis,代表绕哪一个轴旋转,0,1,2 (0红色轴,1绿色,2蓝色)
//degrees:旋转的度数
matrix.setRotate(axis, degrees);
- ColorFilter使用的子类
ColorMatrixColorFilter:色彩矩阵的颜色过滤器
LightingColorFilter(mul, add):过滤颜色和增强色彩的方法(光照颜色过滤器)
PorterDuffColorFilter(color, mode):图形混合滤镜,Mode模式与Xfermode一致