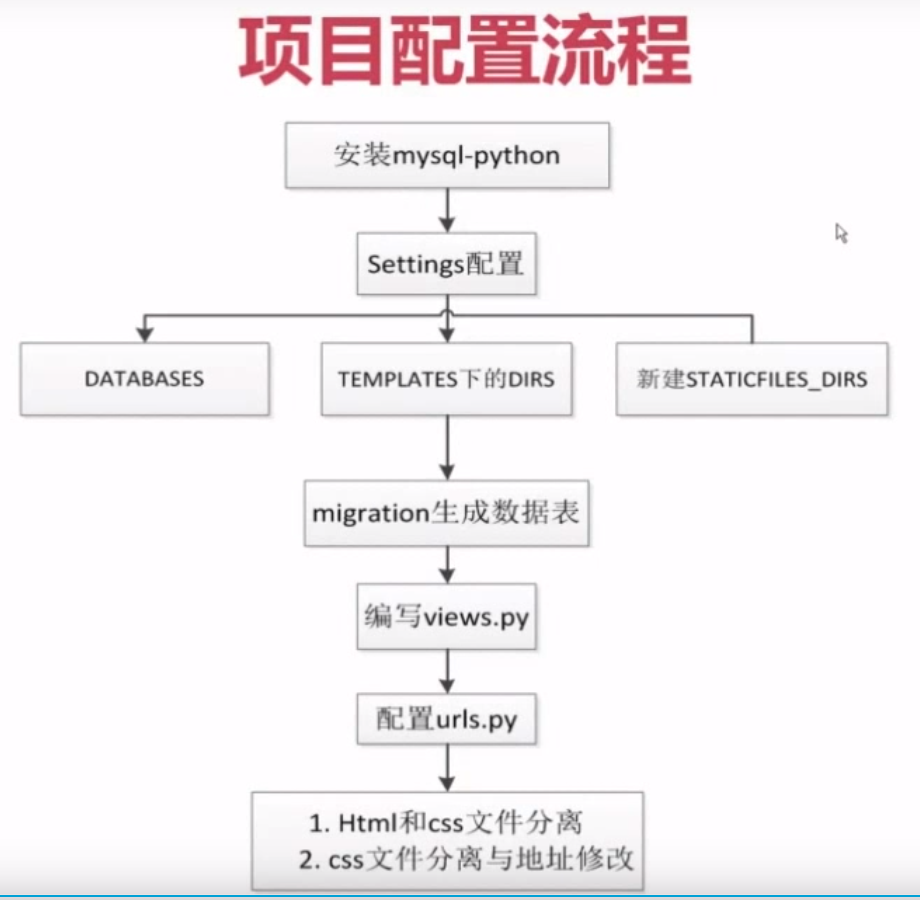
1.写message_form.html
<!DOCTYPE html> <html lang="en"> <head> <meta charset="UTF-8"> <title>Title</title> <link rel="stylesheet" href="/static/css/style.css"> </head> <body> <form action="/form" method="post" class="smart-green"> <h1>留言信息 <span>请留下你的信息</span> </h1> <label> <span>姓名 :</span> <input id="name" type="text" class="error" placeholder="请输入您的姓名"> <div class="error-msg"></div> </label> <label> <span>邮箱 :</span> <input id="email" type="email" class="email" placeholder="请输入您的邮箱地址"> <div class="error-msg"></div> </label> <label> <span>联系地址:</span> <input id="address" type="address" class="address" placeholder="请输入您的联系地址"> <div class="error-msg"></div> </label> <label> <span>留言:</span> <textarea name="message" id="message" placeholder="请输入您的留言"></textarea> <div class="error-msg"></div> </label> <div class="success-msg"></div> <label> <span> </span> <input type="button" class="button" value="提交"/> </label> </form> </body> </html>
2.写css
.smart-green{
    margin-left: auto;
    margin-right: auto;
    max-width: 500px;
    background: #F8F8F8;
    padding: 30px 30px 20px 30px;
    font: 12px "Microsoft YaHei UI";
    color: #666;
    border-radius: 5px;
    -webkit-border-radius: 5px;
    -moz-border-radius: 5px;
}
.smart-green h1{
    font: 12px "Microsoft YaHei UI";
    padding: 20px 0px 20px 40px;
    display: block;
    margin: -30px -30px 10px -30px;
    color: #FFF;
    background: #9DC45F;
    text-shadow: 1px 1px 1px #949494;
    border-radius: 2px 5px 0px 0px;
    -webkit-border-radius: 5px 5px 0px 0px;
    -moz-border-radius: 5px 5px 0px 0px;
    border-bottom: 1px solid #89AF4C;
}
.smart-green textarea{
    height: 100px;
    padding-top: 10px;
}
.smart-green label{
    display: block;
    font-size: 11px;
    color:#000;
}
.smart-green button:hover{
    background-color: #80A24A;
}
.error-msg{
    color:red;
    margin-top: 10px;
}
.error-msg{
    color:#80A24A;
    margin-top: 10px;
    margin-bottom: 10px;
}
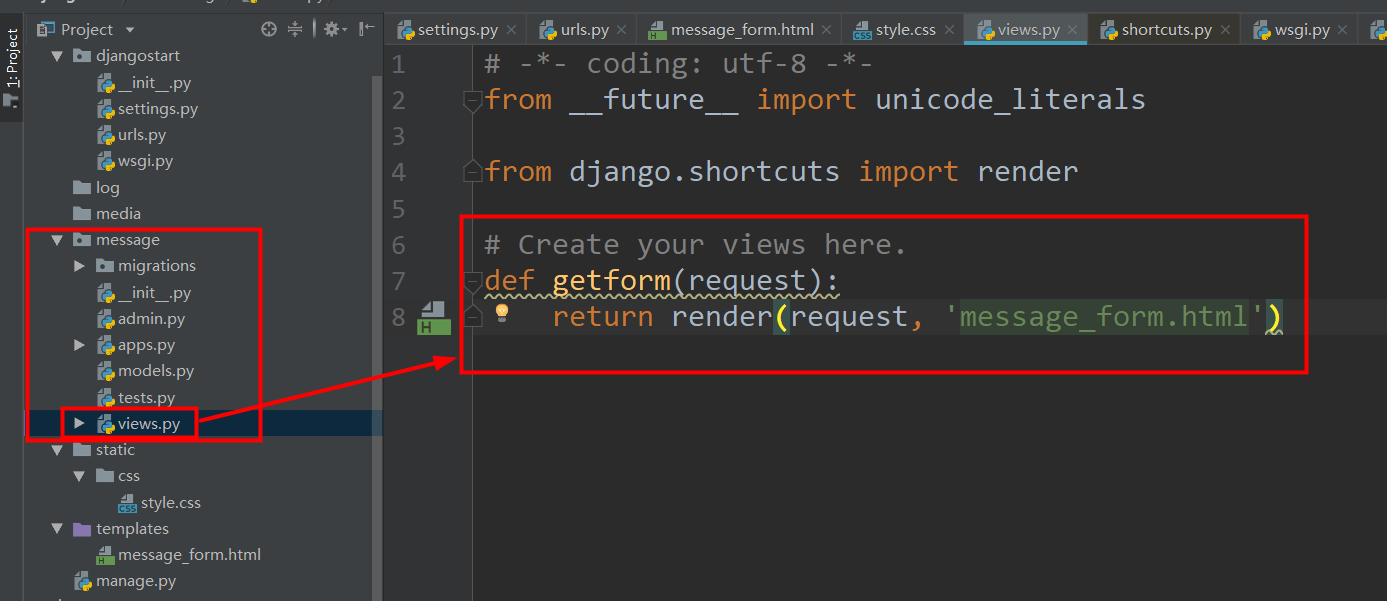
3.这两个文件这样放置

4.在message.views 里写 getform函数
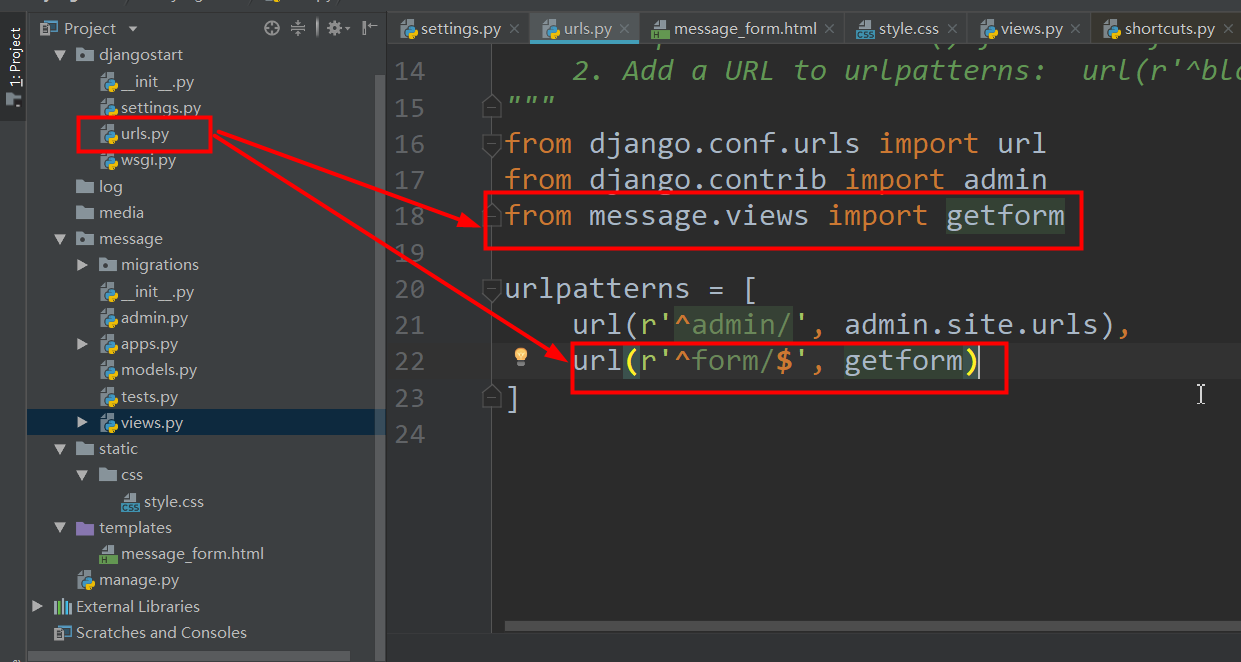
5.配置相应的url
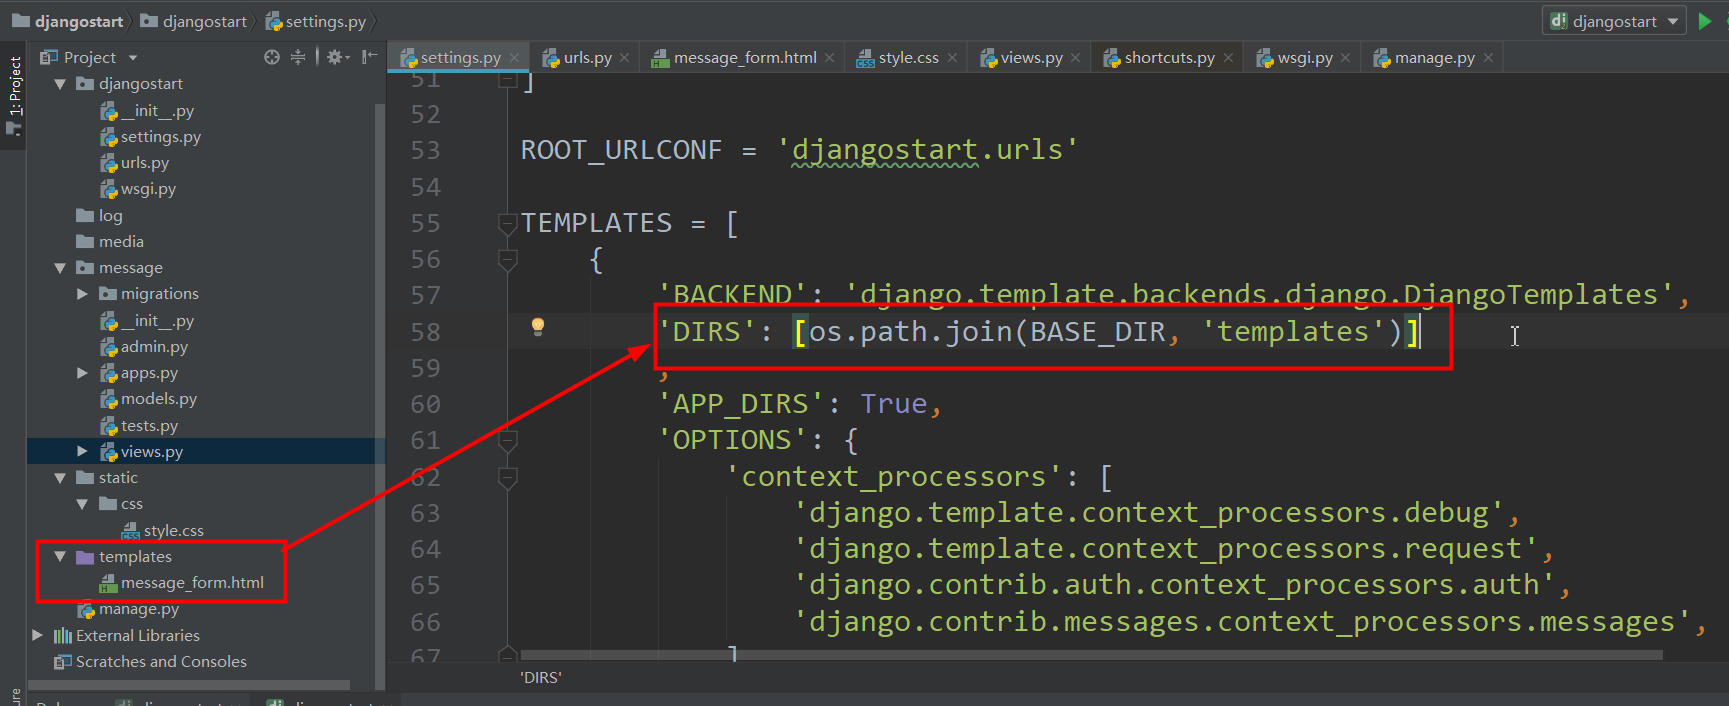
6.在setings.py里配置templates和static的路径

7.运行成功,大功告成!
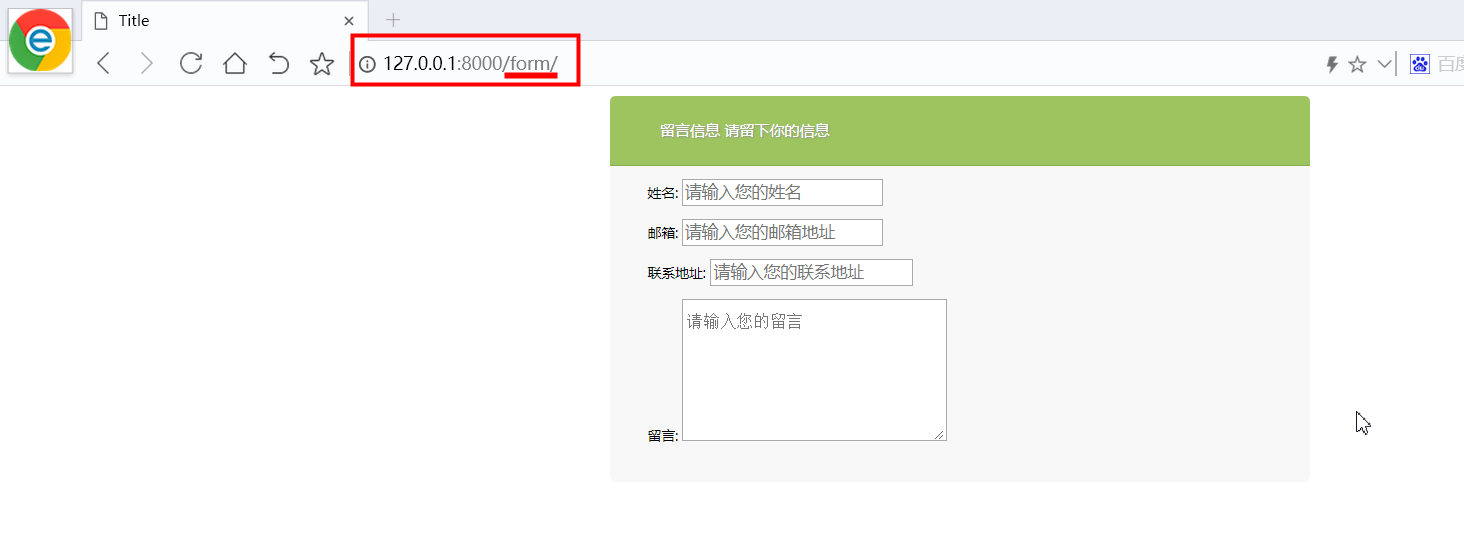
8.回顾流程
