1、导入 jar包

2 、新建实体类
3、把实体类转化成xml文件
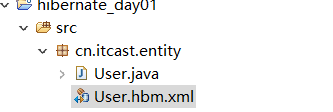
3.1 在 xml 进行配置
<?xml version="1.0" encoding="UTF-8"?>
<!DOCTYPE hibernate-mapping PUBLIC
    "-//Hibernate/Hibernate Mapping DTD 3.0//EN"
    "http://www.hibernate.org/dtd/hibernate-mapping-3.0.dtd">
<hibernate-mapping>
    <!-- 1、 配置实体类和表对应
        class标签
        name属性:实体类全路径
        table属性:数据库表名称
    -->
    <class name="cn.itcast.entity.User" table="t_user">
        <!-- 2、配置实体类 id和 表id对应
            hibernate 要求实体类有一个属性唯一值
            hibernate 要求表有字段作为唯一值
        -->
            <!-- id标签
                name属性:实体类中id属性名称
                column属性:生成的表的字段名称
             -->
        <id name="uid" column="uid">
            <!-- 设置数据库表id的增长策略
                native:生成表id值就是主键自动增长
            -->
            <generator class="native"></generator>
        </id>
        <!-- 配置其他属性和表字段对应
            name:实体类属性名称
            column:生成表字段名称
         -->
        <property name="username" column="username"></property>
        <property name="password" column="password"></property>
        <property name="address" column="address"></property>
    </class>
</hibernate-mapping>
4、配置 核心xml文件
4.1 必须在src文件夹下,文件名称不能变

4.2 hibernate.cfg.xml 配置实例
    <?xml version="1.0" encoding="UTF-8"?>
    <!DOCTYPE hibernate-configuration PUBLIC
        "-//Hibernate/Hibernate Configuration DTD 3.0//EN"
        "http://www.hibernate.org/dtd/hibernate-configuration-3.0.dtd">
    <<hibernate-configuration>
        <session-factory>
            <!-- 第一部分,配置数据库信息 必须的-->
            <property name="hibernate.connection.driver_class">com.mysql.jdbc.Driver</property>
            <property name="hibernate.connection.url">jdbc.mysql///hib</property>
            <property name="hibernate.connection.username">root</property>
            <property name="hibernate.connection.password">362222</property>

            <!-- 第二部分,配置hibernate信息 可选的-->

            <!-- 输出底层sql语句 -->
            <property name="hibernate.show_sql">true</property>
            <!-- 输出底层sql语句格式 -->
            <property name="hibernate.format_sql">true</property>
            <!-- hibernate帮创建表,需要配置之后
          hbm2ddl.auto 表示自动创建表
                update :如果已经有表,更新,如果没有,创建
             -->
            <property name="hibernate.hbm2ddl.auto">update</property>
            <!-- 配置数据库方言
                在mysql里面实现分页  关键字 limit 只能使用在mysql里面
                在oracle数据库,实现分页rownum
                让hibernate框架识别不同数据库的语句
             -->
            <property name="hibernate.dialect">org.hibernate.dialect.MySQLDialect</property>

            <!-- 第三部分,把映射文件放到核心配置文件中 -->
            <mapping resource="cn/itcast/entity/User.hbm.xml"/>

        </session-factory>
    </hibernate-configuration>
5、实现添加操作
5.1 第一步:加载hibernate核心配置文件
5.2 第二步:创建SessionFactory对象
5.3 第三步:使用SessionFactory创建session对象
5.4 第四步:开启事务
5.5 第五步:写具体逻辑 crud 操作
5.6 第六步:提交事务
5.7 第七步:关闭资源
测试:
package cn.itcast.hibernatetest;

import org.hibernate.Session;
import org.hibernate.SessionFactory;
import org.hibernate.Transaction;
import org.hibernate.cfg.Configuration;
import org.junit.Test;

import cn.itcast.entity.User;

public class HibernateDmo {

        @Test
        public void testadd(){

//5.1 第一步:加载hibernate核心配置文件
            //到src下面找到 hibernate.cfg.xml
            //在hibernate里面封装对象
        Configuration conf=new Configuration();
        conf.configure();
//5.2 第二步:创建SessionFactory对象
        //读取hibernate核心配置文件内容,创建sessionFacotry
        //在过程中,根据映射关系,在配置数据库里面把表创建
        SessionFactory factory = conf.buildSessionFactory();

//5.3 第三步:使用SessionFactory创建session对象
        Session session = factory.openSession();
//5.4 第四步:开启事务
        Transaction tx = session.beginTransaction();
//5.5 第五步:写具体逻辑 crud 操作
        //添加功能
        User user=new User();
        user.setUsername("小伟");
        user.setPassword("123456");
        user.setAddress("尚东省");
        //调用session的方法添加
        session.save(user);
//5.6 第六步:提交事务
        tx.commit();
//5.7 第七步:关闭资源
        session.close();
        factory.close();

    }
}