Tomcat是一个免费的开放源代码的Web 应用服务器,属于轻量级应用服务器,也是一个servlet容器的优秀解决方案,做Java web开发的基本上都使用过,但是tomcat大多时间对于我们是一个黑盒,出了问题无所适从,配置文件知道怎么写,但不知道为什么这么写,原理是什么.
本系列文章可以让你:
1.了解tomcat内部原理,比如tomcat怎么接收请求,怎么处理,怎么封装request,怎么开始,怎么使用lifeCycle,日志是怎么生成的,session的原理,为什么session会过期,什么是 engine,host,context,wrapper,tomcat是怎么加载你写的servlet的等等等等等等等等
2.理解设计模式,tomcat使用了外观模式,责任链模式,线程池等设计
3.不编了..自己挖掘吧
本着开源的思想,每章的代码都可以访问我的gitHub获取,每章的结尾会放上地址,我的环境为idea+maven,不过并没有多少依赖
本文的部分代码和思想来源于《深入剖析Tomcat》即《How Tomcat works》和Tomcat4源码
1.http协议
了解http协议是必须的,这里我只简单介绍一下,更多的东西可以参考《深入体验Java Web开发内幕--核心基础》或者更专业的资料
客户端(浏览器,以后统称客户端)会向服务器建立连接,然后发出请求,请求包括一个请求行,0或若干请求头、请求实体,可能是这样的
请求行:GET getPrice.jspx HTTP/1.1

请求头:Accept:*/*

Referer:www.asens.cn

Host:locathost
也可能是这样的
POST getPrice.jspx HTTP/1.1

Host:locathost

Connection:Keep-Alive


name=user&pass=123
服务器接到这样的请求后经过一系列的处理,生成响应返回给客户端,响应可能是这样的
HTTP/1.1 200 OK

Content-length:3242

Content-Type:text.html

我是实体内容
客户端接收到响应后,浏览器就会出现这几个字:我是实体内容,通常情况下响应会返回一个html页面供人浏览
2.最简单的静态server
这个服务器只能访问静态文件,非常简单,只需要3个类
HttpServer,Request,Response,然后在项目根目录创建webroot文件夹作为资源路径
在客户/服务器通信模式中, 服务器端需要创建监听端口的 ServerSocket, ServerSocket 负责接收客户连接请求,先创建一个ServerSocket
 ServerSocket serverSocket = null;
    int port = 80;
    try {
      serverSocket =  new ServerSocket(port, 1, InetAddress.getByName("127.0.0.1"));
    }
    catch (IOException e) {
      e.printStackTrace();
      System.exit(1);
    }
为了方便测试,我设置接听了localhost的80端口,socketServer能时刻待命,接收来自客户端的连接请求,socketServer的实现使用了连接池和线程池,不过具体的实现不在本文讨论范围,有需要的朋友可以自行研究.
 socket = serverSocket.accept();
 input = socket.getInputStream();
 output = socket.getOutputStream();
接收到客户请求后serverSocket会返回一个socket实例,然后获取InputStream和OutPutStream
        Request request = new Request(input);
        request.parse();

        Response response = new Response(output);
        response.setRequest(request);
        response.sendStaticResource();

        socket.close();
然后件inputStream流解析成request,当然这个request还是很原始的request,获取请求里面的uri,解析之后将request传入response
   public void parse() {
    // Read a set of characters from the socket
    StringBuffer request = new StringBuffer(2048);
    int i;
    byte[] buffer = new byte[2048];
    try {
      i = input.read(buffer);
    }
    catch (IOException e) {
      e.printStackTrace();
      i = -1;
    }
    for (int j=0; j<i; j++) {
      request.append((char) buffer[j]);
    }
    System.out.print(request.toString());
    uri = parseUri(request.toString());
  }
   private String parseUri(String requestString) {
    int index1, index2;
    index1 = requestString.indexOf(' ');
    if (index1 != -1) {
      index2 = requestString.indexOf(' ', index1 + 1);
      if (index2 > index1)
        return requestString.substring(index1 + 1, index2);
    }
    return null;
  }
request从流中读取信息,并在请求行中解析出请求的uri
如:GET index.html HTTP/1.1 ,uri就会被设置成index.html,在项目的根目录创建一个webroot的文件夹,创建一个index.html文件,uri和这个文件名要对应
在response中,将读取本地的webroot文件夹的request的uri对应名字的文件,通过socket的outputStream发送给客户端
   public void sendStaticResource() throws IOException {
    byte[] bytes = new byte[BUFFER_SIZE];
    FileInputStream fis = null;
    try {
      File file = new File(HttpServer.WEB_ROOT, request.getUri());
      if (file.exists()) {
        fis = new FileInputStream(file);
        int ch = fis.read(bytes, 0, BUFFER_SIZE);
        while (ch!=-1) {
          output.write(bytes, 0, ch);
          ch = fis.read(bytes, 0, BUFFER_SIZE);
        }
      }
      else {
        // file not found
        String errorMessage = "HTTP/1.1 404 File Not Found
" +
          "Content-Type: text/html
" +
          "Content-Length: 23
" +
          "
" +
          "<h1>File Not Found</h1>";
        output.write(errorMessage.getBytes());
      }
    }
    catch (Exception e) {
      // thrown if cannot instantiate a File object
      System.out.println(e.toString() );
    }
    finally {
      if (fis!=null)
        fis.close();
    }
  }
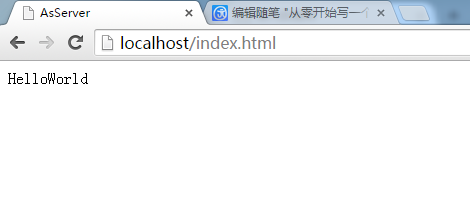
运行httpServer的main方法,然后打开浏览器,输入localhost/index.html

这个纯静态的服务器还是很简单的,但是如果你是初学者的话,还是希望你手动实现一遍
GitHub地址:https://github.com/Asens/AsServer/tree/master/AsServerV1.0
在下一章我将会实现一个支持简单servlet的服务器