(1-1)pytorch张量数据的索引与切片操作
1、对于张量数据的索引操作主要有以下几种方式:
a=torch.rand(4,3,28,28):DIM=4的张量数据a
(1)a[:2]:取第一个维度的前2个维度数据(不包括2);
(2)a[:2,:1,:,:]:取第一个维度的前两个数据,取第2个维度的前1个数据,后两个维度全都取到;
(3)a[:2,1:,:,:]:取第一个维度的前两个数据,取第2个维度的第1个索引到最后索引的数据(包含1),后两个维度全都取到;
(4)a[:2,-3:]:负号表示第2个维度上从倒数第3个数据取到最后倒数第一个数据-1(包含-3);
(5)a[:,:,0:28:2,0:28:2]:两个冒号表示隔行取数据,一定的间隔;
(6)a[:,:,::2,::3]:两个冒号直接写表示从所有的数据中隔行取数据。
2、对于tensor数据的切片与其中某些维度数据的提取方法:
a.index_select(x,torch.tensor([m,n])):表示提取tensor数据a的第x个维度上的索引为m和n的数据
3、torch.masked_select(x,mask):该函数主要用来选取x数据中的mask性质的数据,比如mask=x.ge(0.5)表示选出大于0.5的所有数据,并且输出时将其转换为了dim=1的打平tensor数据。
4、#take函数的应用:先将张量数据打平为一个dim=1的张量数据(依次排序下来成为一个数据列),然后按照索引进行取数据
a=torch.tensor([[1,2,3],[4,5,6]])
torch.take(a,torch.tensor([1,2,5])):表示提取a这个tensor数据打平以后的索引为1/2/5的数据元素
(1-2)tensor数据的维度变换
1、对于tensor数据的维度变换主要有四大API函数:
(1)view/reshape:主要是在保证tensor数据大小不变的情况下对tensor数据进行形状的重新定义与转换
(2)Squeeze/unsqueeze:删减维度或者增加维度操作
(3)transpose/t/permute:类似矩阵的转置操作,对于多维的数据具有多次或者单次的转换操作
(4)Expand/repeat:维度的扩展,将低维数据转换为高维的数据
2、view(reshape)维度转换操作时需要保证数据的大小numl保持不变,即数据变换前后的prod是相同的:
prod(a.size)=prod(b.size)
另外,对于view操作有一个致命的缺陷就是在数据进行维度转换之后数据之前的存储与维度顺序信息会丢失掉,不能够复原,而这对于训练的数据来说非常重要。
3、squeeze/unsqueeze挤压和增加维度操作的函数
a=torch.rand(4,3,28,28)
a.unsqueeze(1):在a原来维度索引1之间增加一个维度
a.unsqueeze(-1):在a原来维度索引-1之后增加维度
例如:
a=torch.tensor([1.2,1.3]) #[2]
print(a.unsqueeze(0)) #[1,2]
print(a.unsqueeze(-1)) #[2,1]
a=torch.rand(4,32,28,28)
b=torch.rand(32) #如果要实现a和数据b的叠加,则需要对于数据b进行维度扩张
print(b.unsqueeze(1).unsqueeze(2).unsqueeze(0).shape)
4、维度删减squeeze()
对于维度的挤压squeeze,主要是挤压掉tensor数据中维度特征数为1的维度,如果不是1的话就不可以挤压
b=torch.rand(32)
b=b.unsqueeze(1).unsqueeze(2).unsqueeze(0)
print(b.squeeze().shape)
print(b.squeeze(0).shape)
print(b.squeeze(1).shape)
print(b.squeeze(-1).shape)
5、维度的扩展:expand(绝对扩展)/repeat(相对扩展)
#维度的扩张expand(绝对值)/repeat,repeat扩展实质是重复拷贝的次数-相对值,并且由于拷贝操作,原来的数据不能再用,已经改变,而expand是绝对扩展,其实现只能从1扩张到n,不能从M扩张到N,另外-1表示对该维度保持不变的操作。
a=torch.rand(4,32,14,14)
b=torch.rand(32)
b=b.unsqueeze(1).unsqueeze(2).unsqueeze(0)
print(a.shape,b.shape)
print(b.expand(4,32,14,14).shape)
print(b.expand(-1,32,-1,-1).shape) #-1表示对维度保持不变
print(b.repeat(4,32,1,1).shape)
print(b.repeat(4,1,14,14).shape)
6、维度交换操作:
(1).t()操作:只可以对DIM=2的矩阵进行转置操作
(2)transpose操作:对不同的DIM均可以进行维度交换
a=torch.rand(4,3,32,32)
a1=a.transpose(1,3).contiguous().view(4,32*32*3).view(4,32,32,3).transpose(1,3)
print(a1.shape)
print(torch.all(torch.eq(a,a1)))
整体的变换顺序为a[b,c,h,w]->[b,w,h,c]->[b,w*h*c]->[b,w,h,c]->[b,c,h,w]
7、permute操作
相比于transpose只可以进行两个维度之间的一次交换操作,permute维度交换操作可以一步实现多个维度之间的交换(相当于transpose操作的多步操作)
#.t()和transpose/permute维度交换操作,需要考虑数据的信息保存,不能出现数据的污染和混乱.contiguous()操作保持存储顺序不变
c=torch.rand(3,4)
print(c)
print(c.t())
a=torch.rand(4,3,32,32)
a1=a.transpose(1,3).contiguous().view(4,32*32*3).view(4,32,32,3).transpose(1,3)
print(a1.shape)
print(torch.all(torch.eq(a,a1)))
a=torch.rand(4,3,28,32)
a1=a.permute(0,2,3,1)
print(a1.shape)
a2=a.contiguous().permute(0,2,3,1)
print(torch.all(torch.eq(a1,a2)))
对于以上的数据维度变换和索引切片训练代码如下所示:
#tensor数据的索引与切片操作
import torch
a=torch.rand(4,3,28,28)
print(a)
print(a.shape)
print(a.dim())
#索引与切片操作
print(a[0].shape)
print(a[0,0,1,2])
print(a[:2].shape)
print(a[:2,:1,:,:].shape)
print(a[:2,1:,:,:].shape)
print(a[:2,-3:].shape)
print(a[:,:,0:28:2,0:28:2].shape)
print(a[:,:,::2,::3].shape)
#选择其中某维度的某些索引数据
b=torch.rand(5,3,3)
print(b)
print(b.index_select(0,torch.tensor([1,2,4])))
print(b.index_select(2,torch.arange(2)).shape)
#...操作表示自动判断其中得到维度区间
a=torch.rand(4,3,28,28)
print(a[...,2].shape)
print(a[0,...,::2].shape)
print(a[...].shape)
#msaked_select
x=torch.randn(3,4)
print(x)
mask=x.ge(0.5) #选出所有元素中大于0.5的数据
print(mask)
print(torch.masked_select(x,mask)) #选出所有元素中大于0.5的数据,并且输出时将其转换为了dim=1的打平tensor数据
#take函数的应用:先将张量数据打平为一个dim=1的张量数据(依次排序下来成为一个数据列),然后按照索引进行取数据
a=torch.tensor([[1,2,3],[4,5,6]])
print(a)
print(a.shape)
print(torch.take(a,torch.tensor([1,2,5])))
#tensor数据的维度变换
#view/reshape操作:不进行额外的记住和存贮就会丢失掉原来的数据的数据和维度顺序信息,而这是非常重要的
a=torch.rand(4,1,28,28)
print(a.view(4,28*28))
b=a.view(4,28*28)
print(b.shape)
#squeeze/unsqueeze挤压和增加维度的操作
a=torch.rand(4,3,28,28)
print(a)
print(a.unsqueeze(0).shape)
print(a.unsqueeze(-1).shape)
print(a.unsqueeze(-4).shape)
a=torch.tensor([1.2,1.3]) #[2]
print(a.unsqueeze(0)) #[1,2]
print(a.unsqueeze(-1)) #[2,1]
a=torch.rand(4,32,28,28)
b=torch.rand(32) #如果要实现a和数据b的叠加,则需要对于数据b进行维度扩张
print(b.unsqueeze(1).unsqueeze(2).unsqueeze(0).shape)
b=b.unsqueeze(1).unsqueeze(2).unsqueeze(0)
print(b.shape)
print(b.squeeze().shape)
print(b.squeeze(0).shape)
print(b.squeeze(1).shape)
print(b.squeeze(-1).shape)
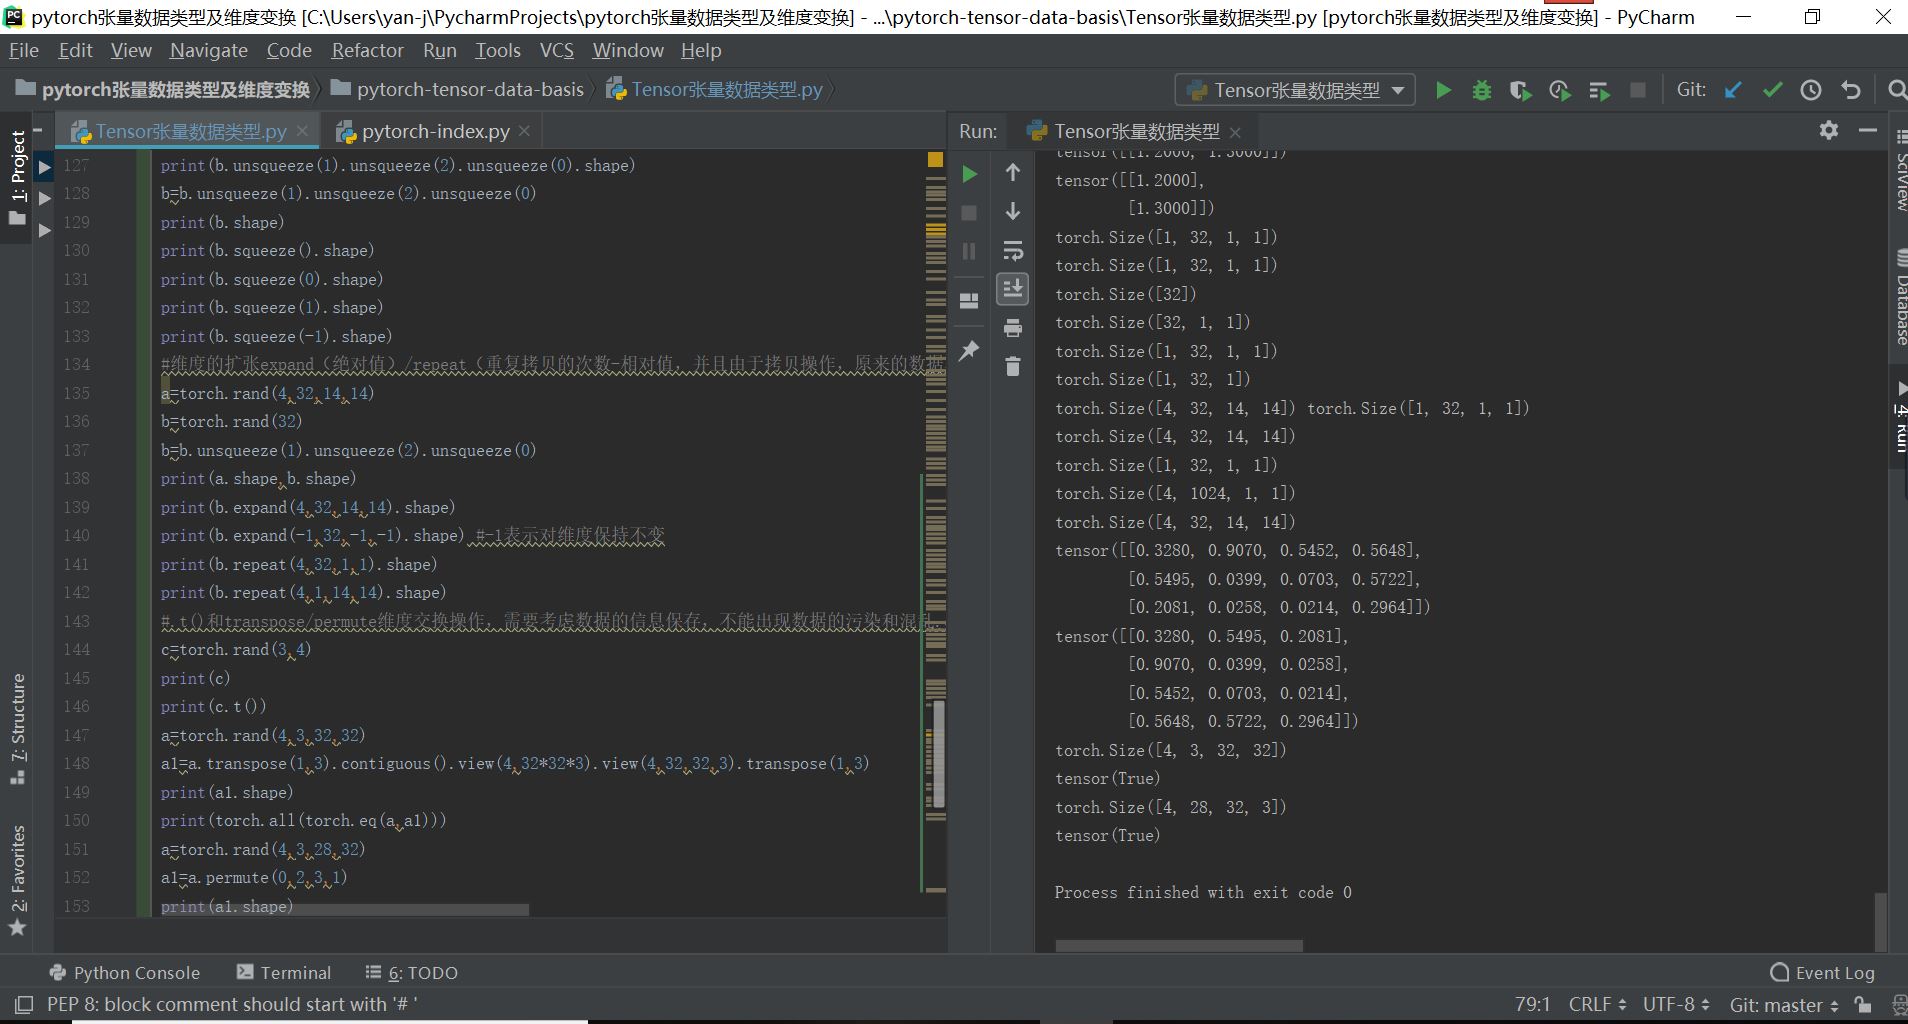
#维度的扩张expand(绝对值)/repeat(重复拷贝的次数-相对值,并且由于拷贝操作,原来的数据不能再用,已经改变),只能从1扩张到n,不能从M扩张到N,另外-1表示对该维度保持不变的操作
a=torch.rand(4,32,14,14)
b=torch.rand(32)
b=b.unsqueeze(1).unsqueeze(2).unsqueeze(0)
print(a.shape,b.shape)
print(b.expand(4,32,14,14).shape)
print(b.expand(-1,32,-1,-1).shape) #-1表示对维度保持不变
print(b.repeat(4,32,1,1).shape)
print(b.repeat(4,1,14,14).shape)
#.t()和transpose/permute维度交换操作,需要考虑数据的信息保存,不能出现数据的污染和混乱.contiguous()操作保持存储顺序不变
c=torch.rand(3,4)
print(c)
print(c.t())
a=torch.rand(4,3,32,32)
a1=a.transpose(1,3).contiguous().view(4,32*32*3).view(4,32,32,3).transpose(1,3)
print(a1.shape)
print(torch.all(torch.eq(a,a1)))
a=torch.rand(4,3,28,32)
a1=a.permute(0,2,3,1)
print(a1.shape)
a2=a.contiguous().permute(0,2,3,1)
print(torch.all(torch.eq(a1,a2)))
最终的实现结果如下所示: