1.基于注解的AOP开发步骤
(1)创建目标接口和目标类(内部有切点)
(2)创建切面类(内部有增强方法)
(3)将目标类和切面类的对象创建权交给spring
(4)在切面类中使用注解配置织入关系
(5)在配置文件中开启组件扫描和AOP的自动代理

(6)测试
原先的bean在xml中配的,现在的bean用注解配了
案例:
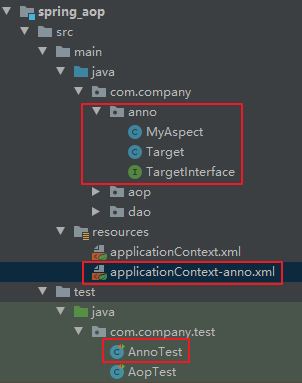
目标接口和目标类
TargetInterface.java
package com.company.anno;

public interface TargetInterface {
    void  save();
}
Target.java
package com.company.anno;

import org.springframework.stereotype.Component;

@Component("targetInterface")
public class Target implements TargetInterface {
    public void save() {
        System.out.println("save running ...");
    }
}
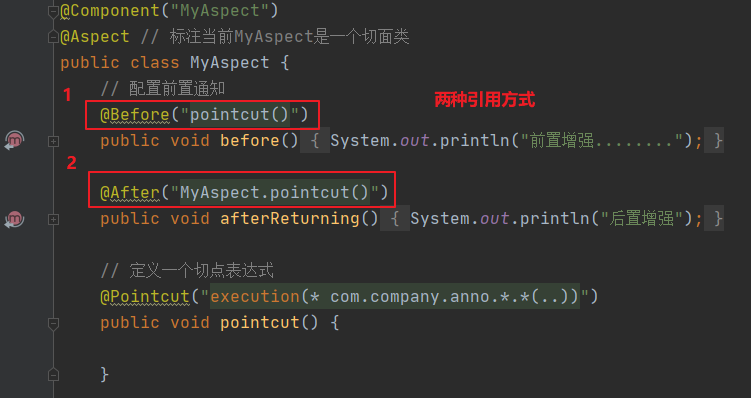
MyAspect.java
package com.company.anno;
import org.aspectj.lang.annotation.After;
import org.aspectj.lang.annotation.Aspect;
import org.aspectj.lang.annotation.Before;
import org.springframework.stereotype.Component;
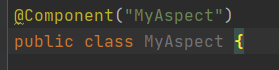
@Component("MyAspect")
@Aspect // 标注当前MyAspect是一个切面类
public class MyAspect {
// 配置前置通知
@Before("execution(* com.company.anno.*.*(..))")
public void before() {
System.out.println("前置增强........");
}
@After("execution(* com.company.anno.*.*(..))")
public void afterReturning() {
System.out.println("后置增强");
}
}
applicationContext-anno.xml
<?xml version="1.0" encoding="UTF-8"?>

<beans xmlns="http://www.springframework.org/schema/beans"
       xmlns:xsi="http://www.w3.org/2001/XMLSchema-instance"
       xmlns:aop="http://www.springframework.org/schema/aop"
       xmlns:context="http://www.springframework.org/schema/context"
       xsi:schemaLocation="
       http://www.springframework.org/schema/beans http://www.springframework.org/schema/beans/spring-beans.xsd
       http://www.springframework.org/schema/aop http://www.springframework.org/schema/aop/spring-aop.xsd
       http://www.springframework.org/schema/context http://www.springframework.org/schema/context/spring-context.xsd
">

    <!--开启组件扫描-->
    <context:component-scan base-package="com.company.anno"/>
    <!--aop自动代理-->
    <aop:aspectj-autoproxy/>
</beans>
AnnoTest.java
package com.company.test;

import com.company.anno.TargetInterface;

import org.junit.Test;
import org.junit.runner.RunWith;
import org.springframework.beans.factory.annotation.Autowired;
import org.springframework.test.context.ContextConfiguration;
import org.springframework.test.context.junit4.SpringJUnit4ClassRunner;

@RunWith(SpringJUnit4ClassRunner.class)
@ContextConfiguration("classpath:applicationContext-anno.xml")
public class AnnoTest {
    @Autowired
    private TargetInterface targetInterface;
    @Test
    public void test1() {
        targetInterface.save();
    }

}
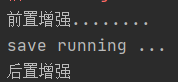
运行结果:
2.注解通知种类
通知的配置语法:@通知注解(“切点表达式”)


3.切点表达式的抽取
同xml配置aop一样,我们可以将切点表达式抽取。抽取方式是在切面内定义方法,在该方法上使用@Pointcut注解定义切点表达式,然后再在增强注解中进行引用。具体如下: