SpringBoot 整合 kaptcha 验证码
有些场景需要用到图形验证码,例如账号登录、密码找回,这里用到了 kaptcha 工具类。
1、引入 maven 依赖
<dependency>
    <groupId>com.github.penggle</groupId>
    <artifactId>kaptcha</artifactId>
    <version>2.3.2</version>
</dependency>
2、配置 kaptcha
import com.google.code.kaptcha.impl.DefaultKaptcha;
import com.google.code.kaptcha.util.Config;
import org.springframework.context.annotation.Bean;
import org.springframework.context.annotation.Configuration;

import java.util.Properties;

/**
 * @Author Lin
 * @Description 图形验证码配置
 * @Date 2021/11/11
 **/
@Configuration
public class KaptchaConfig {

    @Bean
    public DefaultKaptcha defaultKaptcha() {
        DefaultKaptcha kaptcha = new DefaultKaptcha();

        Properties properties = new Properties();
        //边框
        properties.setProperty("kaptcha.border", "no");
        //字体颜色
        properties.setProperty("kaptcha.textproducer.font.color", "blue");
        //图片宽度
        properties.setProperty("kaptcha.image.width", "120");
        //图片高度
        properties.setProperty("kaptcha.image.height", "40");
        //字体大小
        properties.setProperty("kaptcha.textproducer.font.size", "20");
        //session key
        properties.setProperty("kaptcha.session.key", "kaptcha");
        //验证码长度
        properties.setProperty("kaptcha.textproducer.char.length", "4");
        //字体
        properties.setProperty("kaptcha.textproducer.font.names", "宋体,楷体,微软雅黑");
        //文字间隔
        properties.setProperty("kaptcha.textproducer.char.space", "10");
        //去除干扰线
        properties.setProperty("kaptcha.noise.impl", "com.google.code.kaptcha.impl.NoNoise");
        //图片样式-阴影
        properties.setProperty("kaptcha.obscurificator.impl", "com.google.code.kaptcha.impl.ShadowGimpy");
        //背景结束颜色渐变,白色
        properties.setProperty("kaptcha.background.clear.to","white");

        Config config = new Config(properties);
        kaptcha.setConfig(config);
        return kaptcha;
    }
}
总的配置表如下:
| Constant | 描述 | 默认值 |
|---|---|---|
| kaptcha.border | 图片边框,合法值:yes , no | yes |
| kaptcha.border.color | 边框颜色,合法值: r,g,b (and optional alpha) 或者 white,black,blue | black |
| kaptcha.image.width | 图片宽 | 200 |
| kaptcha.image.height | 图片高 | 50 |
| kaptcha.producer.impl | 图片实现类 | com.google.code.kaptcha.impl.DefaultKaptcha |
| kaptcha.textproducer.impl | 文本实现类 | com.google.code.kaptcha.text.impl.DefaultTextCreator |
| kaptcha.textproducer.char.string | 文本集合,验证码值从此集合中获取 | abcde2345678gfynmnpwx |
| kaptcha.textproducer.char.length | 验证码长度 | 5 |
| kaptcha.textproducer.font.names | 字体 | Arial, Courier |
| kaptcha.textproducer.font.size | 字体大小 | 40px. |
| kaptcha.textproducer.font.color | 字体颜色,合法值: r,g,b 或者 white,black,blue. | black |
| kaptcha.textproducer.char.space | 文字间隔 | 2 |
| kaptcha.noise.impl | 干扰实现类 | com.google.code.kaptcha.impl.DefaultNoise |
| kaptcha.noise.colorv | 干扰 颜色,合法值: r,g,b 或者 white,black,blue. | black |
| kaptcha.obscurificator.impl | 图片样式: 水纹 com.google.code.kaptcha.impl.WaterRipple 鱼眼 com.google.code.kaptcha.impl.FishEyeGimpy 阴影 com.google.code.kaptcha.impl.ShadowGimpy | com.google.code.kaptcha.impl.WaterRipple |
| kaptcha.background.impl | 背景实现类 | com.google.code.kaptcha.impl.DefaultBackground |
| kaptcha.background.clear.from | 背景颜色渐变,开始颜色 | light grey |
| kaptcha.background.clear.to | 背景颜色渐变, 结束颜色 | white |
| kaptcha.word.impl | 文字渲染器 | com.google.code.kaptcha.text.impl.DefaultWordRenderer |
| kaptcha.session.key | session key | KAPTCHA_SESSION_KEY |
| kaptcha.session.date | session date | KAPTCHA_SESSION_DATE |
3、生成验证码
编写 getImageCode接口:
@Autowired
private RedisTemplate redisTemplate;


@ApiOperation("生成图形验证码")
@GetMapping("/getImageCode/{phone}")
public void getImageCode(@PathVariable String phone, HttpServletResponse response) throws 		 IOException {
    //设置响应头
    response.setHeader("Cache-Control", "no-cache");
    response.setHeader("Pragma", "no-cache");
    response.setContentType("image/jpeg");

    String code = defaultKaptcha.createText();
    //将验证码存入redis
    redisTemplate.opsForValue().set(phone, code, 1, TimeUnit.MINUTES);
    //创建验证码图片
    BufferedImage image = defaultKaptcha.createImage(code);
    ServletOutputStream os = response.getOutputStream();
    ImageIO.write(image, "jpg", os);
    IOUtils.closeQuietly(os);
}
postman 测试结果如下:
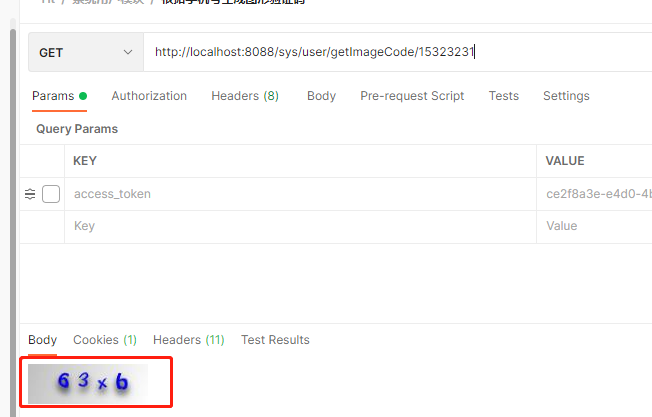
可以看到成功生成了验证码。
4、校验验证码
编写校验验证码接口 validateCode
@GetMapping("/validateCode")
public String validateCode(@RequestBody Map<String, Object> map) {
    String phone = map.get("phone").toString();
    String imageCode = map.get("imageCode").toString();

    //验证码不能为空
    if (StringUtils.isBlank(imageCode)) {
        return "图形验证码不能为空";
    }

    //校验验证码
    if (!redisTemplate.hasKey(phone)) {
        return "图形验证码已失效";
    }
    String codeGen = (String) redisTemplate.opsForValue().get(phone);
    if (!imageCode.equals(codeGen)) {
        return "图形验证码错误";
    }
    return "校验成功";
}
至此,图形验证码的配置及校验完成,整个过程相对简单。