创建harbor私有镜像库
一、部署准备:
harbor软件包
在部署节点上:
1)解压harbor的软件包将harbor目录下所有文件发送到/opt/目录下
tar zxvf harbor-offline-installer-v1.4.0.tgz
[root@cicd kubernetes]# cd harbor
[root@cicd harbor]# ls
common                    docker-compose.notary.yml  ha          harbor.v1.4.0.tar.gz  LI
docker-compose.clair.yml  docker-compose.yml         harbor.cfg  install.sh
root@cicd kubernetes]# mv harbor /opt/
[root@cicd kubernetes]# cd /opt/
[root@cicd opt]# ls
harbor
二、在根目录下创建 /data目录
在/data目录下创建/harbor目录
[root@cicd /]# mkdir data
[root@cicd data]# mkdir harbor
然后cd到kubernetes目录下解压ca.tar.gz,将解压后的ca目录移动到创建的/data/harbor/目录并重命名为cert
[root@cicd harbor]# cd /root/kubernetes
[root@cicd kubernetes]# ls
bash  ca.tar.gz  harbor-offline-installer-v1.4.0.tgz  image  image.tar.gz  k8s197.tar.gz
[root@cicd kubernetes]# tar zxf ca.tar.gz
[root@cicd kubernetes]# ls
bash  ca  ca.tar.gz  harbor-offline-installer-v1.4.0.tgz  image  image.tar.gz  k8s197.tar
[root@cicd kubernetes]# mv ca /data/harbor/cert
[root@cicd kubernetes]# cd /data/harbor/cert/
[root@cicd cert]# ls
ca.crt  ca.key  ca.srl  harbor.crt  harbor.csr  harbor.key
三、cd到/opt/harbor/目录下修改配置文件:
1)找到volumes模块,将映射的目录改为/data/harbor/clair-db
[root@cicd harbor]# cat docker-compose.clair.yml
volumes:
- /data/harbor/clair-db:/var/lib/postgresql/data:z
2)再找到volumes模块,将映射目录改为- /data/harbor/notary-db
[root@cicd harbor]# cat docker-compose.notary.yml
volumes:
- /data/harbor/notary-db:/var/lib/mysql:z
3)然后找到docker-compose.yml配置文件中需要修改映射目录的地方(一共6处)
[root@cicd harbor]# cat docker-compose.yml
    volumes:
      - /data/harbor/var/log/harbor/:/var/log/docker/:z
      - ./common/config/log/:/etc/logrotate.d/:z

    volumes:
      - /data/harbor/registry:/storage:z
      - ./common/config/registry/:/etc/registry/:z

    volumes:
      - /data/harbor/database:/var/lib/mysql:z

    volumes:
      - /data/harbor/config/:/etc/adminserver/config/:z
      - /data/harbor/secretkey:/etc/adminserver/key:z
      - /data/harbor/:/data/:z

    volumes:
  - /data/harbor/secretkey:/etc/ui/key:z
      - /data/harbor/ca_download/:/etc/ui/ca/:z
      - /data/harbor/psc/:/etc/ui/token/:z

    volumes:
      - /data/harbor/job_logs:/var/log/jobs:z
      - ./common/config/jobservice/app.conf:/etc/jobservice/app.conf:z
      - /data/secretkey:/etc/jobservice/key:z
4)编辑harbor.cfg文件
找到如下参数,并修为如下配置:
hostname = reg.yunwei.edu
ui_url_protocol = https
ssl_cert = /data/harbor/cert/harbor.crt
ssl_cert_key = /data/harbor/cert/harbor.key
secretkey_path = /data/harbor
harbor_admin_password = admin
以上为ca证书名称,必须与实际文件同名
secretkey_path = /data/harbor 为ca证书目录
三、安装harbor程序:
执行安装脚本,搭建harbor镜像库
(1)cd到 /opt/harbor/目录下,执行
sh install.sh
成功的话末尾会显示以下几行
✔ ----Harbor has been installed and started successfully.----

Now you should be able to visit the admin portal at https://reg.yunwei.edu.
For more details, please visit https://github.com/vmware/harbor .
(2)验证harbor是否部署成功:
必须在/opt/harbor/目录下执行
#docker-compose ps
[root@cicd opt]# docker-compose ps
ERROR:
        Can't find a suitable configuration file in this directory or any
        parent. Are you in the right directory?              #此报错就是因为没有再/opt/harbor目录下执行

        Supported filenames: docker-compose.yml, docker-compose.yaml

[root@cicd opt]# cd harbor/
[root@cicd harbor]# docker-compose ps
       Name                     Command               State                                Ports
------------------------------------------------------------------------------------------------------------------------------
harbor-adminserver   /harbor/start.sh                 Up
harbor-db            /usr/local/bin/docker-entr ...   Up      3306/tcp
harbor-jobservice    /harbor/start.sh                 Up
harbor-log           /bin/sh -c /usr/local/bin/ ...   Up      127.0.0.1:1514->10514/tcp
harbor-ui            /harbor/start.sh                 Up
nginx                nginx -g daemon off;             Up      0.0.0.0:443->443/tcp, 0.0.0.0:4443->4443/tcp, 0.0.0.0:80->80/tcp
registry             /entrypoint.sh serve /etc/ ...   Up      5000/tcp
可以看到所有容器的状态都为启动,即为成功部署了harbor。
四、各节点设置登陆harbor私有镜像仓库:
为各节点分发ca证书,以便各节点都能登陆创建的私有仓库。
(1)进入下载了ansible的容器,并在每个节点(包括harbor节点)的/etc/docker/目录下,创建certs.d/reg.yunwei.edu/目录
/ # ansible all -m shell -a 'mkdir -p /etc/docker/certs.d/reg.yunwei.edu'
 [WARNING]: Consider using file module with state=directory rather than running
mkdir

192.168.253.9 | SUCCESS | rc=0 >>


192.168.253.10 | SUCCESS | rc=0 >>


192.168.253.11 | SUCCESS | rc=0 >>


192.168.253.14 | SUCCESS | rc=0 >>
可以看到四个节点都创建目录成功。注意此操作是在下载了ansible的容器里面。
当然这是建立在此容器已经能够成功ping通其他节点。
(2)harbor节点上(部署节点),将harbor的ca证书中的ca.crt拷贝到/etc/docker目录下
[root@cicd reg.yunwei.edu]# cp ca.crt /etc/docker/certs.d/reg.yunwei.edu/
(3)将harbor节点的ca.crt文件,分发给各节点的/etc/docker/certs.d/reg.yunwei.edu/下
scp /etc/docker/certs.d/reg.yunwei.edu/ca.crt node1:/etc/docker/certs.d/reg.yunwei.edu/
scp /etc/docker/certs.d/reg.yunwei.edu/ca.crt node1:/etc/docker/certs.d/reg.yunwei.edu/
scp /etc/docker/certs.d/reg.yunwei.edu/ca.crt node1:/etc/docker/certs.d/reg.yunwei.edu/
(4)在/etc/hosts 解析中添加一行解析到自己私有仓库的地址,(部署节点ip)
192.168.253.9 reg.yunwei.edu
然后harbor镜像库验证
命令行:各节点登陆镜像库地址后,输入用户名/密码(admin/admin)后出现 Login Succeeded
docker login reg.yunwei.edu
[root@cicd ~]# docker login reg.yunwei.edu
Username: admin
Password:
Login Succeeded
注意需要命令行登陆了镜像库之后,才可以推送或者下载镜像从私有仓库中。
来到web浏览器:输入harbor节点ip/harbor访问
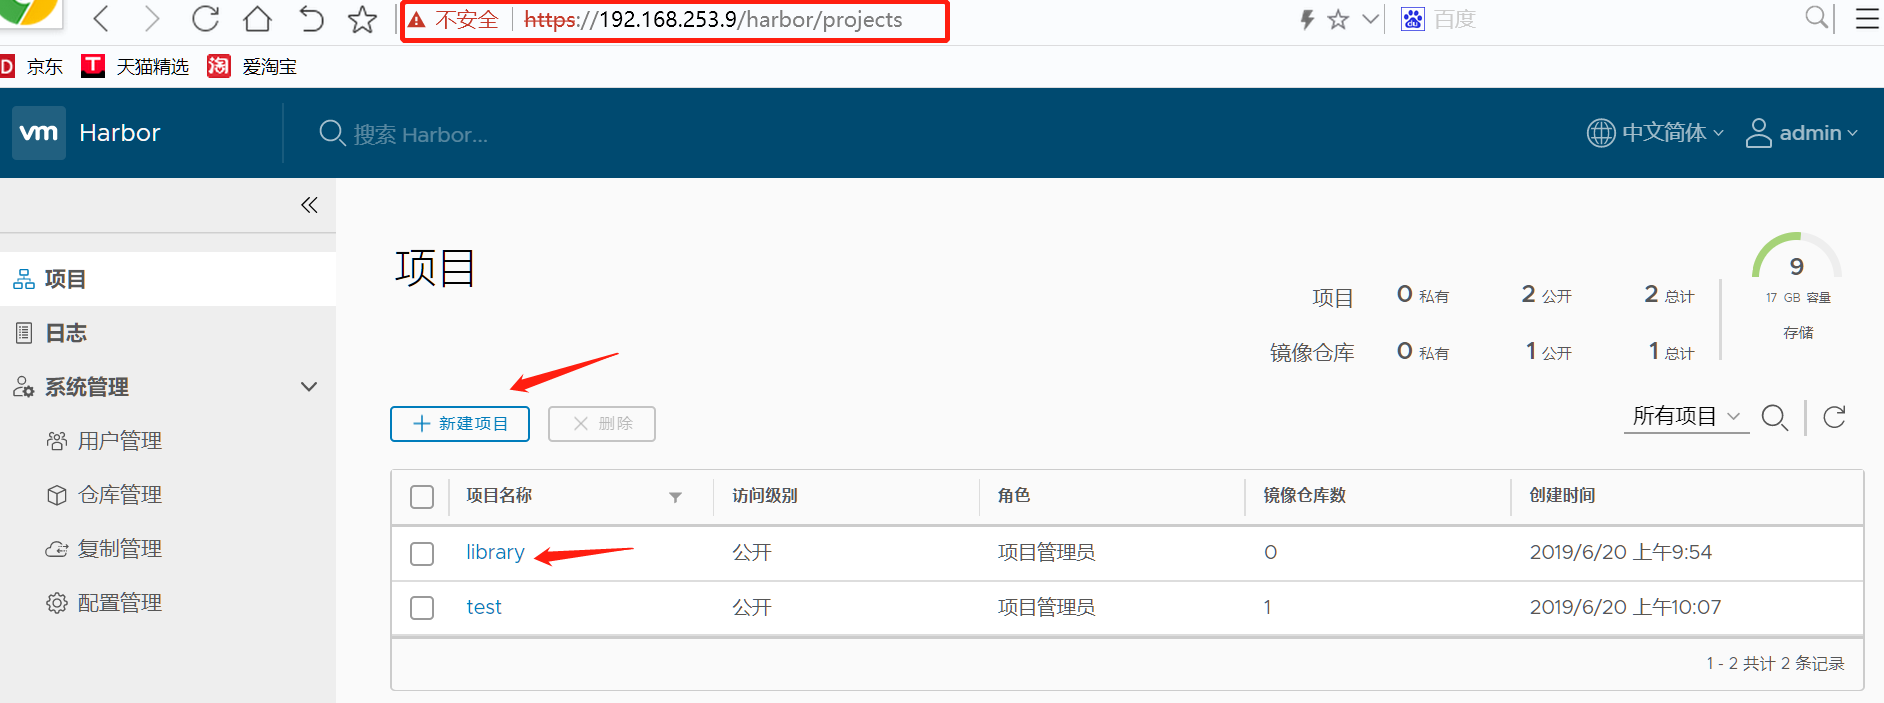
登陆用户名和密码后会有一个默认的library项目,可以选择新建项目。
五、上传镜像到harbor私有镜像仓库:
(1)选择本地镜像nginx
(2)查看镜像上传的格式标准。
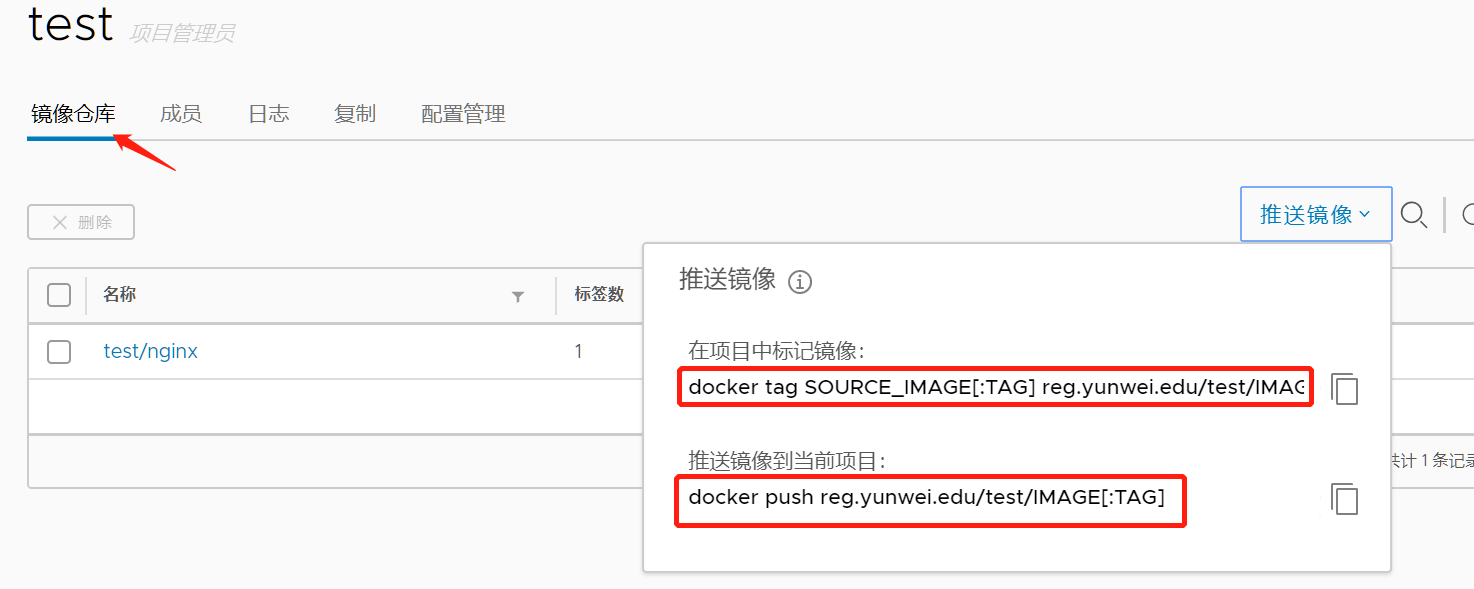
按照上述标准重命名
[root@cicd ~]# docker tag nginx reg.yunwei.edu/test/nginx:latest
[root@cicd ~]# docker images
REPOSITORY                     TAG                 IMAGE ID            CREATED             SIZE
reg.yunwei.edu/test/nginx      latest              719cd2e3ed04        9 days ago          109MB
nginx                          latest              719cd2e3ed04        9 days ago          109MB
。。。
将重新打tag之后的镜像上传到镜像库
[root@cicd ~]# docker push reg.yunwei.edu/test/nginx
The push refers to repository [reg.yunwei.edu/test/nginx]
d7acf794921f: Pushed
d9569ca04881: Pushed
cf5b3c6798f7: Pushed
latest: digest: sha256:079aa93463d2566b7a81cbdf856afc6d4d2a6f9100ca3bcbecf24ade92c9a7fe size: 948
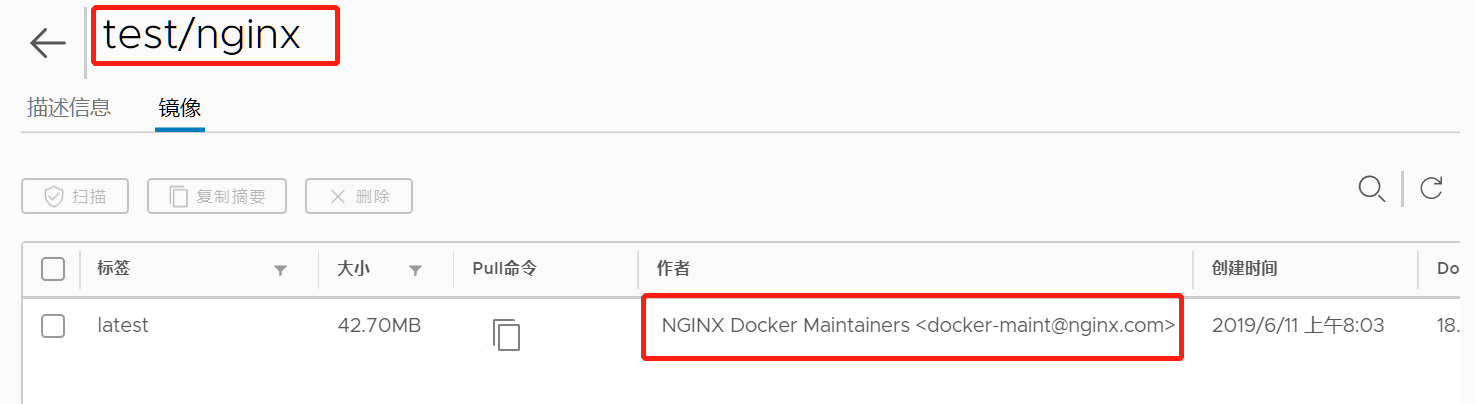
成功后刷新网页,可以看到镜像被上传到了选择的test库。
私有镜像库的使用
(1)在节点上下载仓库中的镜像。
但前提是仓库中有。
[root@cicd ~]# docker pull reg.yunwei.edu/test/nginx:latest
latest: Pulling from test/nginx
Digest: sha256:079aa93463d2566b7a81cbdf856afc6d4d2a6f9100ca3bcbecf24ade92c9a7fe
Status: Downloaded newer image for reg.yunwei.edu/test/nginx:latest
(2)节点配置好了ca证书的ca.crt后,便可执行如下命令下载镜像。在kubernets集群中节点在启动pod时,会自动下载镜像
[root@node1 ~]# docker pull reg.yunwei.edu/test/nginx:latest
值得注意的是不管上传还是下载镜像都需要命令行登陆,不然会报错拒绝连接denied access。