一 stat模块
检查文件状态使用,模块获取文件的状态等信息,类似与linux中的STAT命令可以用来获取文件的属主、可读/写、文件状态等信息
[root@node1 ansible]# stat lookup_files_ex.yml
  File: ‘lookup_files_ex.yml’
  Size: 125           Blocks: 8          IO Block: 4096   regular file
Device: fd00h/64768d    Inode: 69018922    Links: 1
Access: (0644/-rw-r--r--)  Uid: (    0/    root)   Gid: (    0/    root)
Access: 2020-04-30 18:01:52.947596173 +0800
Modify: 2020-04-30 18:01:51.624591268 +0800
Change: 2020-04-30 18:01:51.626591276 +0800
 Birth: -
[root@node1 ansible]# vim files_stat_ex.yml
- hosts: demo2.example.com
  gather_facts: no
  tasks:
    - name: stat /rtc/fstab
      stat:
        path: /etc/fstab
      register: fstab_stat
    - name: print fstab_stat
      debug:
        msg: "{{ fstab_stat }}"
[root@node1 ansible]# ansible-playbook files_stat_ex.yml
TASK [print fstab_stat] ***********************************************************************************************************************
ok: [demo2.example.com] => {
    "msg": {
        "changed": false,
        "failed": false,
        "stat": {
            "atime": 1588162552.5214317,
            "attr_flags": "",
            "attributes": [],
            "block_size": 4096,
            "blocks": 8,
            "charset": "us-ascii",
            "checksum": "8e1580bbd25809a2232e28adba26735dad99cc06",
            "ctime": 1565620911.8073654,
            "dev": 64768,
            "device_type": 0,
            "executable": false,
            "exists": true,
            "gid": 0,
            "gr_name": "root",
            "inode": 33554498,
            "isblk": false,
            "ischr": false,
            "isdir": false,
            "isfifo": false,
            "isgid": false,
            "islnk": false,
            "isreg": true,
            "issock": false,
            "isuid": false,
            "mimetype": "text/plain",
            "mode": "0644",
            "mtime": 1565620660.3251472,
            "nlink": 1,
            "path": "/etc/fstab",
            "pw_name": "root",
            "readable": true,
            "rgrp": true,
            "roth": true,
            "rusr": true,
            "size": 465,
            "uid": 0,
            "version": "598828928",
            "wgrp": false,
            "woth": false,
            "writeable": true,
            "wusr": true,
            "xgrp": false,
            "xoth": false,
            "xusr": false
        }
    }
}
二 blockinfile模块
blockinfile 是 Ansible 的一个非常实用的模块,和单行替换模块 lineinfile 类似,但是可以帮助我们在文件中插入一段文本。
[root@node1 ansible]# vim files/test.html
<html>
    <head>
    </head>
    <body>
    </body>
</html>
[root@node1 ansible]# vim blockfile_ex.yml
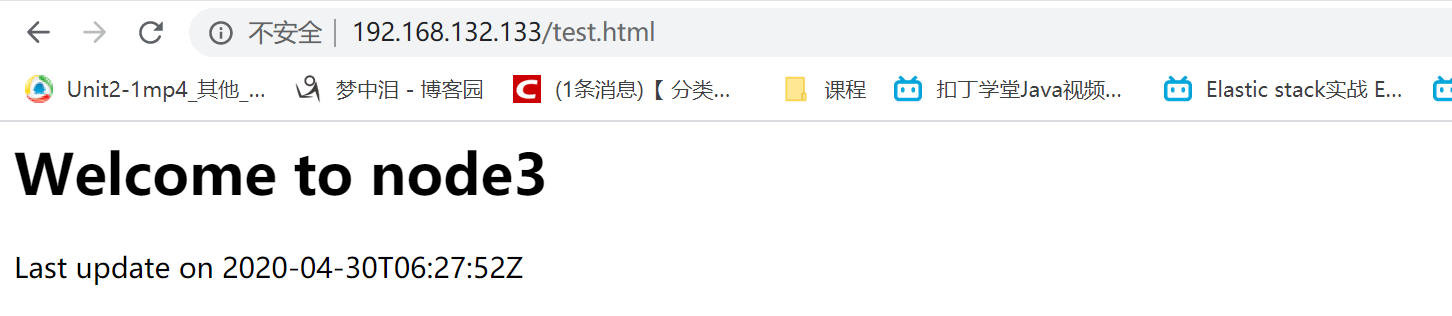
- name: blockinfile module test
  hosts: demo3.example.com
  tasks:
    - name: install httpd
      yum:
        name: httpd
        state: installed
    - name: copy test.html to dest
      copy:
        src: files/test.html
        dest: /var/www/html/test.html
    - name: add block
      blockinfile:
        marker: "<!--{mark} ANSIBLE MANAGED BLOCK -->"
        insertafter: "<body>"
        path: /var/www/html/test.html
        block:
          <h1>Welcome to {{ ansible_hostname}}</h1>
          <p>Last update on {{ ansible_date_time.iso8601}} </p>
    - name: start service
      service:
        name: httpd
        state: started
执行
[root@node1 ansible]# ansible-playbook blockfile_ex.yml
访问
三 lineinfile模块
在大多数时候,我们在linux上的操作,就是针对文件的操作,通过配置管理工具对配置文件作统一的配置修改是一个非常酷的功能。
下面是官方针对该模块的说明:
lineinfile - Ensure a particular line is in a file, or replace an existing line using a back-referenced regular expression
简单讲,这个模块就是针对一个文件中行内容的操作。
下面我们详细说一说其具体可以做的事情。
3.1 修改匹配行
修改selinux示例
[root@node1 ansible]# ansible demo3.example.com -m shell -a "cat /etc/selinux/config |grep ^SELINUX="
![]()
[root@node1 ansible]# vim edit_selinux.yml
- hosts: demo3.example.com
  gather_facts: no
  tasks:
    - name: disable selinux
      lineinfile:
        path: /etc/selinux/config
        regex: ^SELINUX=
        line: SELINUX=disabled
[root@node1 ansible]# ansible-playbook edit_selinux.yml
[root@node1 ansible]# ansible demo3.example.com -m shell -a "cat /etc/selinux/config |grep ^SELINUX="
demo3.example.com | CHANGED | rc=0 >>
SELINUX=disabled
在node3节点写入一个文件
[root@node3 ~]# vim /tmp/test.conf
Listen 127.0.0.1:80
Listen 80
Port
3.2 插入匹配行
[root@node1 ansible]# vim lineinfile.yml
- hosts: demo3.example.com
  gather_facts: no
  tasks:
    - name: inser after
      lineinfile:
        path: /tmp/test.conf
        insertafter: "^Listen 80"   #在之后插入
        line: "aaaaa"
    - name: inser befor
      lineinfile:
        path: /tmp/test.conf
        insertbefore: "^Listen 80"    #之前插入
        line: "befor bbbb"
执行
[root@node1 ansible]# ansible-playbook lineinfile.yml
[root@node1 ansible]# ansible demo3.example.com -m shell -a "cat /tmp/test.conf"
demo3.example.com | CHANGED | rc=0 >>
Listen 127.0.0.1:80
befor bbbb
Listen 80
aaaaa
Port
3.3 删除匹配行
[root@node1 ansible]# vim lineinfile.yml
- hosts: demo3.example.com
  gather_facts: no
  vars:
    testfile: "/tmp/test.conf"
  tasks:
    - name: inser after
      lineinfile:
        path: "{{testfile}}"
        insertafter: "^Listen 80"
        line: "aaaaa"
    - name: inser befor
      lineinfile:
        path: "{{ testfile }}"
        insertbefore: "^Listen 80"
        line: "befor bbbb"
    - name: delete line
      lineinfile:
        path: "{{ testfile }}"
        regex: "^Port"
        state: absent
[root@node1 ansible]# ansible-playbook lineinfile.yml
[root@node1 ansible]# ansible demo3.example.com -m shell -a "cat /tmp/test.conf"
demo3.example.com | CHANGED | rc=0 >>
Listen 127.0.0.1:80
befor bbbb
Listen 80
aaaaa
3.4 文件存在则添加一行内容
往/etc/hosts里添加一行10.1.61.131 test.dz11.com(多次执行,不会重复添加),示例如下:
- name: add a line
  lineinfile:
    path: /etc/hosts
    line: '10.1.61.131 test.dz11.com'
如果有匹配的行则修改该行,如果不匹配则添加
[root@node1 ansible]# vim lineinfile.yml
- hosts: demo3.example.com
  gather_facts: no
  vars:
    testfile: "/tmp/test.conf"
  tasks:
    - name: inser after
      lineinfile:
        path: "{{testfile}}"
        insertafter: "^Listen 80"
        line: "aaaaa"
    - name: inser befor
      lineinfile:
        path: "{{ testfile }}"
        insertbefore: "^Listen 80"
        line: "befor bbbb"
    - name: delete line
      lineinfile:
        path: "{{ testfile }}"
        regex: "^Port"
        state: absent
    - name: regex
      lineinfile:
        path: "{{testfile}}"
        regex: "^Listen 8080 "
        line: "Listen 809090 "
[root@node1 ansible]# ansible-playbook lineinfile.yml
[root@node1 ansible]# ansible demo3.example.com -m shell -a "cat /tmp/test.conf"
demo3.example.com | CHANGED | rc=0 >>
Listen 127.0.0.1:80
befor bbbb
Listen 80
aaaaa
Listen 809090
3.5 参数backrefs,backup说明
- backup: 是否备份原文件,默认为no
- backrefs:
- 当backrefs为no时,如果regex没有匹配到行,则添加一行,如果Regx匹配到行,则修改该行
- 当backrefs为yes时,如果regex没有匹配到行,则保持原文件不变,如果regex匹配到行,则修改该行
- backrefs默认为no,所以上面那个示例中,我们没有配置backrefs,而默认没有匹配,则修改。
3.6 使用validate验证文件是否正确修改
在一些场景下,我们修改完文件后,需要对文件做一下测试,用以检查文件修改之后,是否能正常运行。如http.conf、nginx.conf等,一旦改错,而不加以测试,可能会直接导致http服务挂掉。
可以使用validate关键字,在修改完成以后,对文件执行检测:
- name: test validate
  lineinfile:
      dest: /etc/sudoers
      state: present
      regexp: '^%ADMIN ALL='
      line: '%ADMIN ALL=(ALL)'
      validate: 'visudo -cf %s'    #这里就是执行检测,比如nginx就可以写入nginx -t检测配置文件
  tags:
    - testsudo
博主声明:本文的内容来源主要来自誉天教育晏威老师,由本人实验完成操作验证,需要的博友请联系誉天教育(http://www.yutianedu.com/),获得官方同意或者晏老师(https://www.cnblogs.com/breezey/)本人同意即可转载,谢谢!