让大家久等了。继续更新thrift序列化的消息体,下面我们一步一步的看一看thrift的rpc是怎么实例化消息体的。
首先我们先准备一个request文件
1 namespace java bky
2 struct TestRequest{
3     1:i32 code;
4     2:string name;
5     3:string data;
6 }
一个respone文件
1 namespace java bky
2 struct TestRespone{
3     1:i32 code;
4     2:string message;
5 }
一个service文件
1 namespace java bky
2 include 'TestRequest.thrift'
3 include 'TestRespone.thrift'
4 service TestService{
5     TestRespone.TestRespone testRPC(1:TestRequest.TestRequest request);
6 }
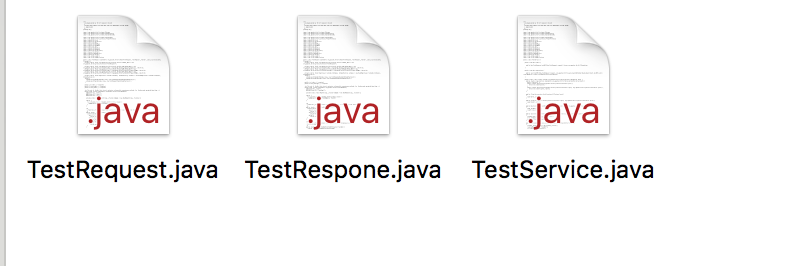
编译文件
生成的文件如下
自己写一个简单的RPC的例子
client
package com.thrift.test;

import bky.TestRequest;
import bky.TestRespone;
import bky.TestService;
import com.thrift.WmCreateAccountRequest;
import com.thrift.WmCreateAccountRespone;
import com.thrift.WmCreateAccountService;
import org.apache.thrift.TException;
import org.apache.thrift.protocol.TBinaryProtocol;
import org.apache.thrift.protocol.TProtocol;
import org.apache.thrift.transport.TFramedTransport;
import org.apache.thrift.transport.TSocket;
import org.apache.thrift.transport.TTransport;
import org.apache.thrift.transport.TTransportException;

import java.util.Random;

public class RpcClient {

    public static final String SERVER_IP = "localhost";
    public static final int SERVER_PORT = 8090;
    public static final int TIMEOUT = 1000000;


    public static void main(String[] args) throws TException {

        TSocket t = new TSocket ( SERVER_IP, SERVER_PORT, TIMEOUT );
        t.open ();
        TTransport transport = new TFramedTransport ( t );
        TProtocol protocol = new TBinaryProtocol ( transport );
        TestRequest request = new TestRequest ();
        request.setCode ( 123 );
        request.setName ( "博客园" );
        request.setData ( "这是我的RPC测试程序" );
        TestService.Client client = new TestService.Client ( protocol );
        TestRespone result = client.testRPC (  request);
        System.out.println ( "Thrify client result =: " + result );

    }
}
server
package com.thrift.test;

import bky.TestService;
import bky.TestServiceImpl;
import org.apache.thrift.TProcessor;
import org.apache.thrift.protocol.TBinaryProtocol;
import org.apache.thrift.server.TServer;
import org.apache.thrift.server.TServer.Args;
import org.apache.thrift.server.TSimpleServer;
import org.apache.thrift.transport.TFramedTransport;
import org.apache.thrift.transport.TServerSocket;
import org.apache.thrift.transport.TTransportException;

public class RpcServer {

    public static final int SERVER_PORT = 8090;

    public static void main(String[] a) throws TTransportException {

        System.out.println("HelloWorld THsHaServer start ....");

        TProcessor tprocessor = new TestService.Processor<TestService.Iface> (
                new TestServiceImpl ());
        TServerSocket serverTransport = new TServerSocket(SERVER_PORT);

        Args args = new Args (serverTransport);
        args.processor(tprocessor);
        args.transportFactory(new TFramedTransport.Factory());
        args.protocolFactory(new TBinaryProtocol.Factory());
        TServer server = new TSimpleServer (args);
        server.serve();
    }
}
自己的实现类
package bky;

import org.apache.thrift.TException;

public class TestServiceImpl implements TestService.Iface {
    @Override
    public TestRespone testRPC(TestRequest request) throws TException {
        TestRespone respone = new TestRespone();
        respone.setCode ( 456 );
        respone.setMessage ( "这是服务端的返回示例" );
        return respone;
    }
}
跟踪thrift的发送源码
 public TestRespone testRPC(TestRequest request) throws org.apache.thrift.TException
    {
      send_testRPC(request);
      return recv_testRPC();
    }
protected void sendBase(String methodName, TBase args) throws TException {
    oprot_.writeMessageBegin(new TMessage(methodName, TMessageType.CALL, ++seqid_));
    args.write(oprot_);
    oprot_.writeMessageEnd();
    oprot_.getTransport().flush();
  }
跟到这里发现其实thrift的发送是分成了4个部分。
1:封装方法信息message,由TProtocol也就是我们上面的TBinaryProtocol发送到TTransport,这里我们的实现是TFrameTransport。
2:将request通过TProtocol序列化,也就是我们上一篇https://www.cnblogs.com/zyl2016/p/10044234.html讲到的东西。
3:把message的结束信息通过TProtocol序列化其实这部是空实现,有特殊需求可以自定义TProtocol重写。
4:通过TTransport将service消息体发送出去
首先我们看writeMessageBegin都干了些什么
public void writeMessageBegin(TMessage message) throws TException {
    if (strictWrite_) {
      int version = VERSION_1 | message.type;
      writeI32(version);
      writeString(message.name);
      writeI32(message.seqid);
    } else {
      writeString(message.name);
      writeByte(message.type);
      writeI32(message.seqid);
    }
  }
1:默认先写入一个四个字节版本号,区分不同thrift版本,防止thrift8的client和thrift9的server引起的不兼容的问题,然后在写入message.name 也就是方法名称,最后写入seq唯一id,是为了防止client并发引起的问题,所以thrift的client是不支持并发的,因为是一个tcp链路上的传输,所以想允许并发调用接口可以采用apache pool client连接池就可以了。
2:第二步写入request,参照上一篇文章。
3:写入消息结束,这里的TBinaryProtocol实现为空,需要特性化信息的可以进行方法重写。
4:oprot_.getTransport().flush(); 这里通过transport将消息体flush出去,将字节流发送到server。
我们 再看看TTransport发送做了些什么操作,这里我们的实现是TFrameTransport。
private final TByteArrayOutputStream writeBuffer_ =new TByteArrayOutputStream(1024);
public void write(byte[] buf, int off, int len) throws TTransportException {
    writeBuffer_.write(buf, off, len);
  }

  @Override
  public void flush() throws TTransportException {
    byte[] buf = writeBuffer_.get();
    int len = writeBuffer_.len();
    writeBuffer_.reset();

    encodeFrameSize(len, i32buf);
    transport_.write(i32buf, 0, 4);
    transport_.write(buf, 0, len);
    transport_.flush();
  }
write方法我们发现其实每次TProtocol write的时候都是将数据流扔到writeBuffer中缓存,等待所有二进制流发送完毕之后统一flush,然后transport先获取到缓存的二进制流,然后通过encodeFrameSize方法获取流的长度转换成4个字节的int数据,然后首先write四个字节长度,然后在wirte后面对应长度的消息体,所以知道长度之后server就可以做对应的拆包操作去调用本地的实现了。咱们本地debug测试一下他发送的字节流数据
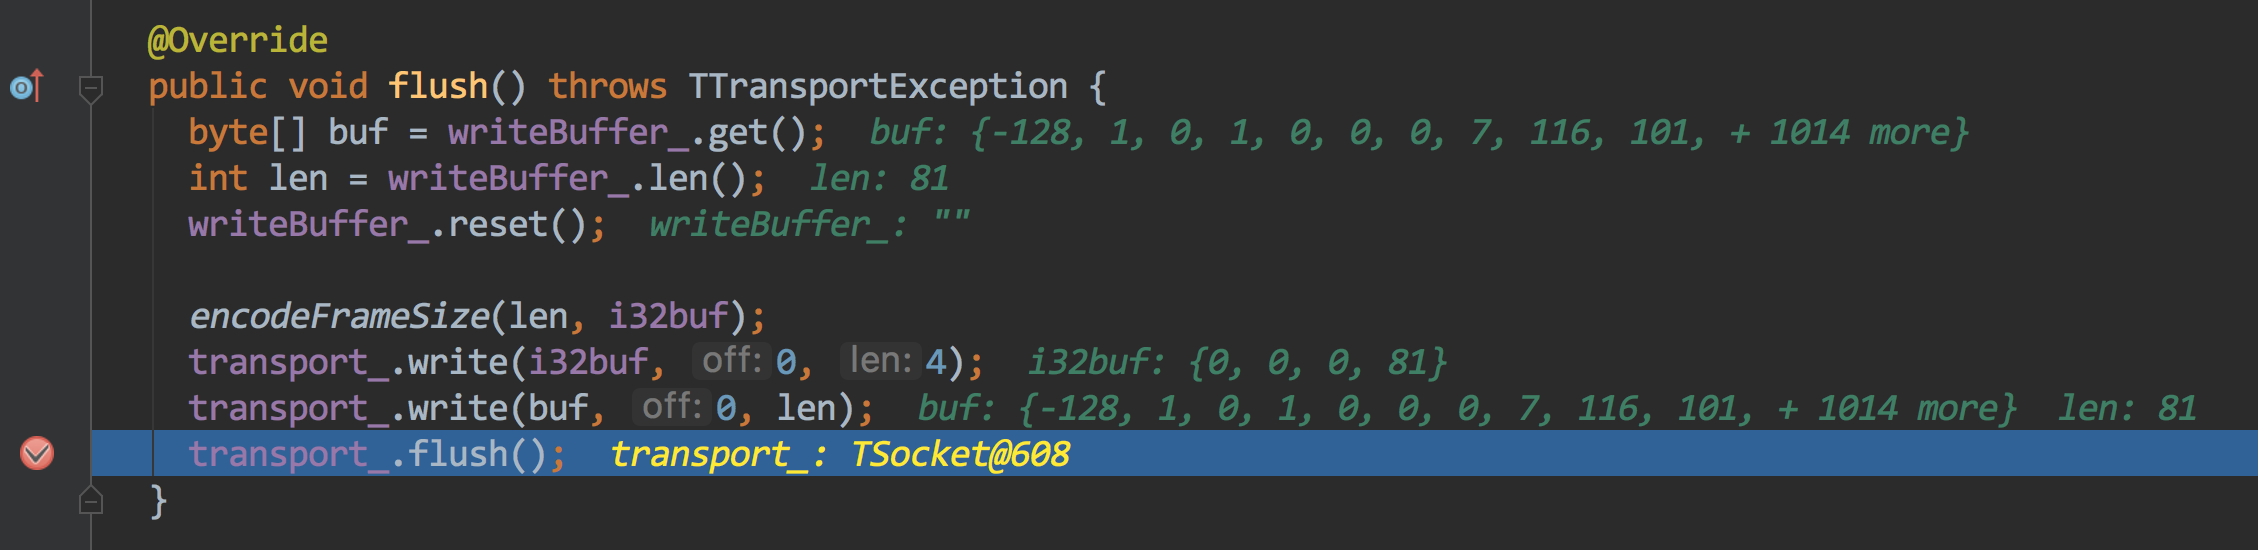
首先write一个四个字节的数组,转换成int是81,然后在write消息体,非常清晰简单的消息体,server反解析我会在下一篇文章中去讲解
这里聪明的读者一定会发现,我想自定义协议只需要在transport 的write和read的时候去做一些手脚就可以啦。
在我git上已经https://gitee.com/a1234567891/koalas-rpc 写好了一个完整的RPC例子,客户端采用thrift协议,服务端支持netty和thrift的TThreadedSelectorServer半同步半异步线程模型,支持动态扩容,服务上下线,(权重动态,可用性配置,页面流量统计等),喜欢的小伙伴给个star吧。
更多学习内容请加高级java QQ群:825199617