1、对昨天主页不能显示添加的新成员信息bug进行修改
2、运用EFCore将其数据写入数据库中
1、对昨天主页不能显示添加的新成员信息bug进行修改
修改下生命周期,在运行
Transient:每一次GetService都会创建一个新的实例
Scoped:在同一个Scope内只初始化一个实例 ,可以理解为( 每一个request级别只创建一个实例,同一个http request会在一个 scope内)
Singleton:整个应用程序生命周期内只创建一个实例


ok完成
2、运用EFCore将其数据写入数据库中
我们输入的数据是要写入数据库里面的,下面我将介绍怎么连接数据库,将数据写入数据库
第一步,添加连接数据库的字符串 打开appsettings.json
{
  "Logging": {
    "LogLevel": {
      "Default": "Warning"
    }
  },
  "AllowedHosts": "*",
  "ConnectionStrings": {
    "DefaultConnection": "Data Source=(localdb)\ProjectsV13;Database=TutorialStudy;Trusted_connection=true;"
  }
}
其中(localdb)ProjectsV13注意看看自己的数据库叫什么?

然后建立Data文件夹,建立DataContext类,用来创建数据库、表
using Microsoft.EntityFrameworkCore;
using TutorialStudy.Model;

namespace TutorialStudy.Data
{
    public class DataContext:DbContext
    {
        public DataContext(DbContextOptions<DataContext> options):base(options)
        {

        }

        public DbSet<Student> Students { get; set; }
    }
}
回到startup类进行注册DataContext类,连接字符串
using Microsoft.AspNetCore.Builder;
using Microsoft.AspNetCore.Hosting;
using Microsoft.AspNetCore.Http;
using Microsoft.EntityFrameworkCore;
using Microsoft.Extensions.Configuration;
using Microsoft.Extensions.DependencyInjection;
using TutorialStudy.Data;
using TutorialStudy.Model;
using TutorialStudy.Services;

namespace TutorialStudy
{
    public class Startup
    {
        private readonly IConfiguration _configuration;

        public Startup(IConfiguration configuration)
        {
            _configuration = configuration;
        }

        public void ConfigureServices(IServiceCollection services)
        {
            services.AddDbContext<DataContext>(options =>
                {
                    options.UseSqlServer(_configuration.GetConnectionString("DefaultConnection"));
                });

            /*Transient:每一次GetService都会创建一个新的实例
                Scoped:在同一个Scope内只初始化一个实例 ,可以理解为( 每一个request级别只创建一个实例,同一个http request会在一个 scope内)
                Singleton:整个应用程序生命周期内只创建一个实例 */

            //services.AddScoped<IRepository<Student>, InMemoryRepository>();
            services.AddSingleton<IRepository<Student>, InMemoryRepository>();
            services.AddMvc();
        }

        // This method gets called by the runtime. Use this method to configure the HTTP request pipeline.
        public void Configure(IApplicationBuilder app, IHostingEnvironment env)
        {
            if (env.IsDevelopment())
            {
                app.UseDeveloperExceptionPage();
            }

            app.UseStaticFiles();
            app.UseStatusCodePages();
            app.UseMvc(routes => { routes.MapRoute("Default", "{controller=Home}/{action=Index}/{id?}"); });


            app.Run(async (context) =>
            {
                await context.Response.WriteAsync("Hello World!");
            });
        }
    }
}
连接json字符串的为GetConnectionString,可以进入它源代码看看
    /// <summary>Shorthand for GetSection("ConnectionStrings")[name].</summary>
    /// <param name="configuration">The configuration.</param>
    /// <param name="name">The connection string key.</param>
    /// <returns></returns>
    public static string GetConnectionString(this IConfiguration configuration, string name)
    {
      return configuration?.GetSection("ConnectionStrings")?[name];
    }
意味着在appserttings.json文件中会找到ConnectionStrings里面的下一级别也就是我们所定义的DefaultConnection
或者这样也行
var connectionString = _configuration["ConnectionStrings:DefaultConnection"];
            services.AddDbContext<DataContext>(options =>
            {
                    options.UseSqlServer(connectionString);
                    //options.UseSqlServer(_configuration.GetConnectionString("DefaultConnection"));
             });
更推荐第一种
接下来我们把服务接口的实现类在重新写一遍,在services中添加EfCoreRepository类
using System.Collections.Generic;
using System.Linq;
using TutorialStudy.Data;
using TutorialStudy.Model;

namespace TutorialStudy.Services
{
    public class EfCoreRepository:IRepository<Student>
    {
        private readonly DataContext _context;

        public EfCoreRepository(DataContext context)
        {
            _context = context;
        }

        public IEnumerable<Student> GetAll()
        {
            return _context.Students.ToList();
        }

        public Student GetById(int studentId)
        {
            return _context.Students.Find(studentId);
        }

        public Student Add(Student student)
        {
            //这里就不需要maxId,因为在数据库中Id属性是自增的
            var model=new Student
            {
                FirstName = student.FirstName,
                LastName = student.LastName,
                BirthDate = student.BirthDate,
                Gender = student.Gender
            };
            _context.Students.Add(model);
            _context.SaveChanges();
            return student;
        }
    }
}
改下startup类中服务注册与生命周期

//这里不能用AddSingleton,会发生多线程的问题,这里是每次http请求生成一个实例

打开这个
输入这条语句add-migration initialDB,接着输入这条语句update-database

当当当!!!数据库搞定
Add-Migration 将创建下一次基于上一次迁移以来的更改的迁移;
Update-Databse 将任何挂起的迁移应用到数据库
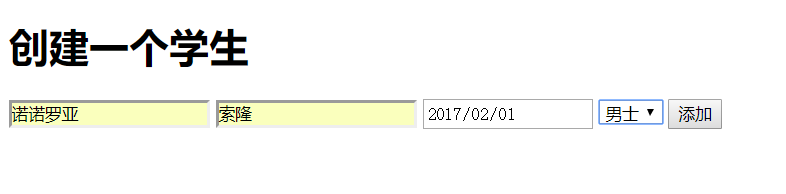
接下来我们运行下程序

主页什么都没有是因为我们数据库是空的,还没录入数据


额,有一个问题是Id没增长,然而当我关闭再次运行程序,过着点开他们的信息却都有Id,这是一个小bug,

还有一个bug是当我在网页刷新这一页的时候发现会重复提交数据

第二个bug,下一篇解决吧