前言
最开始接触这个是在L版本的监控平台里面看到的,有个iscsi网关,但是没看到有类似的介绍,然后通过接口查询到了一些资料,当时由于有比较多的东西需要新内核,新版本的支持,所以并没有配置出来,由于内核已经更新迭代了几个小版本了,经过测试验证可以跑起来了,这里只是把东西跑起来,性能相关的对比需要根据去做
实践过程
架构图
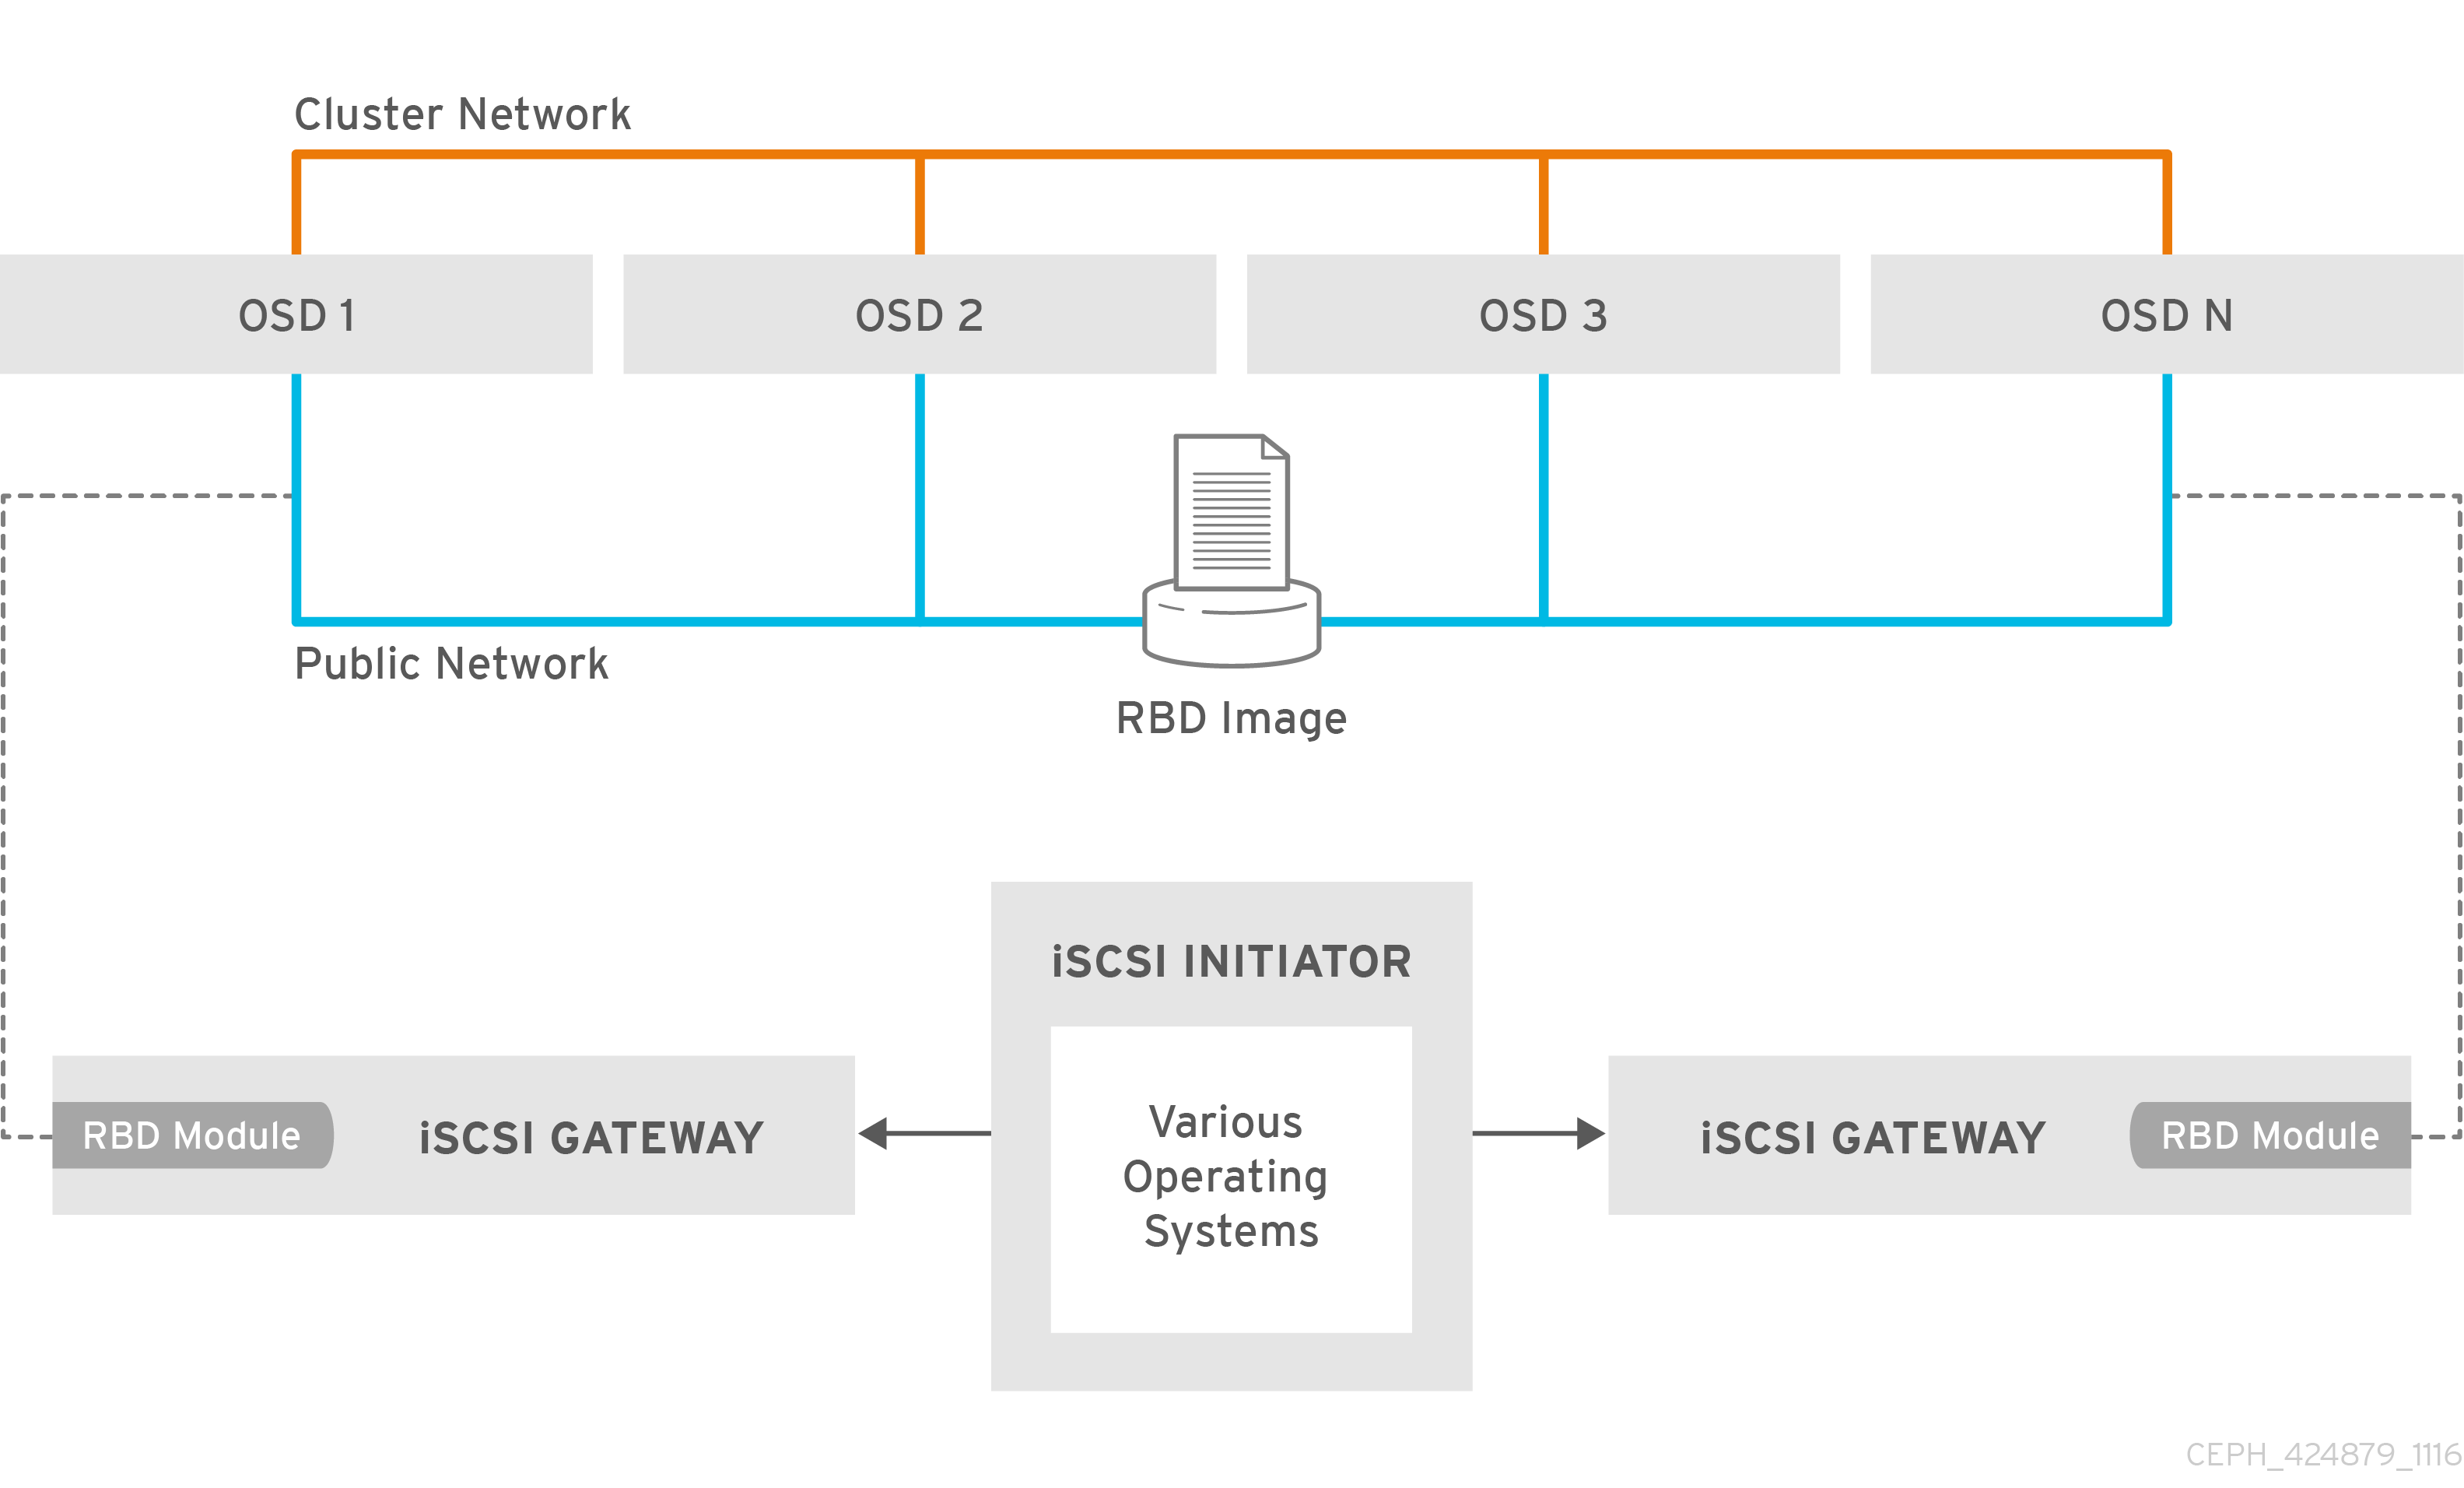
这个图是引用的红帽的架构图,可以理解为一个多路径的实现方式,那么这个跟之前的有什么不同
主要是有个新的tcmu-runner来处理LIO TCM后端存储的用户空间端的守护进程,这个是在内核之上多了一个用户态的驱动层,这样只需要根据tcmu的标准来对接接口就可以了,而不用去直接跟内核进行交互
需要的软件
Ceph Luminous 版本的集群或者更新的版本
RHEL/CentOS 7.5或者Linux kernel v4.16或者更新版本的内核
其他控制软件
targetcli-2.1.fb47 or newer package
python-rtslib-2.1.fb64 or newer package
tcmu-runner-1.3.0 or newer package
ceph-iscsi-config-2.4 or newer package
ceph-iscsi-cli-2.5 or newer package
以上为配置这个环境需要的软件,下面为我使用的版本的软件,统一打包放在一个下载路径
我安装的版本如下:
kernel-4.16.0-0.rc5.git0.1
targetcli-fb-2.1.fb48
python-rtslib-2.1.67
tcmu-runner-1.3.0-rc4
ceph-iscsi-config-2.5
ceph-iscsi-cli-2.6
下载链接:
如果环境之前有安装过其他版本,需要先卸载掉,并且需要提前部署好一个Luminous 最新版本的集群
官方建议调整的参数
# ceph tell osd.* injectargs '--osd_client_watch_timeout 15'
# ceph tell osd.* injectargs '--osd_heartbeat_grace 20'
# ceph tell osd.* injectargs '--osd_heartbeat_interval 5'
配置过程
创建一个存储池
需要用到rbd存储池,用来存储iscsi的配置文件,提前创建好一个名字是rbd的存储池
创建iscsi-gateway配置文件
touch /etc/ceph/iscsi-gateway.cfg
修改iscsi-gateway.cfg配置文件
[config]
# Name of the Ceph storage cluster. A suitable Ceph configuration file allowing
# access to the Ceph storage cluster from the gateway node is required, if not
# colocated on an OSD node.
cluster_name = ceph

# Place a copy of the ceph cluster's admin keyring in the gateway's /etc/ceph
# drectory and reference the filename here
gateway_keyring = ceph.client.admin.keyring


# API settings.
# The API supports a number of options that allow you to tailor it to your
# local environment. If you want to run the API under https, you will need to
# create cert/key files that are compatible for each iSCSI gateway node, that is
# not locked to a specific node. SSL cert and key files *must* be called
# 'iscsi-gateway.crt' and 'iscsi-gateway.key' and placed in the '/etc/ceph/' directory
# on *each* gateway node. With the SSL files in place, you can use 'api_secure = true'
# to switch to https mode.

# To support the API, the bear minimum settings are:
api_secure = false

# Additional API configuration options are as follows, defaults shown.
# api_user = admin
# api_password = admin
# api_port = 5001
# trusted_ip_list = 192.168.0.10,192.168.0.11
最后一行的trusted_ip_list修改为用来配置网关的主机IP,我的环境为
trusted_ip_list =192.168.219.128,192.168.219.129
所有网关节点的这个配置文件的内容需要一致,修改好一台直接scp到每个网关节点上
启动API服务
[root@lab101 install]# systemctl daemon-reload
[root@lab101 install]# systemctl enable rbd-target-api
[root@lab101 install]# systemctl start rbd-target-api
[root@lab101 install]# systemctl status rbd-target-api
● rbd-target-api.service - Ceph iscsi target configuration API
   Loaded: loaded (/usr/lib/systemd/system/rbd-target-api.service; enabled; vendor preset: disabled)
   Active: active (running) since Thu 2018-03-15 09:44:34 CST; 18min ago
 Main PID: 1493 (rbd-target-api)
   CGroup: /system.slice/rbd-target-api.service
           └─1493 /usr/bin/python /usr/bin/rbd-target-api

Mar 15 09:44:34 lab101 systemd[1]: Started Ceph iscsi target configuration API.
Mar 15 09:44:34 lab101 systemd[1]: Starting Ceph iscsi target configuration API...
Mar 15 09:44:58 lab101 rbd-target-api[1493]: Started the configuration object watcher
Mar 15 09:44:58 lab101 rbd-target-api[1493]: Checking for config object changes every 1s
Mar 15 09:44:58 lab101 rbd-target-api[1493]:  * Running on http://0.0.0.0:5000/
配置iscsi
执行gwcli命令

默认是这样的
进入icsi-target创建一个target
/> cd iscsi-target
/iscsi-target> create iqn.2003-01.com.redhat.iscsi-gw:iscsi-igw
ok
创建iSCSI网关。以下使用的IP是用于iSCSI数据传输的IP,它们可以与trusted_ip_list中列出的用于管理操作的IP相同,也可以不同,看有没有做多网卡分离
/iscsi-target> cd iqn.2003-01.com.redhat.iscsi-gw:iscsi-igw/
/iscsi-target...-gw:iscsi-igw> cd gateways
/iscsi-target...-igw/gateways> create lab101 192.168.219.128 skipchecks=true
OS version/package checks have been bypassed
Adding gateway, syncing 0 disk(s) and 0 client(s)
  /iscsi-target...-igw/gateways> create lab102 192.168.219.129 skipchecks=true
OS version/package checks have been bypassed
Adding gateway, sync'ing 0 disk(s) and 0 client(s)
ok
/iscsi-target...-igw/gateways> ls
o- gateways ............. [Up: 2/2, Portals: 2]
  o- lab101 ............. [192.168.219.128 (UP)]
  o- lab102 ............. [192.168.219.129 (UP)]
创建一个rbd设备disk_1
/iscsi-target...-igw/gateways> cd /disks
/disks> create pool=rbd image=disk_1 size=100G
ok
创建一个客户端名称iqn.1994-05.com.redhat:75c3d5efde0
/disks> cd /iscsi-target/iqn.2003-01.com.redhat.iscsi-gw:iscsi-igw/hosts
/iscsi-target...csi-igw/hosts> create iqn.1994-05.com.redhat:75c3d5efde0
ok
创建chap的用户名密码,由于用户名密码都有特殊要求,如果你不确定,就按我给的去设置,并且chap必须设置,否则服务端是禁止连接的
/iscsi-target...t:75c3d5efde0> auth chap=iqn.1994-05.com.redhat:75c3d5efde0/admin@a_12a-bb
ok
chap的命名规则可以这样查询
/iscsi-target...t:75c3d5efde0> help auth

SYNTAX
======
auth [chap]


DESCRIPTION
===========

Client authentication can be set to use CHAP by supplying the
a string of the form <username>/<password>

e.g.
auth chap=username/password | nochap

username ... the username is 8-64 character string. Each character
             may either be an alphanumeric or use one of the following
             special characters .,:,-,@.
             Consider using the hosts 'shortname' or the initiators IQN
             value as the username

password ... the password must be between 12-16 chars in length
             containing alphanumeric characters, plus the following
             special characters @,_,-

WARNING: Using unsupported special characters may result in truncation,
         resulting in failed logins.


Specifying 'nochap' will remove chap authentication for the client
across all gateways.
增加磁盘到客户端
/iscsi-target...t:75c3d5efde0> disk add rbd.disk_1
ok
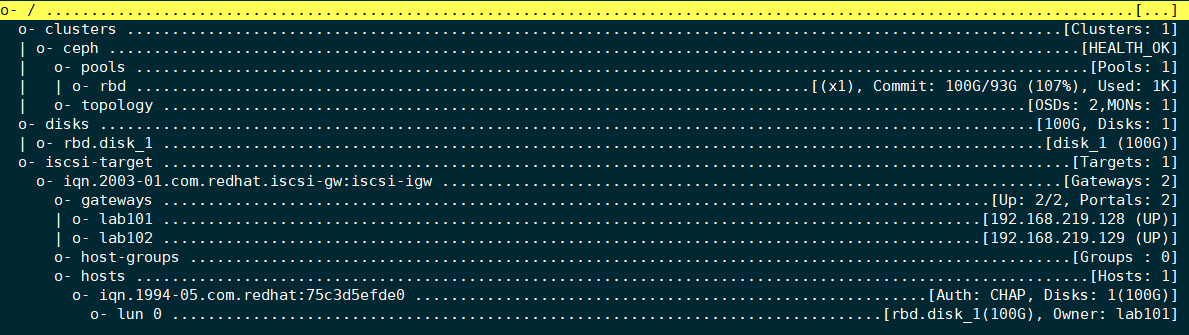
到这里就配置完成了,我们看下最终应该是怎么样的
windows客户端配置
这个地方我配置的时候用的win10配置的时候出现了无法连接的情况,可能是windows10自身的认证要求跟服务端冲突了,这里用windows server 2016 进行连接测试
windows server开启下Multipath IO
修改windows iscsi客户端的名称
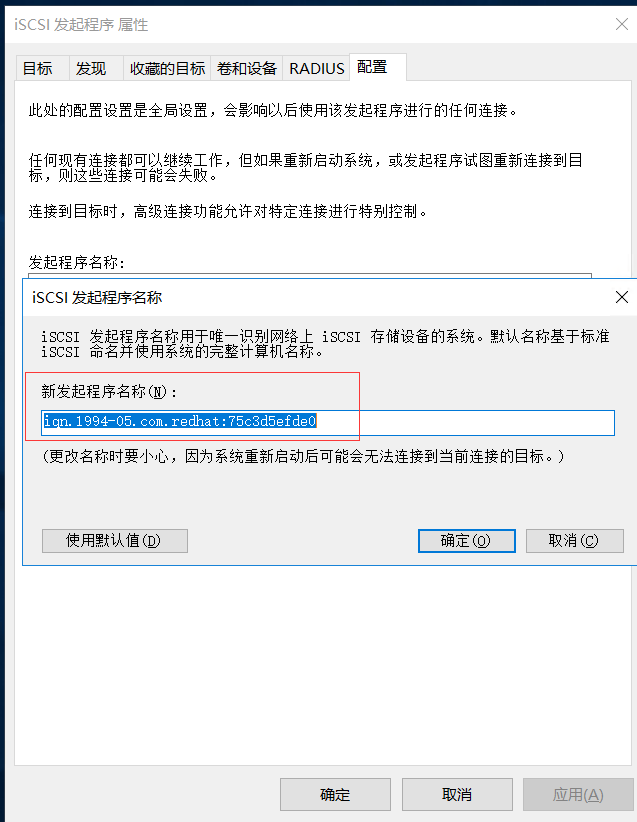
修改为上面创建的客户端名称
发现门户
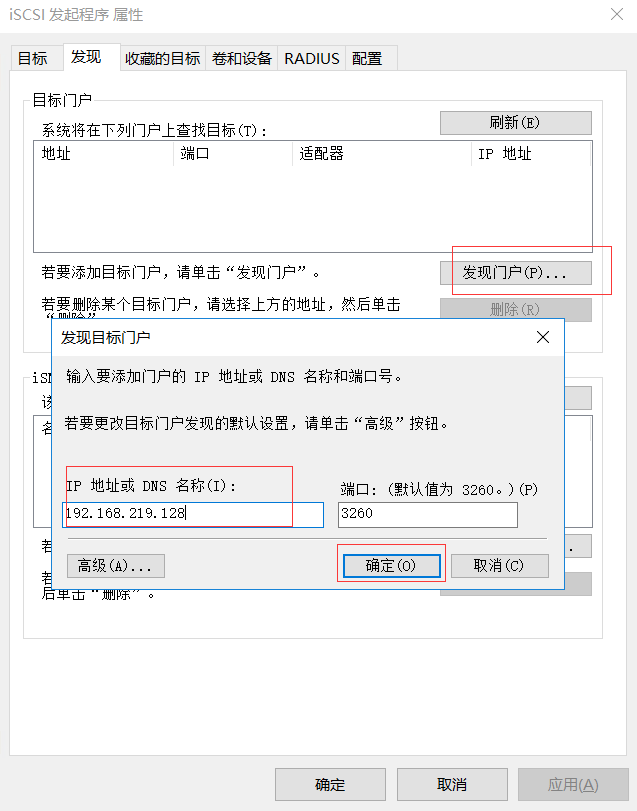
点击发现门户,填写好服务端的IP后直接点确定,这里先不用高级里面的配置
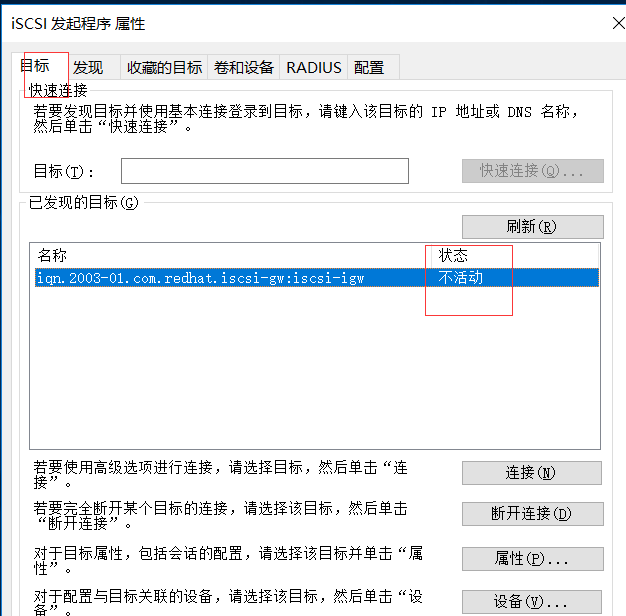
这个时候目标里面已经有一个发现的目标了,显示状态是不活动的,准备点击连接
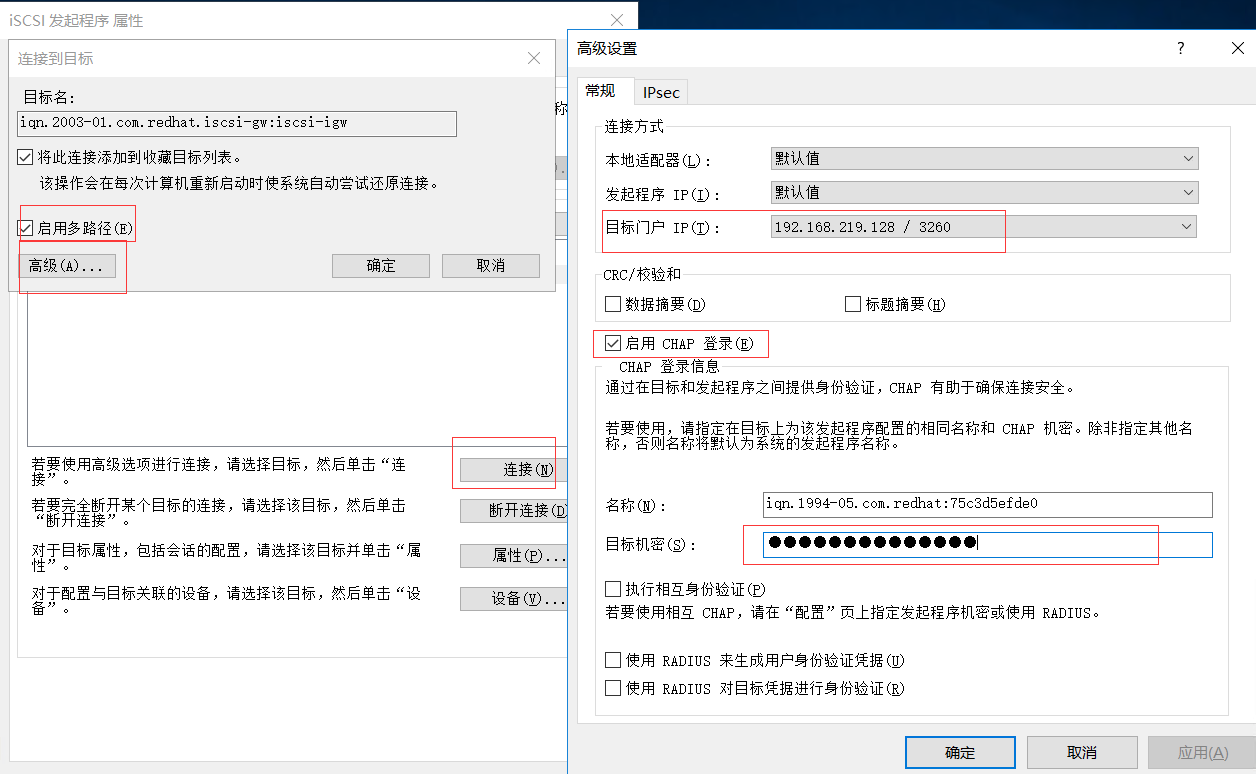
点击高级,选择门户IP,填写chap登陆信息,然后chap名称就是上面设置的用户名称,因为跟客户端名称设置的一致,也就是客户端的名称,密码就是上面设置的admin@a_12a-bb
切换到卷和设备,点击自动配置
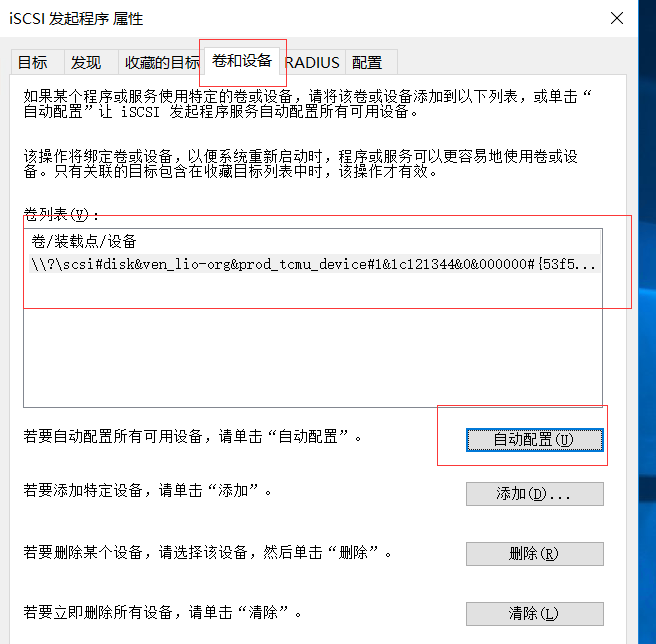
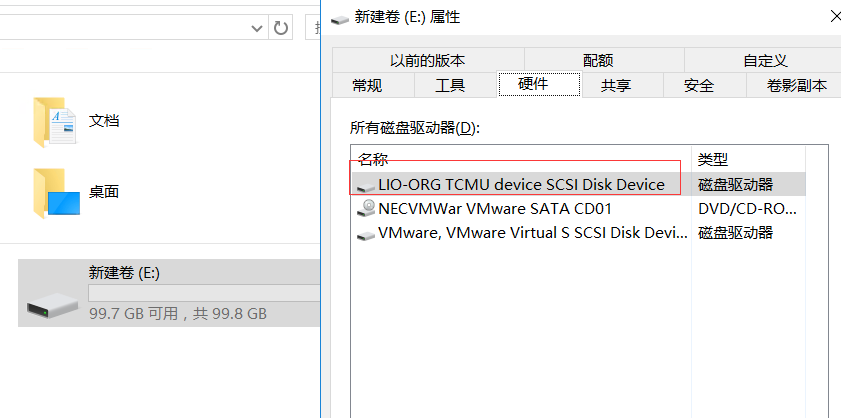
可以看到已经装载设备了
在服务管理器,文件存储服务,卷,磁盘里面查看设备
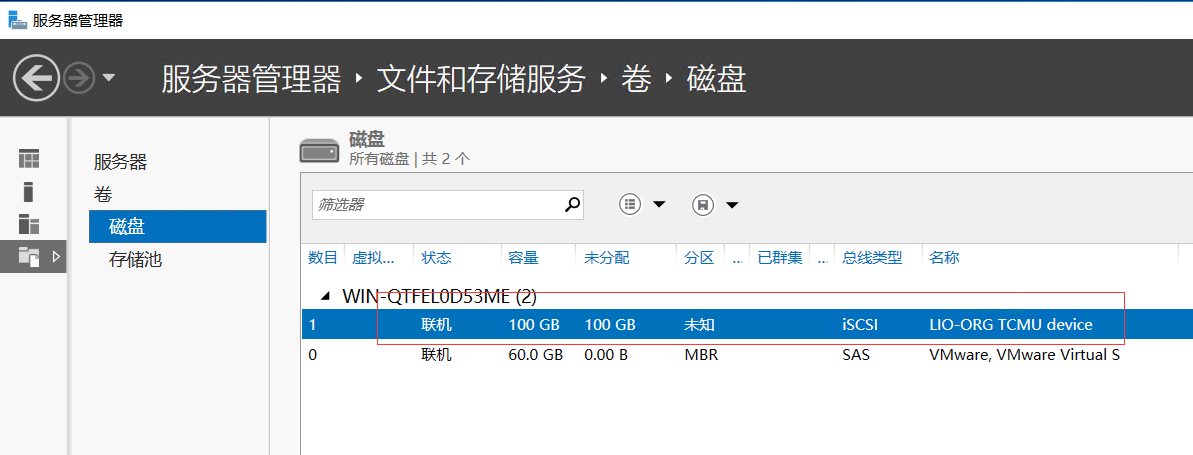
可以看到是配置的LIO-ORG TCMU设备,对设备进行格式化即可
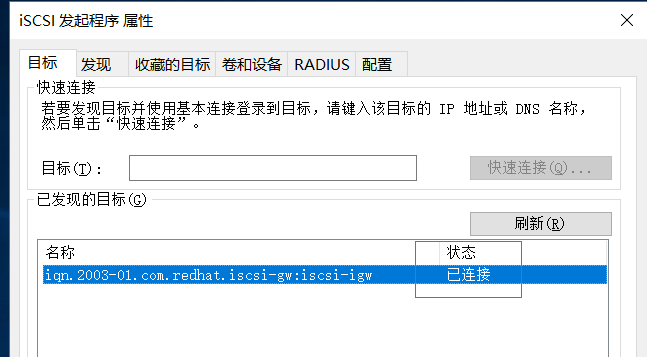
完成了连接了
Linux的客户端连接
Linux客户端选择建议就选择3.10默认内核,选择高版本的内核的时候在配置多路径的时候碰到内核崩溃的问题
安装连接软件
[root@lab103 ~]# yum install iscsi-initiator-utils
[root@lab103 ~]# yum install device-mapper-multipath
配置多路径
开启服务
[root@lab103 ~]# mpathconf --enable --with_multipathd y
修改配置文件/etc/multipath.conf
devices {
        device {
                vendor                 "LIO-ORG"
                hardware_handler       "1 alua"
                path_grouping_policy   "failover"
                path_selector          "queue-length 0"
                failback               60
                path_checker           tur
                prio                   alua
                prio_args              exclusive_pref_bit
                fast_io_fail_tmo       25
                no_path_retry          queue
        }
}
重启多路径服务
[root@lab103 ~]# systemctl reload multipathd
配置chap的认证
修改配置客户端的名称为上面设置的名称
[root@lab103 ~]# cat /etc/iscsi/initiatorname.iscsi
InitiatorName=iqn.1994-05.com.redhat:75c3d5efde0
修改认证的配置文件
[root@lab103 ~]# cat /etc/iscsi/iscsid.conf |grep "node.session.auth.username|node.session.auth.password|node.session.auth.authmethod"
node.session.auth.authmethod = CHAP
node.session.auth.username = iqn.1994-05.com.redhat:75c3d5efde0
node.session.auth.password = admin@a_12a-bb
查询iscsi target
[root@lab103 ~]# iscsiadm -m discovery -t st -p 192.168.219.128
192.168.219.128:3260,1 iqn.2003-01.com.redhat.iscsi-gw:iscsi-igw
192.168.219.129:3260,2 iqn.2003-01.com.redhat.iscsi-gw:iscsi-igw
连接target
[root@lab103 ~]# iscsiadm -m node -T iqn.2003-01.com.redhat.iscsi-gw:iscsi-igw -l
Logging in to [iface: default, target: iqn.2003-01.com.redhat.iscsi-gw:iscsi-igw, portal: 192.168.219.129,3260] (multiple)
Logging in to [iface: default, target: iqn.2003-01.com.redhat.iscsi-gw:iscsi-igw, portal: 192.168.219.129,3260] (multiple)
Login to [iface: default, target: iqn.2003-01.com.redhat.iscsi-gw:iscsi-igw, portal: 192.168.219.129,3260] successful.
Login to [iface: default, target: iqn.2003-01.com.redhat.iscsi-gw:iscsi-igw, portal: 192.168.219.129,3260] successful.
[root@lab101 ~]# multipath -ll
mpathb (360014052fc39ba627874fdba9aefcf6c) dm-4 LIO-ORG ,TCMU device
size=100G features='1 queue_if_no_path' hwhandler='1 alua' wp=rw
|-+- policy='queue-length 0' prio=10 status=active
| `- 5:0:0:0 sdc 8:32 active ready running
`-+- policy='queue-length 0' prio=10 status=enabled
  `- 6:0:0:0 sdd 8:48 active ready running
查看盘符
[root@lab101 ~]# parted -s /dev/mapper/mpathb print
Model: Linux device-mapper (multipath) (dm)
Disk /dev/mapper/mpathb: 107GB
Sector size (logical/physical): 512B/512B
Partition Table: gpt
Disk Flags:

Number  Start   End    Size   File system  Name                          Flags
 1      17.4kB  134MB  134MB               Microsoft reserved partition  msftres
 2      135MB   107GB  107GB  ntfs         Basic data partition
直接使用这个/dev/mapper/mpathb设备即可
变更记录
| Why | Who | When |
|---|---|---|
| 创建 | 武汉-运维-磨渣 | 2018-04-11 |