1.安装依赖
yum search libaio           #检索是否有对应库
yum install -y libaio        #安装依赖包
2.检查MySQL是否已经安装
yum installed | grep mysql
No such command: installed. Please use /bin/yum --help
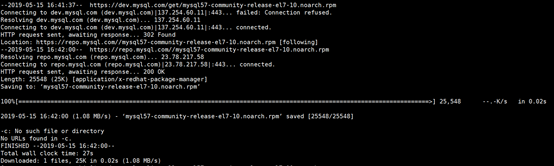
3.下载MySQL Yum Repository(yum仓库)
4.如果没有wget命令,则下载对应安装包
yum –y install wget
5.添加MySQL Yum Repository到系统repository列表中

6.验证是否添加成功
yum repolist enabled | grep "mysql.*-community.*"

![]()
7.安装MySQL
yum -y install mysql-community-server

8.启动MySQL
systemctl start mysqld
systemctl status mysqld        #查看状态

9.验证MySQL
登陆:mysql -uroot –p

输入密码登陆。

mysql: [Warning] Using a password on the command line interface can be insecure.

Welcome to the MySQL monitor.  Commands end with ; or g.

Your MySQL connection id is 2

Server version: 5.7.26


Copyright (c) 2000, 2019, Oracle and/or its affiliates. All rights reserved.


Oracle is a registered trademark of Oracle Corporation and/or its

affiliates. Other names may be trademarks of their respective

owners.


Type 'help;' or 'h' for help. Type 'c' to clear the current input statement.

mysql> show databases;

+--------------------+

| Database           |

+--------------------+

| information_schema |

| mysql              |

| performance_schema |

| sys                |

+--------------------+

4 rows in set (0.00 sec)
10.创建Hive需要的数据库
mysql> create database if not exists hive_metadata;

Query OK, 1 row affected (0.01 sec)


mysql> show databases;

+--------------------+

| Database           |

+--------------------+

| information_schema |

| hive_metadata      |

| mysql              |

| performance_schema |

| sys                |

+--------------------+

5 rows in set (0.00 sec)
为hive_metadata设置权限
grant all privileges on hive_metadata.* to 'hive'@'%' identified by 'hive';

grant all privileges on hive_metadata.* to 'hive'@'locaclhost' identified by 'hive';

grant all privileges on hive_metadata.* to 'hive'@'centos-master' identified by 'hive';

flush privileges;
(Navicat)连接测试

以上就是博主为大家介绍的这一板块的主要内容,这都是博主自己的学习过程,希望能给大家带来一定的指导作用,有用的还望大家点个支持,如果对你没用也望包涵,有错误烦请指出。如有期待可关注博主以第一时间获取更新哦,谢谢!同时也欢迎转载,但必须在博文明显位置标注原文地址,解释权归博主所有!