界面一:
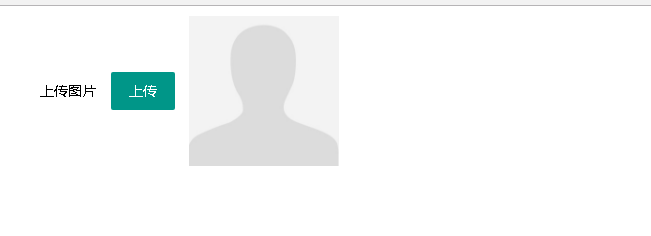


<link href="../theme/js/layui.layim/src/css/layui.css" rel="stylesheet"/>
<style>
    #form1 { padding: 10px; }
    .usericon { margin-left: 0; }
</style>

<form class="layui-form" id="form1" runat="server">
    <div class="layui-form-item">
        <div class="layui-inline">
            <label class="layui-form-label">上传图片</label>
            <div class="layui-input-block">
                <button id="btnUpload" class="layui-btn" type="button">上传</button>
            </div>
        </div>
        <div class="layui-inline">
            <div class="layui-input-block usericon">
                <img id="imgShow" src="../theme/img/user.jpg" onerror="../theme/img/user.jpg" width="150" height="150" />
            </div>
        </div>
    </div>
</form>
<script src="../theme/js/layui.layim/src/layui.js"></script>
<script src="../theme/js/jquery.min.js"></script>
<script type="text/javascript">
    layui.use(['layer'], function () {
        //上传
        $("#btnUpload").on("click", function () {
            layer.open({
                title: ['上传', 'font-size:18px;'],
                area: ['700px', '550px'],
                fixed: false, //不固定
                maxmin: true,
                type: 2,
                content: "/test/PreviewImg.aspx"
            });
        });
    });
    function Update(src) {
        $("#imgShow").attr("src", src);
    }
</script>
界面二:
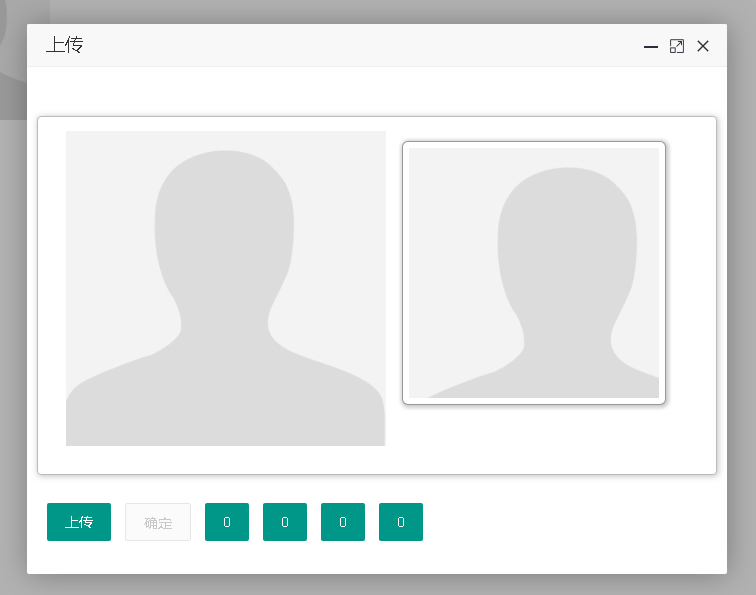
<link href="../theme/js/layui.layim/src/css/layui.css" rel="stylesheet" />
<link href="../theme/js/Jcrop/css/jquery.Jcrop.min.css" rel="stylesheet" />
<style>
    .container { margin-right: auto; margin-left: auto; *zoom: 1; }
        .container:before,
        .container:after { display: table; content: ""; line-height: 0; }
        .container:after { clear: both; }
    .row { *zoom: 1; }
        .row:before,
        .row:after { display: table; content: ""; line-height: 0; }
        .row:after { clear: both; }
    .span12 { margin-left: 10px; margin-right: 10px; }
    .span12 .layui-btn{margin-left:10px;}
    .jc-demo-box { text-align: left; margin: 2em auto; background: white; border: 1px #bbb solid; -webkit-border-radius: 4px; -moz-border-radius: 4px; border-radius: 4px; -webkit-box-shadow: 1px 1px 10px rgba(0, 0, 0, 0.25); -moz-box-shadow: 1px 1px 10px rgba(0, 0, 0, 0.25); box-shadow: 1px 1px 10px rgba(0, 0, 0, 0.25); padding: 1em 2em 2em; }
    form { margin: 1.5em 0; }
    .jcrop-holder #preview-pane { display: block; position: absolute; z-index: 2000; top: 10px; right: -280px; padding: 6px; border: 1px rgba(0,0,0,.4) solid; background-color: white; -webkit-border-radius: 6px; -moz-border-radius: 6px; border-radius: 6px; -webkit-box-shadow: 1px 1px 5px 2px rgba(0, 0, 0, 0.2); -moz-box-shadow: 1px 1px 5px 2px rgba(0, 0, 0, 0.2); box-shadow: 1px 1px 5px 2px rgba(0, 0, 0, 0.2); }
    #preview-pane .preview-container { width: 250px; height: 250px; overflow: hidden; }
</style>

<form id="form1" runat="server">
    <div class="container">
        <div class="row">
            <div class="span12">
                <div class="jc-demo-box">
                    <img src="../theme/img/user.jpg" id="target" alt="[Jcrop Example]" />
                    <div id="preview-pane">
                        <div class="preview-container">
                            <img src="../theme/img/user.jpg" class="jcrop-preview" alt="Preview" />
                        </div>
                    </div>
                </div>
                <button id="btnUpload" class="layui-btn" type="button">上传</button>
                <button id="btnOk" class="layui-btn layui-btn-disabled" type="button">确定</button>
                <button id="btnX" class="layui-btn" type="button">0</button>
                <button id="btnY" class="layui-btn" type="button">0</button>
                <button id="btnW" class="layui-btn" type="button">0</button>
                <button id="btnH" class="layui-btn" type="button">0</button>
            </div>
        </div>
    </div>
    <asp:HiddenField ID="x1" runat="server" />
    <asp:HiddenField ID="y1" runat="server" />
    <asp:HiddenField ID="w" runat="server" />
    <asp:HiddenField ID="h" runat="server" />
</form>
<script src="../theme/js/jquery.min.js"></script>
<script src="../theme/js/Jcrop/js/jquery.Jcrop.min.js"></script>
<script src="../theme/js/layui.layim/src/layui.js"></script>
jQuery(function ($) {
    // Create variables (in this scope) to hold the API and image size
    var jcrop_api,
        boundx,
        boundy,
        // Grab some information about the preview pane
        $preview = $('#preview-pane'),
        $pcnt = $('#preview-pane .preview-container'),
        $pimg = $('#preview-pane .preview-container img'),
        xsize = $pcnt.width(),
        ysize = $pcnt.height();
    //console.log('init', [xsize, ysize]);
    $('#target').Jcrop({
        onChange: updatePreview,
        onSelect: updatePreview,
        aspectRatio: xsize / ysize
    }, function () {
        // Use the API to get the real image size
        var bounds = this.getBounds();
        boundx = bounds[0];
        boundy = bounds[1];
        // Store the API in the jcrop_api variable
        jcrop_api = this;
        // Move the preview into the jcrop container for css positioning
        $preview.appendTo(jcrop_api.ui.holder);
    });
    function updatePreview(c) {
        if (parseInt(c.w) > 0) {
            var rx = xsize / c.w;
            var ry = ysize / c.h;
            $pimg.css({
                 Math.round(rx * boundx) + 'px',
                height: Math.round(ry * boundy) + 'px',
                marginLeft: '-' + Math.round(rx * c.x) + 'px',
                marginTop: '-' + Math.round(ry * c.y) + 'px'
            });
        }
        $('#x1').val(c.x);//左顶点的x坐标
                $('#y1').val(c.y);//右顶点的x坐标
                $('#w').val(c.w);//截图的宽度
                $('#h').val(c.h);//截图的高度
        $('#btnX').html(c.x);//左顶点的x坐标
                $('#btnY').html(c.y);//右顶点的x坐标
                $('#btnW').html(c.w);//截图的宽度
                $('#btnH').html(c.h);//截图的高度
    };
});
//上传文件
layui.use('upload', function () {
    var upload = layui.upload;
    //单个文件上传
    var uploadInst = upload.render({
        elem: '#btnUpload' //绑定元素
      , url: '/test/ashx/ashx.ashx' //上传接口
      , data: {
          action: "uploadimg"
          //, maxSize: $(".jcrop-holder>.jcrop-tracker").width()
      }
      , before: function (obj) {//在 choose 回调之后、done/error 回调之前触发
          //layer.load(); //上传loading
      }
      , done: function (res) {
          //上传完毕回调
          $("#target").attr("src", res.data.src);
          $(".jcrop-holder>img").attr("src", res.data.src);
          $(".preview-container>img.jcrop-preview").attr("src", res.data.src);
          $(".jcrop-tracker").siblings("img").attr("src", res.data.src);
          //上传图片后-确定按钮可用
          $("#btnOk").removeClass("layui-btn-disabled");

      }
      , error: function () {
          //请求异常回调
      }
    });
});
//确定
$("#btnOk").on("click", function () {
    if (!$(this).hasClass("layui-btn-disabled")) {
       var x= $('#x1').val();//左顶点的x坐标
       var y = $('#y1').val();//右顶点的x坐标
       var w = $('#w').val();//截图的宽度
       var h = $('#h').val();//截图的高度
        $.ajax({
            //提交数据的类型 POST GET
            type: "POST",
            //提交的网址
            url: '/test/ashx/ashx.ashx',
            //提交的数据
            data: {
                action: "cutimg",
                x: x,
                y: y,
                w: w,
                h: h,
                src: $("#target").attr("src"),
                maxWidth: $(".jcrop-holder>.jcrop-tracker").width(),
                maxHeight: $(".jcrop-holder>.jcrop-tracker").height()
            },
            //返回数据的格式-"xml", "html", "script", "json", "jsonp", "text".
            datatype: "json",
            //成功返回之后调用的函数
            success: function (data) {
                if (data.code == 0) {
                    parent.Update(data.src);
                    CloseThis();
                }
            },
            //调用出错执行的函数
            error: function () {
                //请求出错处理
            }
        });
    }
});
//关闭当前iframe
function CloseThis() {
    //先得到当前iframe层的索引
    var index = parent.layer.getFrameIndex(window.name);
    parent.layer.close(index); //再执行关闭
}
/// <summary>
/// 上传图片(如果没有传入宽高,不压缩图片)
/// </summary>
/// <param name="context"></param>
/// <returns></returns>
private string Uploadimg(HttpContext context)
{
    int maxSize = 0;//压缩后的最大尺寸(长或高,单位px)
    int.TryParse(context.Request.Params["maxSize"], out maxSize);
    //图片保存路径
    string savePath = "/uploadfiles/test/" + DateTime.Now.ToString("yyyyMM") + "/";
    if (!Directory.Exists(context.Server.MapPath(savePath)))
    {
        Directory.CreateDirectory(context.Server.MapPath(savePath));
    }
    string fileName = Guid.NewGuid().ToString("N");
    HttpPostedFile file = context.Request.Files[0];//上传的图片
    if (file != null)
    {//上传的图片不为空
        string fileExt = Path.GetExtension(file.FileName);//文件扩展名
        fileName += fileExt;
        //压缩后的图片
        Bitmap img = FileExt.ImageZip(file.InputStream, fileExt, maxSize);
        if (img != null)
        {//压缩后的图片不为空
            img.Save(context.Server.MapPath(savePath + fileName));
        }
        else
        {//原图片保存
            file.SaveAs(context.Server.MapPath(savePath + fileName));
        }
    }
    return "{"code":0,"msg":"上传成功","data":{"src":"" + (savePath + fileName) + ""}}";
}
/// <summary>
/// 裁剪图片-返回裁剪后的图片地址
/// </summary>
/// <param name="context"></param>
/// <returns></returns>
private string CutImg(HttpContext context)
{
    string src = context.Request.Params["src"];//原图片地址
    Image file = Image.FromFile(context.Server.MapPath(src));//上传的图片
    int x = string.IsNullOrEmpty(context.Request.Params["x"]) ? 0 : int.Parse(context.Request.Params["x"]);//左顶点的x坐标
    int y = string.IsNullOrEmpty(context.Request.Params["y"]) ? 0 : int.Parse(context.Request.Params["y"]);//右顶点的x坐标
    int w = string.IsNullOrEmpty(context.Request.Params["w"]) ? 0 : int.Parse(context.Request.Params["w"]);//截图的宽度
    int h = string.IsNullOrEmpty(context.Request.Params["h"]) ? 0 : int.Parse(context.Request.Params["h"]);//截图的高度
    int maxWidth = string.IsNullOrEmpty(context.Request.Params["maxWidth"]) ? 0 : int.Parse(context.Request.Params["maxWidth"]);//最大宽
    int maxHeight = string.IsNullOrEmpty(context.Request.Params["maxHeight"]) ? 0 : int.Parse(context.Request.Params["maxHeight"]);//最大高

    string fileExt = Path.GetExtension(src);//图片格式
    string fileName = Guid.NewGuid().ToString("N") + fileExt;
    string savePath = "/uploadfiles/test/" + DateTime.Now.ToString("yyyyMM") + "/" + fileName;

    CutImage(GetReducedImage(file, maxHeight, maxHeight), x, y, w, h, savePath, context);
    return "{"code":0,"src":"" + savePath + ""}";
}

/// <summary>
/// 生成缩略图重载方法1,返回缩略图的Image对象
/// </summary>
/// <param name="Width">缩略图的宽度</param>
/// <param name="Height">缩略图的高度</param>
/// <returns>缩略图的Image对象</returns>
public Bitmap GetReducedImage(Image ResourceImage, int Width, int Height)
{
    try
    {
        //用指定的大小和格式初始化Bitmap类的新实例
        Bitmap bitmap = new Bitmap(Width, Height, PixelFormat.Format32bppArgb);
        //从指定的Image对象创建新Graphics对象
        Graphics graphics = Graphics.FromImage(bitmap);
        //清除整个绘图面并以透明背景色填充
        graphics.Clear(Color.Transparent);
        //在指定位置并且按指定大小绘制原图片对象
        graphics.DrawImage(ResourceImage, new Rectangle(0, 0, Width, Height));
        return bitmap;
    }
    catch (Exception e)
    {
        return null;
    }
}

/// <summary>
/// 截取图片方法
/// </summary>
/// <param name="bitmap">原图</param>
/// <param name="beginX">开始位置-X</param>
/// <param name="beginY">开始位置-Y</param>
/// <param name="width">截取宽度</param>
/// <param name="height">截取长度</param>
/// <param name="path">保存路径</param>
/// <param name="context">上下文</param>
public static void CutImage(Bitmap bitmap, int beginX, int beginY, int width, int height, string path, HttpContext context)
{
    if (beginX + width > bitmap.Width)
        beginX = bitmap.Width - width;
    if (beginY + height > bitmap.Height)
        beginY = bitmap.Height - height;
    Bitmap destBitmap = new Bitmap(width, height);//目标图
    Rectangle destRect = new Rectangle(0, 0, width, height);//矩形容器
    Rectangle srcRect = new Rectangle(beginX, beginY, width, height);
    Graphics g = Graphics.FromImage(destBitmap);
    g.DrawImage(bitmap, destRect, srcRect, GraphicsUnit.Pixel);
    destBitmap.Save(context.Server.MapPath(path), ImageFormat.Jpeg);
}