1: package com.example.notification;
2:
3: import android.net.Uri;
4: import android.os.Bundle;
5: import android.app.Activity;
6: import android.app.AlertDialog;
7: import android.app.Notification;
8: import android.app.NotificationManager;
9: import android.app.PendingIntent;
10: import android.content.Context;
11: import android.content.DialogInterface;
12: import android.content.Intent;
13: import android.view.Menu;
14: import android.view.View;
15: import android.widget.Button;
16:
17: public class MainActivity extends Activity {
18:
19: @Override
20: protected void onCreate(Bundle savedInstanceState) {
21: super.onCreate(savedInstanceState);
22: setContentView(R.layout.activity_main);
23: Button button = (Button)findViewById(R.id.button);
24:
25: button.setOnClickListener(new View.OnClickListener() {
26:
27: @Override
28: public void onClick(View v) {
29: // TODO Auto-generated method stub
30: new AlertDialog.Builder(MainActivity.this)
31: .setTitle("sharpandroid")
32: .setMessage("你确定要访问 Android 网站吗?")
33: .setCancelable(false)
34: .setPositiveButton("确定", new DialogInterface.OnClickListener() {
35: public void onClick(DialogInterface dialog, int id) {
36: //创建一个访问“http://www.android.com”网站的意图,
37: //该意图会告知系统打开浏览器,并访问该网址。
38: Intent intent = new Intent(Intent.ACTION_VIEW,
39: Uri.parse("http://www.android.com"));
40: startActivity(intent);
41: }
42: })
43: .setNegativeButton("取消", new DialogInterface.OnClickListener() {
44: public void onClick(DialogInterface dialog, int id) {
45: dialog.cancel(); //删除对话框
46: }
47: }).show();//显示对话框
48:
49: }
50: });
51: }
52:
53: @Override
54: public boolean onCreateOptionsMenu(Menu menu) {
55: // Inflate the menu; this adds items to the action bar if it is present.
56: getMenuInflater().inflate(R.menu.main, menu);
57: return true;
58: }
59:
60: }
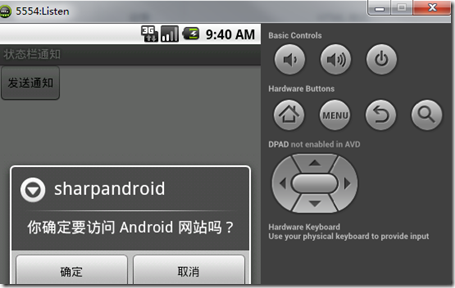
AlertDialog.Builder builder = new
AlertDialog.Builder(AlertDialogActivity.this);
创建一个 AlertDialog 类的内部类 Builder 的对象。
� builder.setTitle("sharpandroid")
为 builer 设置标题
� setMessage("你确定要访问 Android 网站吗?")
为 builer 设置消息内容
� setCancelable(false)
设置为 false 后,键盘上的后退键失效。
� setPositiveButton("确定",
new DialogInterface.OnClickListener() {
public void onClick(DialogInterface dialog, int id) {
//创建一个访问“http://www.android.com”网站的意图,
//该意图会告知系统打开浏览器,并访问该网址。
Intent intent = new Intent(Intent.ACTION_VIEW,
Uri.parse("http://www.android.com"))
;
startActivity(intent);
}
})
添 加 确 定 按 钮 , 并 添 加 对 该 按 钮 的 处 理 事 件 。 本 例 中 的 处 理 事 件 是 访 问
http://www.android.com 网站。
� .setNegativeButton("取消", new DialogInterface.OnClickListener() {
public void onClick(DialogInterface dialog, int id)
{
dialog.cancel(); //删除对话框
}
});
添加拒绝按钮,并添加处理事件,处理结果是删除该对话框。
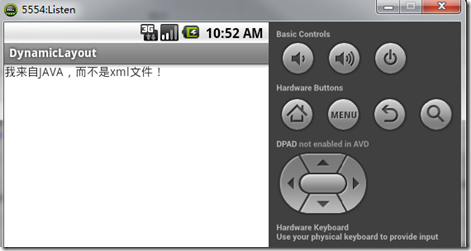
下面介绍一种不用xml文件,而是用.java文件生成布局文件的方法:
1: package com.example.dynamiclayout;
2:
3: import android.os.Bundle;
4: import android.app.Activity;
5: import android.view.Menu;
6: import android.view.ViewGroup;
7: import android.widget.LinearLayout;
8: import android.widget.TextView;
9:
10: public class MainActivity extends Activity {
11:
12: @Override
13: protected void onCreate(Bundle savedInstanceState) {
14: super.onCreate(savedInstanceState);
15: //setContentView(R.layout.activity_main);
16: //创建一个线性布局文件
17: LinearLayout layout = new LinearLayout(this);
18: //创建一个布局参数,确定该线性布局的宽和高。
19: LinearLayout.LayoutParams layoutParams = new LinearLayout.LayoutParams(ViewGroup.LayoutParams.FILL_PARENT, ViewGroup.LayoutParams.FILL_PARENT);
20: //把该组件显示在屏幕上
21: setContentView(layout,layoutParams);
22: //创建一个 TextView
23: TextView textView = new TextView(this);
24: //设置 textView 上显示的文字信息
25: textView.setText("我来自JAVA,而不是xml文件!");
26: //创建一个布局参数,确定该线性布局的宽和高。
27: LinearLayout.LayoutParams tLayoutParams = new LinearLayout.LayoutParams(ViewGroup.LayoutParams.FILL_PARENT, ViewGroup.LayoutParams.FILL_PARENT);
28: //将 textView 添加入布局文件中,并在屏幕中显示
29: layout.addView(textView,tLayoutParams);
30: }
31:
32: @Override
33: public boolean onCreateOptionsMenu(Menu menu) {
34: // Inflate the menu; this adds items to the action bar if it is present.
35: getMenuInflater().inflate(R.menu.main, menu);
36: return true;
37: }
38:
39: }
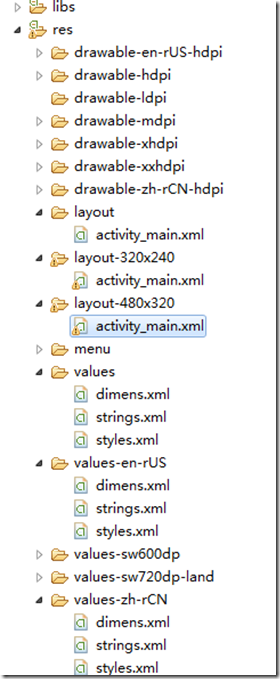
国际化:
一般情况下,只需要将value文件夹改变和drawable 抽屉文件夹改变,然后通过更改手机
的setting,语言包,会自动调入。系统会自动调入你刚刚新建的语言包。这个比较好!没有的话,会
载入默认的包。
以上之文字来自于 values-en-rUS 文件夹下的 strings.xml 文件中。
以上之图片来自于 drawable-en-rUS-hdpi 文件夹下的 sharpandroid.png 文件。
最后补充一点,如果没有对应的国家的 values、drawable 包,如没有 values-en-rUS,
那么默认会使用 values 包下的内容。
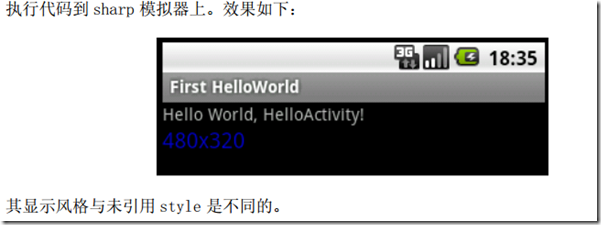
为hello world 指定样式
<resources xmlns:android="http://schemas.android.com/apk/res/android">

    <!--
        Base application theme, dependent on API level. This theme is replaced
        by AppBaseTheme from res/values-vXX/styles.xml on newer devices.
    -->
    <style name="AppBaseTheme" parent="android:Theme.Light">
        <!--
            Theme customizations available in newer API levels can go in
            res/values-vXX/styles.xml, while customizations related to
            backward-compatibility can go here.
        -->
    </style>

    <!-- Application theme. -->
    <style name="AppTheme" parent="AppBaseTheme">
        <!-- All customizations that are NOT specific to a particular API-level can go here. -->
    </style>

    <style name="sharp"><!-- 为样式定义一个全局的唯一的名字 -->
        <item name = "android:textSize">18px</item><!--name 属性为样式要用在的View 控件持有的属性   -->
    <item name="android:textColor">#0000CC</item>
    </style>
</resources>
在布局文件中的使用方法:
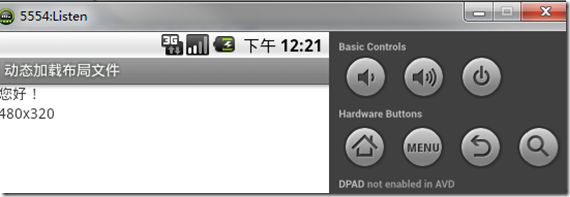
<TextView
style="@style/sharp"
android:layout_width="wrap_content"
android:layout_height="wrap_content"
android:text="480x320" />
<style>元素中有一个 parent 属性。这个属性可以让当前样式继承一个父样式,当前样
式可以继承到父样式的值。 当然, 如果父样式的值不符合你的需求, 你也可以对它进行修改,
如下:
<style name="subsharp" parent="@style/sharp">
<item name="android:textColor">#FF0000</item>
</style>
如何引用主题 theme
下面代码显示在 AndroidManifest.xml 中如何为应用设置上面定义的主题:
<application android:icon="@drawable/icon" android:label="@string/app_name"
android:theme="@style/sharpTheme">
......
</application>
尽管在定义上, 样式和主题基本相同, 但是它们使用的地方不同。 样式用在单独的 View,
如 : EditText 、 TextView 等 ;主 题通 过 AndroidManifest.xml 中 的 <application> 和
<activity>用在整个应用或者某个 Activity, 主题对整个应用或某个 Activity 进行全局性
影响。如果一个应用使用了主题,同时应用下的 view 也使用了样式,那么当主题与样式属
性发生冲突时,样式的优先级高于主题。
另外 android 系统也定义了一些主题,例如:
<activity android:theme= “@android:style/Theme.Dialog”>,该主题可以让 Activity 看起来像
一个对话框, 如果需要查阅这些主题, 可以在文档的 reference—>android —>R.style 中查看。
