本文基于6.1版本的PMD.如果你是工作中用到这个工具,请结合你的源码看.因为源码分析实际上DEBUG也能知道,但PMD涉及的类非常多,十遍debug也不能掌握大部分吧.
0. 大纲
a) Core篇
b) XML篇
c) 后续
1.Core篇
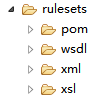
PMD支持对XML文件的扫描,本身对xml的规则支持非常少,而且还分为xml,POM,wsdl等部分. 看起来有四个ruleSets(规则集)实际上,没有几个规则(笑).本文主要对xml的解析进行源码跟踪解读,core篇涉及部分为参数配置的封装,对应parser(解析器)的生成,xpathRule的讲解.可能有部分漏,请谅解,本文大致做类的说明和方法调用,不写最详细的callgraph,因为我认为几个功能入口找对,便把握了核心.
首先PMD的解析入口是Core包下的net.sourceforge.pmd.PMD,入口方法是main,核心分析方法是doPMD方法.(下次会简单讲解下PMD的执行参数)
 1  public static int doPMD(PMDConfiguration configuration) {
 2
 3         //使用工厂方法来加载ruleSet 规则集.会将配置configuration对象里的ruleSet属性转换成对应的ruleSet..ruleSet是rule规则类的集合
 4         RuleSetFactory ruleSetFactory = RulesetsFactoryUtils.getRulesetFactory(configuration, new ResourceLoader());
 5         RuleSets ruleSets = RulesetsFactoryUtils.getRuleSetsWithBenchmark(configuration.getRuleSets(), ruleSetFactory);
 6         if (ruleSets == null) {
 7             return 0;
 8         }
 9     //对当前参数中的语言进行解析,生成language对象,后续对这个language进行传递,来获得具体的file资源(过滤文件后缀名extension)
10         Set<Language> languages = getApplicableLanguages(configuration, ruleSets);
11         List<DataSource> files = getApplicableFiles(configuration, languages);
12
13         long reportStart = System.nanoTime();
14         try {
15             Renderer renderer = configuration.createRenderer(); //根据参数生成对应的render,输出类(以固定格式输出到文件)
16             List<Renderer> renderers = Collections.singletonList(renderer);
17
18             renderer.setWriter(IOUtil.createWriter(configuration.getReportFile()));
19             renderer.start();
20        ...22
23             RuleContext ctx = new RuleContext();
24            ...36        //对文件流进行具体分析的入口,指定了规则集工厂,文件,ctx(上下文,在规则调用中传递当前分析文件路径等信息,render是最终渲染输出的类)
37             processFiles(configuration, ruleSetFactory, files, ctx, renderers);
38       ...
从processFiles进入,会启用线程,并传入文件类,规则上下文
 if (configuration.getThreads() > 0) { //多线程类
            new MultiThreadProcessor(configuration).processFiles(silentFactoy, files, ctx, renderers);
        } else { //单线程类
            new MonoThreadProcessor(configuration).processFiles(silentFactoy, files, ctx, renderers);
        }
AbstractPMDProcessor是MultiThreadProcessor的父类,下次有空会简单分析下PMD的多线程使用,这也是让我学到一些并发库知识的地方.
processFiles里核心代码是这一句:
runAnalysis(new PmdRunnable(dataSource, niceFileName, renderers, ctx, rs, processor));
简单来讲,PMD将一系列需要的参数封装到PmdRunnable里面,这个Runnable实际上是Callable的实现类,是通过这个类的call方法里调用到:
sourceCodeProcessor.processSourceCode(stream, tc.ruleSets, tc.ruleContext);
SourceCodeProcessor顾名思义就是核心的代码源分析类.调用processSourceCode后.对参数做各种封装,再调用自身的好几个processSource方法,但最核心的是:
 1 private void processSource(Reader sourceCode, RuleSets ruleSets, RuleContext ctx) {
 2         LanguageVersion languageVersion = ctx.getLanguageVersion();
 3         LanguageVersionHandler languageVersionHandler = languageVersion.getLanguageVersionHandler();
 4        //生成对应语言的解析器,我们这里生成XmlParser
 5         Parser parser = PMD.parserFor(languageVersion, configuration);
 6        //调用XmlParser的parse方法解析资源代码
 7         Node rootNode = parse(ctx, sourceCode, parser);
 8         symbolFacade(rootNode, languageVersionHandler);
 9         Language language = languageVersion.getLanguage();
10         ...
11         List<Node> acus = Collections.singletonList(rootNode);
12         //规则分析代码的核心!!
13         ruleSets.apply(acus, ctx, language);
14     }
这里算是离最终的解析Node最近的一步了.PMD使用了大量的parser但是有很好的抽取和抽象父类,一切基于java的多态得以完美运作.
至此,core篇的几个重要的类就这样.(我省略了好多目前无关紧要的类)
2.XML篇
core篇最终是生成对应的parser,而这里就是XmlParser了,来看看parse方法内部是什么.
public Node parse(String fileName, Reader source) throws ParseException {
        return new net.sourceforge.pmd.lang.xml.ast.XmlParser((XmlParserOptions) parserOptions).parse(source);
    }
这里是new了一个xml工程里ast包下的parser来解析,为什么这样做,是因为开发者考虑了xml的多个parser的可能性,这个ast包外的XmlParser只是个xml工程入口的开端,然后看情况对parser做具体分发.
实际上ast下的parser的代码是这样的(这里是文件里的xml进行分析生成AST的核心步骤!)
 1  protected Document parseDocument(Reader reader) throws ParseException {
 2         nodeCache.clear();
 3         try {
 4             String xmlData = IOUtils.toString(reader);
 5
 6             DocumentBuilderFactory dbf = DocumentBuilderFactory.newInstance();
 7             ... //做一些set,防XXE攻击
 8             DocumentBuilder documentBuilder = dbf.newDocumentBuilder();
 9             documentBuilder.setEntityResolver(parserOptions.getEntityResolver());
10             Document document = documentBuilder.parse(new InputSource(new StringReader(xmlData)));
11       //解析生成行号的核心步骤
12             DOMLineNumbers lineNumbers = new DOMLineNumbers(document, xmlData);
13       //生成行号的方法.determine  可以点源码进去看看
14             lineNumbers.determine();
15             return document;
16         } catch (ParserConfigurationException | SAXException | IOException e) {
17             throw new ParseException(e);
18         }
19     }
20
21
22     public XmlNode parse(Reader reader) {
23     //实际上是用了DOM4J来解析
24         Document document = parseDocument(reader);
25         XmlNode root = new RootXmlNode(this, document);
26         nodeCache.put(document, root);
27         return root;
28     }
简单理解:PMD的XML的AST的生成是基于DOM4J做xml文件分析成DOM树,然后做行列号解析和封装的.(比java代码的解析要简单大概100倍吧,java是基于javacc的),这是xml的node基本类:
public interface XmlNode extends Node, AttributeNode {
    String BEGIN_LINE = "pmd:beginLine";
    String BEGIN_COLUMN = "pmd:beginColumn";
    String END_LINE = "pmd:endLine";
    String END_COLUMN = "pmd:endColumn";

    //w3c的node + 各种行列号 = PMD的XmlNode
    org.w3c.dom.Node getNode();
}
至此,xml的Node(AST)已经生成,重新返回到CORE工程的rule下.
为了加快进度,我就简单讲解下.
在ruleSets.apply(List<Node>, ctx, language)里,ruleSets是rule类的集合,接下来PMD做的事情非常简单,就是遍历ruleSet里的rule,并让rule来apply每一个文件.
如果在规则集的配置里使用的是xpath,那就必须在class配置net.sourceforge.pmd.lang.rule.XPathRule,这样最终调用apply就会跑到XpathRule这里,因为这些rule都继承了同样的父类,也还是多态的完美应用.
1  /**
2      * xpathRule里的apply方法,最终xpath语句对xml节点的分析落地是在evaluate方法,不展开讲了.细节是使用Jaxen做支持的.
3      */
4     @Override
5     public void apply(List<? extends Node> nodes, RuleContext ctx) {
6         for (Node node : nodes) {
7             evaluate(node, ctx);
8         }
9     }
3.后续
PMD还有很多值得研究的地方,java这块是解析为各种AST节点,然后以访问者模式做visit来实现的,不得不说也很妙...
后续可能还会对PMD源码继续做分析,看了懂了已经有好多块功能,目前也在做cpp(PMD不支持cpp,只做了cpp的语言的分割,却没做AST生成)这块的规则开发,对PMD又深入了解了许多...
主要写文章太耗时间了..如果对PMD有什么疑问可以留言问我,尽可能解答.