下载安装及配置
下载安装 Visual Studio Code,安装中将如下选项勾选,有助于后期使用方便,安装位置自定义即可。

下载 mingw-w64,建议下载 离线版,下载完成后,找一个合适的位置(相当于安装位置),解压安装包。例如本文演示地址为:C:/mingw64。
进入解压好的文件夹下的 bin 文件夹,将当前路径(C:/mingw64/bin)复制下来,然后选中桌面上的此电脑,右击鼠标,选择属性,选择高级系统设置,点击环境变量,选择系统环境变量下的 Path,选择编辑,点新建,然后把刚刚复制的文件路径粘贴进去,然后点确定并退出。
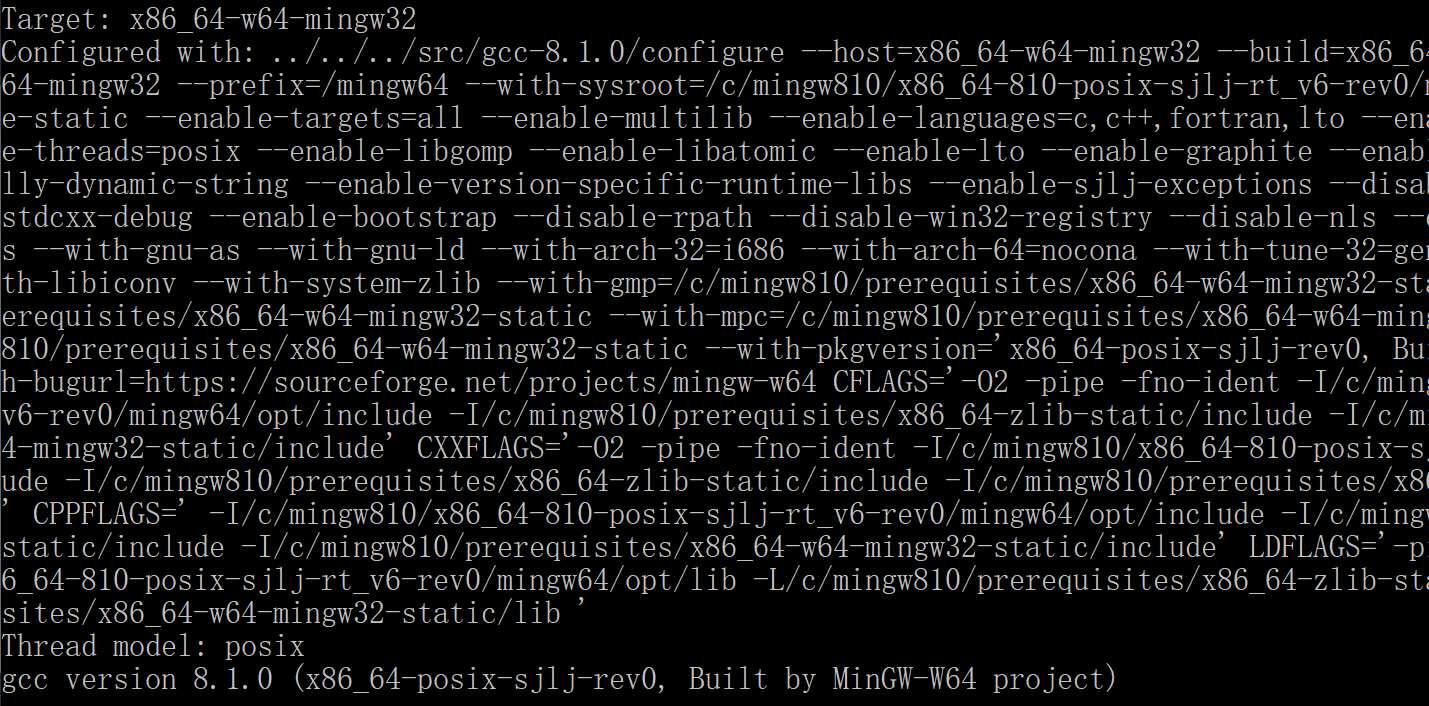
按下键盘上的 Win+r,输入 cmd,在弹出的对话框中,输入:gcc -v
若出现 MinGW-W64 的提示(一堆英文),即为安装成功:
如下有两种编译方法,第一种是用 VScode 的扩展 Code Runner 进行编译,操作简单,但是缺点是无法调试,只能用于简单的编译,适合快速测试一些简单的程序。第二种是新建相关文件,搭建成一个环境进行编译调试,相比于第一种方法,会稍显麻烦。建议使用第二种方法更好。
第一种方法
在 VScode 里,安装 C/C++ 和 Code Runner 这两个扩展


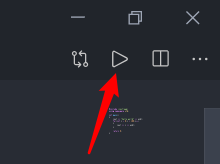
安装完成后,重启 VScode,会在右上角找到一个三角形标志,这个标志就是用来编译的。
接下来点击 文件 > 首选项 > 设置 > 用户设置 > 拓展 > Run Code Configuration,找到 Run In Terminal 选项并打上勾。这一步是为了解决程序中 scanf() 等请求键盘输入数据的函数,在运行时无法从键盘输入数据的问题。
完成后,按下键盘的 Ctrl+N 新建一个文件并保存,例如 helloworld.c 文件:
#include <stdio.h>
#include <stdlib.h>

int main(void) {
    printf("Hello World!
");
    system("pause");
    return 0;
}
点击 VScode 右上角的三角形,即可自动进行编译运行。
第二种方法
编译调试 C 过程
首先在你需要的位置新建一个文件夹,路径不能有中文,例如本次演示路径为:D: est_c。
打开 VScode ,安装 C/C++ 扩展

安装完成后,重启 VScode,点击 文件->打开文件夹,将刚才新建的文件夹添加到 VScode 里。然后在侧边栏里,右键选择新建文件夹,命名为 .vscode,同样的步骤再新建一个名称为 build 的文件夹。
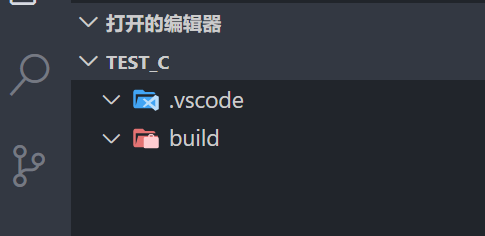
右键选中 .vscode 文件夹,选择新建文件,命名为 c_cpp_properties.json,填入如下代码:
注意
compilerPath更改为你所安装的路径,注意斜杠的方向。
{
    "configurations": [
        {
            "name": "MinGW64",
            "intelliSenseMode": "gcc-x64",
            "compilerPath": "C:/mingw64/bin/gcc.exe",
            "includePath": [
                "${workspaceFolder}"
            ],
            "cStandard": "c11"
        }
    ],
    "version": 4
}
同样的步骤,右键选中 .vscode 文件夹,新建名称为 launch.json 的文件,填入如下代码:
{
    "version": "0.2.0",
    "configurations": [
        {
            "name": "C Launch (GDB)", // 配置名称
            "type": "cppdbg",         // 配置类型
            "request": "launch",
            "targetArchitecture": "x64",
            "program": "${fileDirname}/build/${fileBasenameNoExtension}.exe",
            "args": [],
            "stopAtEntry": false,
            "cwd": "${workspaceRoot}",
            "externalConsole": false, // 调试时是否显示控制台窗
            "internalConsoleOptions": "neverOpen",
            "MIMode": "gdb",
            "miDebuggerPath": "C:/mingw64/bin/gdb.exe", // 更改为你所安装的路径,注意斜杠的方向,别输错了!!!
            "setupCommands": [
                {
                    "description": "Enable pretty-printing for GDB",
                    "text": "-enable-pretty-printing",
                    "ignoreFailures": false
                }
            ],
            "preLaunchTask": "compile"
        }
    ]
}
右键选中 .vscode 文件夹,新建名称为 tasks.json 的文件,填入如下代码:
{
    "version": "2.0.0",
    "tasks": [
        {
            "label": "compile",
            "command": "gcc",
            "args": [
                "${file}",
                "-o",
                "${fileDirname}/build/${fileBasenameNoExtension}.exe",
                "-O0",
                "-ggdb3",
                "-Wall",
                "-std=c11",
                "-Wno-format",
                "-finput-charset=UTF-8",
                "-fexec-charset=GB18030",
                "-D _USE_MATH_DEFINES"
            ],

            "type": "shell",

            "group": {
                "kind": "build",
                "isDefault": true
            },

            "presentation": {
                "echo": true,
                "reveal": "always",
                 "focus": false,
                 "panel": "shared"
            },
        }
    ]
}
完成后,效果如下:
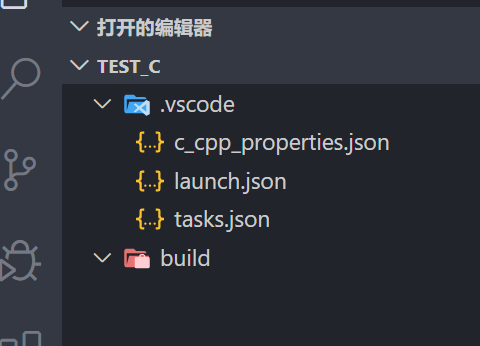
右键点击左侧栏空白处,新建名为 hello_world.c 测试文件,填入如下测试代码:
#include <stdio.h>
#include <stdlib.h>

int j = 0;

int main(void) {
    for (int i = 0; i < 4; i++) {
        j++;
        printf("Hello World!
");
    }

    system("pause");
    return 0;
}
保存后,按下 F5 即可编译。
如下为调试方法:
在 hello_world.c 文件里,找一个位置打断点,例如在 for 循环这里:
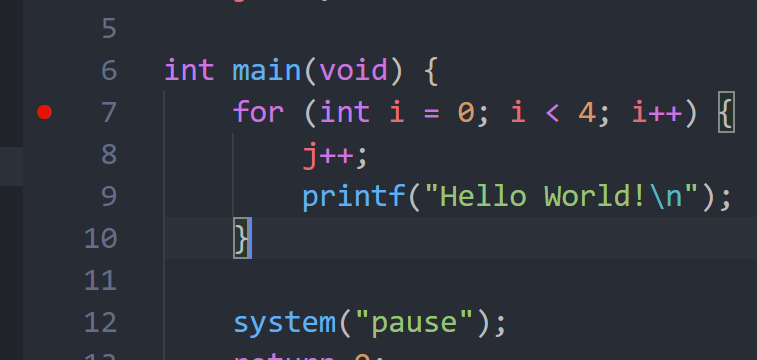
然后按下 F5 进行编译,它会自动停在断点位置:

通过上方的按钮进行操控即可。还可以选中某个变量,右键选择添加到监视,就可以实时查看该变量的变化情况。

编译调试 C++ 过程
和编译调试 C 过程一样,只需要修改 .vscode 文件里的代码即可。
文件 c_cpp_properties.json 代码更换为:
注意
compilerPath更改为你所安装的路径,注意斜杠的方向。
{
    "configurations": [
        {
            "name": "MinGW64",
            "intelliSenseMode": "gcc-x64",
            "compilerPath": "C:/mingw64/bin/g++.exe",
            "includePath": [
                "${workspaceFolder}"
            ],
            "cppStandard": "c++17"
        }
    ],
    "version": 4
}
文件 launch.json 代码更换为:
{
    "version": "0.2.0",
    "configurations": [
        {
            "name": "C++ Launch (GDB)",
            "type": "cppdbg",
            "request": "launch",
            "targetArchitecture": "x64",
            "program": "${fileDirname}/build/${fileBasenameNoExtension}.exe",
            "args": [],
            "stopAtEntry": false,
            "cwd": "${workspaceRoot}",
            "externalConsole": false,
            "internalConsoleOptions": "neverOpen",
            "MIMode": "gdb",
            "miDebuggerPath": "C:/mingw64/bin/gdb.exe",    // 更改为你所安装的路径,注意斜杠的方向,别输错了!!!
            "setupCommands": [
                {
                    "description": "Enable pretty-printing for GDB",
                    "text": "-enable-pretty-printing",
                    "ignoreFailures": false
                }
            ],
            "preLaunchTask": "Compile"
        }
    ]
}
文件 tasks.json 代码更换为:
{
    "version": "2.0.0",
    "tasks": [
        {
            "label": "Compile",
            "command": "g++",
            "args": [
                "${file}",
                "-o",
                "${fileDirname}/build/${fileBasenameNoExtension}.exe",
                "-O0",
                "-ggdb3",
                "-Wall",
                "-static-libgcc",
                "-std=c++17",
                "-finput-charset=UTF-8",
                "-fexec-charset=GB18030",
                "-D _USE_MATH_DEFINES"
            ],

            "problemMatcher": {
                "owner": "cpp",
                "fileLocation": [
                    "absolute",
                ],
                "pattern": {
                    "regexp": "^(.*):(\d+):(\d+):\s+(warning|error):\s+(.*)$",
                    "file": 1,
                    "line": 2,
                    "column": 3,
                    "severity": 4,
                    "message": 5
                }
            },

            "type": "shell",

            "group": {
                "kind": "build",
                "isDefault": true
            },

            "presentation": {
                "echo": true,
                "reveal": "always",
                 "focus": false,
                 "panel": "shared"
            },
        }
    ]
}
新建 CPP 测试文件 hello_world.cpp:
#include <cstdlib>
#include <iostream>

using namespace std;

int j = 0;

int main(void) {

    for (int i = 0; i < 10; i++) {
        j++;
        cout << "Hello World!" << endl;
    }

    system("pause");
    return 0;
}
其他的操作都一样了。