1、注解方式开发
(1)web.xml中配置前端控制器:
<?xml version="1.0" encoding="UTF-8"?>
<web-app xmlns="http://xmlns.jcp.org/xml/ns/javaee"
         xmlns:xsi="http://www.w3.org/2001/XMLSchema-instance"
         xsi:schemaLocation="http://xmlns.jcp.org/xml/ns/javaee http://xmlns.jcp.org/xml/ns/javaee/web-app_4_0.xsd"
         version="4.0">
    <!-- 前端控制器 -->
    <servlet>
        <servlet-name>springmvc</servlet-name>
        <servlet-class>org.springframework.web.servlet.DispatcherServlet</servlet-class>
        <!--绑定springmvc的配置文件-->
        <init-param>
            <param-name>contextConfigLocation</param-name>
            <param-value>classpath:springmvc.xml</param-value>
        </init-param>
        <load-on-startup>1</load-on-startup><!--启动服务器即创建-->
    </servlet>
    <servlet-mapping>
        <servlet-name>springmvc</servlet-name>
        <url-pattern>/</url-pattern>
    </servlet-mapping>
</web-app>
(2)springmvc.xml中配置视图解析器,处理器映射器和处理器适配器在这里不需要再进行配置了,直接被<mvc:annotation-driven></mvc:annotation-driven>代替,它可以完成上述两个实例的注入:
<?xml version="1.0" encoding="UTF-8"?>
<beans xmlns="http://www.springframework.org/schema/beans"
       xmlns:xsi="http://www.w3.org/2001/XMLSchema-instance"
       xmlns:context="http://www.springframework.org/schema/context"
       xmlns:mvc="http://www.springframework.org/schema/mvc"
       xsi:schemaLocation="http://www.springframework.org/schema/beans
       http://www.springframework.org/schema/beans/spring-beans.xsd http://www.springframework.org/schema/context https://www.springframework.org/schema/context/spring-context.xsd http://www.springframework.org/schema/mvc https://www.springframework.org/schema/mvc/spring-mvc.xsd">

    <!--自动扫描包,让指定包下的注解生效,由IOC容器统一管理-->
    <context:component-scan base-package="pers.zhb.controller"></context:component-scan>
    <!--让Springmvc不处理静态资源,如css、js等-->
    <mvc:default-servlet-handler></mvc:default-servlet-handler>
    <!--处理器映射器和处理器适配器-->
    <mvc:annotation-driven></mvc:annotation-driven>
    <!--视图解析器,前缀和后缀-->
    <bean class="org.springframework.web.servlet.view.InternalResourceViewResolver" id="internalResourceViewResolver">
        <property name="prefix" value="/"></property>
        <property name="suffix" value=".jsp"></property>
    </bean>

</beans>
(3)用注解配置处理器:
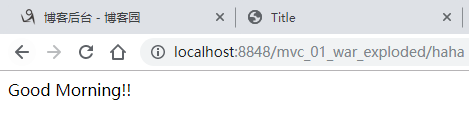
@Controller
@RequestMapping("nihao")
public class HelloController{
    @RequestMapping("/haha")
      public String hello(Model model){
          model.addAttribute("msg","Good Morning!!");//封装数据
          return "hello";//被视图解析器处理
      }
}
(4)视图中取出数据:
<%@ page contentType="text/html;charset=UTF-8" language="java" %>
<html>
<head>
    <title>Title</title>
</head>
<body>
${msg}
</body>
</html>
(5)测试:
2、配置总结
(1)使用接口的方式:该方式每一个方法都只能在单独的一个类里面,因此,使用起来较为繁琐,不建议使用
a、在web.xml中配置前端控制器
<?xml version="1.0" encoding="UTF-8"?>
<web-app xmlns="http://xmlns.jcp.org/xml/ns/javaee"
         xmlns:xsi="http://www.w3.org/2001/XMLSchema-instance"
         xsi:schemaLocation="http://xmlns.jcp.org/xml/ns/javaee http://xmlns.jcp.org/xml/ns/javaee/web-app_4_0.xsd"
         version="4.0">
    <!-- 前端控制器 -->
    <servlet>
        <servlet-name>springmvc</servlet-name>
        <servlet-class>org.springframework.web.servlet.DispatcherServlet</servlet-class>
        <!--绑定springmvc的配置文件-->
        <init-param>
            <param-name>contextConfigLocation</param-name>
            <param-value>classpath:springmvc.xml</param-value>
        </init-param>
        <load-on-startup>1</load-on-startup><!--启动服务器即创建-->
    </servlet>
    <servlet-mapping>
        <servlet-name>springmvc</servlet-name>
        <url-pattern>/</url-pattern>
    </servlet-mapping>
</web-app>
b、书写处理器的代码:
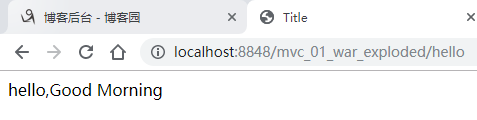
public class HelloController implements Controller {
    public ModelAndView handleRequest(HttpServletRequest httpServletRequest, HttpServletResponse httpServletResponse) throws Exception {
        ModelAndView modelAndView=new ModelAndView();
        modelAndView.addObject("msg","hello,Good Morning");
        modelAndView.setViewName("test");
        return modelAndView;
    }
}
c、配置springmvc:
<?xml version="1.0" encoding="UTF-8"?>
<beans xmlns="http://www.springframework.org/schema/beans"
       xmlns:xsi="http://www.w3.org/2001/XMLSchema-instance"
       xmlns:context="http://www.springframework.org/schema/context"
       xmlns:mvc="http://www.springframework.org/schema/mvc"
       xsi:schemaLocation="http://www.springframework.org/schema/beans
       http://www.springframework.org/schema/beans/spring-beans.xsd
       http://www.springframework.org/schema/context
       https://www.springframework.org/schema/context/spring-context.xsd
       http://www.springframework.org/schema/mvc
       https://www.springframework.org/schema/mvc/spring-mvc.xsd">
    <!--自动扫描包,让指定包下的注解生效,由IOC容器统一管理-->
    <context:component-scan base-package="pers.zhb.controller"></context:component-scan>
    <!--让Springmvc不处理静态资源,如css、js等-->
    <mvc:default-servlet-handler></mvc:default-servlet-handler>
    <!--使得注解生效-->
    <mvc:annotation-driven></mvc:annotation-driven>
    <!--视图解析器,前缀和后缀-->
    <bean class="org.springframework.web.servlet.view.InternalResourceViewResolver" id="internalResourceViewResolver">
        <property name="prefix" value="/"></property>
        <property name="suffix" value=".jsp"></property>
    </bean>
    <bean name="/hello" class="pers.zhb.controller.HelloController"></bean>
</beans>
d、视图(test.jsp):
<%@ page contentType="text/html;charset=UTF-8" language="java" %>
<html>
<head>
    <title>Title</title>
</head>
<body>
${msg}
</body>
</html>
e、测试:
(2)注解的方式
a、配置web.xml(和上面的相同)
b、注解的方式书写处理器代码
@Controller//代表这个类被string接管,类中的所有方法如果返回的是string,
// 并具有具体的页面进行跳转,就会被视图解析器解析
public class HelloController{
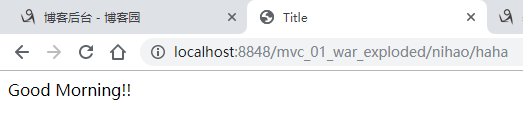
@RequestMapping("/haha")
public String hello(Model model){
model.addAttribute("msg","Good Morning!!");//封装数据
return "hello";//被视图解析器处理
}
}
@RequestMapping用于映射url到控制器类或一个特定的处理程序方法,可用于类或方法上,用于类上的时候表示类中的所有响应请求的方法都是以改地址作为父路径
c、springmvc.xml配置文件:
<?xml version="1.0" encoding="UTF-8"?>
<beans xmlns="http://www.springframework.org/schema/beans"
       xmlns:xsi="http://www.w3.org/2001/XMLSchema-instance"
       xmlns:context="http://www.springframework.org/schema/context"
       xmlns:mvc="http://www.springframework.org/schema/mvc"
       xsi:schemaLocation="http://www.springframework.org/schema/beans
       http://www.springframework.org/schema/beans/spring-beans.xsd
       http://www.springframework.org/schema/context
       https://www.springframework.org/schema/context/spring-context.xsd
       http://www.springframework.org/schema/mvc
       https://www.springframework.org/schema/mvc/spring-mvc.xsd">
    <!--自动扫描包,让指定包下的注解生效,由IOC容器统一管理-->
    <context:component-scan base-package="pers.zhb.controller"></context:component-scan>
    <!--让Springmvc不处理静态资源,如css、js等-->
    <mvc:default-servlet-handler></mvc:default-servlet-handler>
    <!--处理器映射器和处理器适配器-->
    <mvc:annotation-driven></mvc:annotation-driven>
    <!--视图解析器,前缀和后缀-->
    <bean class="org.springframework.web.servlet.view.InternalResourceViewResolver" id="internalResourceViewResolver">
        <property name="prefix" value="/"></property>
        <property name="suffix" value=".jsp"></property>
    </bean>
</beans>
d、视图
<%@ page contentType="text/html;charset=UTF-8" language="java" %>
<html>
<head>
    <title>Title</title>
</head>
<body>
${msg}
</body>
</html>
e、测试: