一个NSThread对象就代表一条线程
创建、启动线程
(1) NSThread *thread = [[NSThread alloc] initWithTarget:self selector:@selector(run) object:nil];
[thread start];
// 线程一启动,就会在线程thread中执行self的run方法
主线程相关用法
+ (NSThread *)mainThread; // 获得主线程
- (BOOL)isMainThread; // 是否为主线程
+ (BOOL)isMainThread; // 是否为主线程
其他用法
获得当前线程
NSThread *current = [NSThread currentThread];
线程的调度优先级:调度优先级的取值范围是0.0 ~ 1.0,默认0.5,值越大,优先级越高
+ (double)threadPriority;
+ (BOOL)setThreadPriority:(double)p;
设置线程的名字
- (void)setName:(NSString *)n;
- (NSString *)name;
其他创建线程的方式
(2)创建线程后自动启动线程
[NSThread detachNewThreadSelector:@selector(run) toTarget:self withObject:nil];
(3)隐式创建并启动线程
[self performSelectorInBackground:@selector(run) withObject:nil];
上述2种创建线程方式的优缺点
优点:简单快捷
缺点:无法对线程进行更详细的设置
二、代码示例
1.使用古老的方式创建
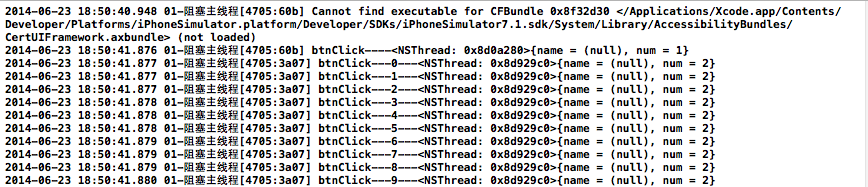
 1 //
 2 //  YYViewController.m
 3 //
 4 //
 5 //  Created by apple on 14-6-23.
 6 //  Copyright (c) 2014年 itcase. All rights reserved.
 7 //
 8
 9
10 #import "YYViewController.h"
11 #import <pthread.h>
12
13
14 @interface YYViewController ()
15 - (IBAction)btnClick;
16 @end
17
18
19 @implementation YYViewController
20
21
22 - (void)viewDidLoad
23 {
24     [super viewDidLoad];
25 }
26
27
28 //按钮的点击事件
29 - (IBAction)btnClick {
30     //1.获取当前线程
31     NSThread *current=[NSThread currentThread];
32     //主线程
33     NSLog(@"btnClick----%@",current);
34
35     //2.使用for循环执行一些耗时操作
36    pthread_t thread;
37     pthread_create(&thread, NULL, run, NULL);
38 }
39
40
41 //c语言函数
42 void *run(void *data)
43 {
44     //获取当前线程,是新创建出来的线程
45     NSThread *current=[NSThread currentThread];
46
47
48     for (int i=0; i<10000; i++) {
49         NSLog(@"btnClick---%d---%@",i,current);
50     }
51     return NULL;
52 }
53
54 //多个线程,点击按钮执行按钮调用方法的时候,主线程没有被阻塞
55
56 @end
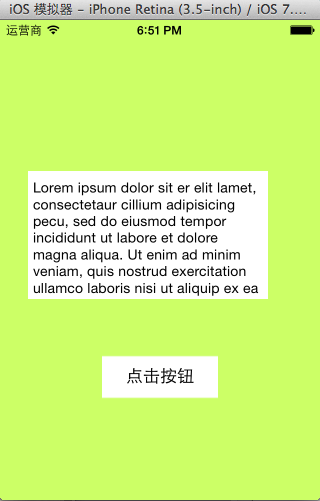
实现效果:
打印结果:
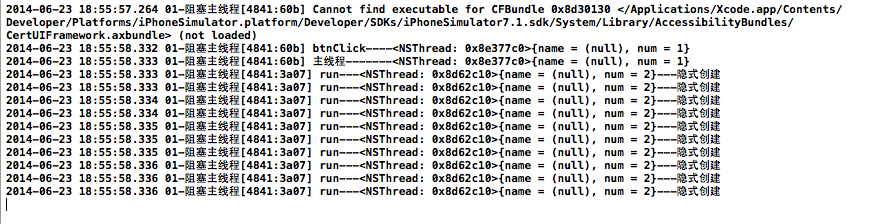
2.使用NSThread创建线程
 1 //
 2 //  YYViewController.m
 3 //
 4 //
 5 //  Created by apple on 14-6-23.
 6 //  Copyright (c) 2014年 itcase. All rights reserved.
 7 //
 8
 9 #import "YYViewController.h"
10 #import <pthread.h>
11
12
13 @interface YYViewController ()
14 - (IBAction)btnClick;
15 @end
16
17
18 @implementation YYViewController
19
20 - (void)viewDidLoad
21 {
22     [super viewDidLoad];
23 }
24
25
26 //按钮的点击事件
27 - (IBAction)btnClick {
28     //1.获取当前线程
29     NSThread *current=[NSThread currentThread];
30     //主线程
31     NSLog(@"btnClick----%@",current);
32
33     //获取主线程的另外一种方式
34    NSThread *main=[NSThread mainThread];
35     NSLog(@"主线程-------%@",main);
36
37     //2.执行一些耗时操作
38     [self creatNSThread];
39 //    [self creatNSThread2];
40 //    [self creatNSThread3];
41 }
42
43
44 /**
45  * NSThread创建线程方式1
46  * 1> 先创建初始化线程
47  * 2> start开启线程
48  */
49 -(void)creatNSThread
50 {
51     NSThread  *thread=[[NSThread alloc] initWithTarget:self selector:@selector(run:) object:@"线程A"];
52     //为线程设置一个名称
53     thread.name=@"线程A";
54      //开启线程
55     [thread start];
56
57
58     NSThread  *thread2=[[NSThread alloc] initWithTarget:self selector:@selector(run:) object:@"线程B"];
59     //为线程设置一个名称
60     thread2.name=@"线程B";
61    //开启线程
62     [thread2 start];
63 }
64
65
66 /**
67  * NSThread创建线程方式2
68 *创建完线程直接(自动)启动
69  */
70 -(void)creatNSThread2
71 {
72 //    NSThread *thread=[NSThread detachNewThreadSelector:@selector(run:) toTarget:self withObject:@"创建完线程直接(自动)启动"];
73
74     [NSThread detachNewThreadSelector:@selector(run:) toTarget:self withObject:@"创建完线程直接(自动)启动"];
75 }
76
77
78 /**
79  * NSThread创建线程方式3
80  * 隐式创建线程, 并且直接(自动)启动
81  */
82 -(void)creatNSThread3
83 {
84     //在后台线程中执行===在子线程中执行
85     [self performSelectorInBackground:@selector(run:) withObject:@"隐式创建"];
86 }
87
88
89
90 -(void)run:(NSString *)str
91 {
92    //获取当前线程
93     NSThread *current=[NSThread currentThread];
94     //打印输出
95     for (int i=0; i<10; i++) {
96        NSLog(@"run---%@---%@",current,str);
97     }
98 }
99 @end
调用线程1,打印结果为:
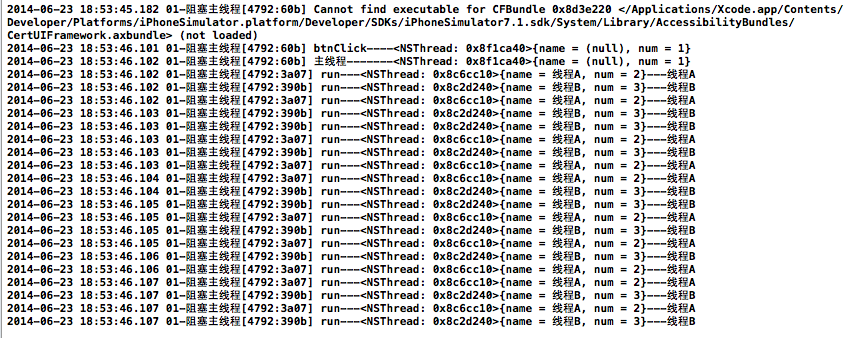
调用线程2

调用线程3