一.简介
本文使用 ASP.NET Core +IdentityServer4来实现SSO单点登录(注销没有实现),我们其中使用Implicit模式和OIDC协议来实现功能,这里先记录实现核心代码,然后再来记录IdentityServer帮我们做了什么(从请求的流程来诉说)。
二.预备工作
建立 ASP.NET Core 三个项目,分别是Client_IdentityServer和Client2_IdentityServer和IdentityServer_SSO
然后修改Window的host文件,注册三个站点,分别是a.cn b.net c.cn
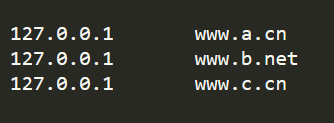
然后设置三个项目的启动地址,让三个项目地址分别对应上面的三个站点,我这里设置两个客户端分别是 www.a.cn 和 www.b.net ,服务端为 www.c.cn
举例
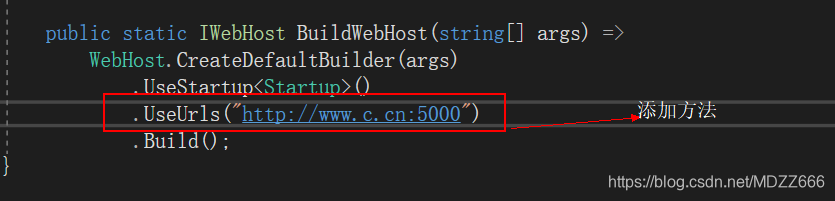
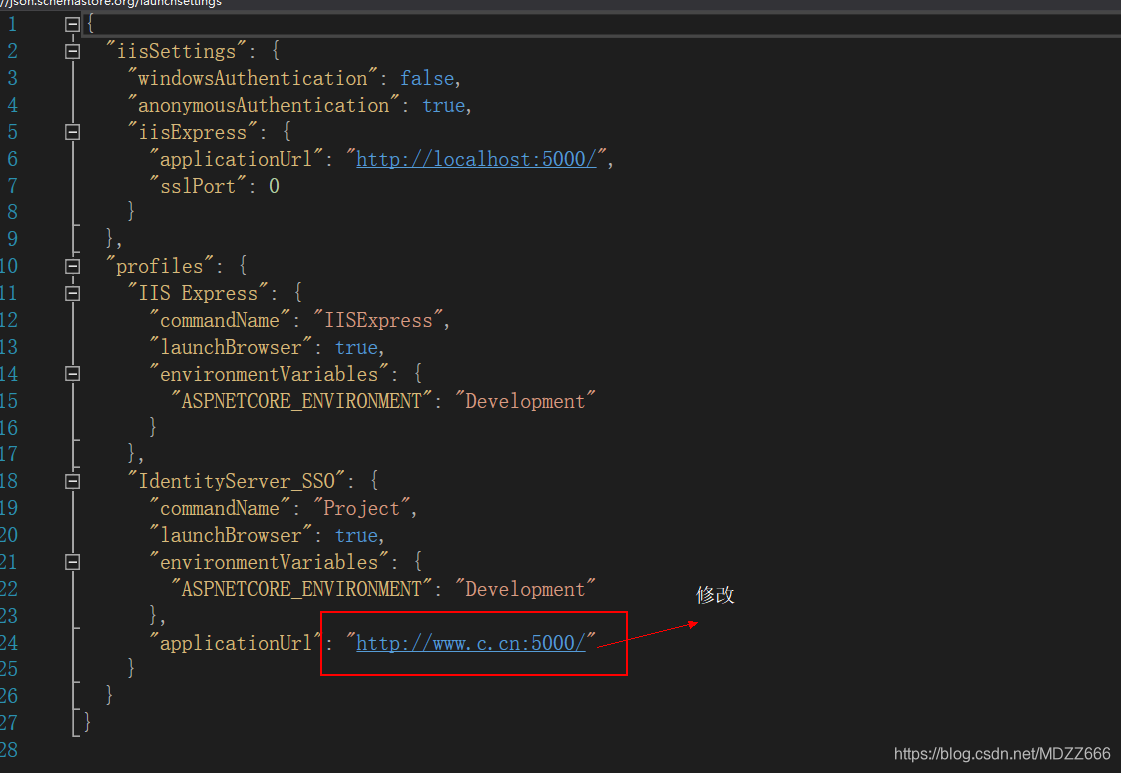 依次按照这种方式来修改剩下的两个项目启动地址就可以了。
服务端配置
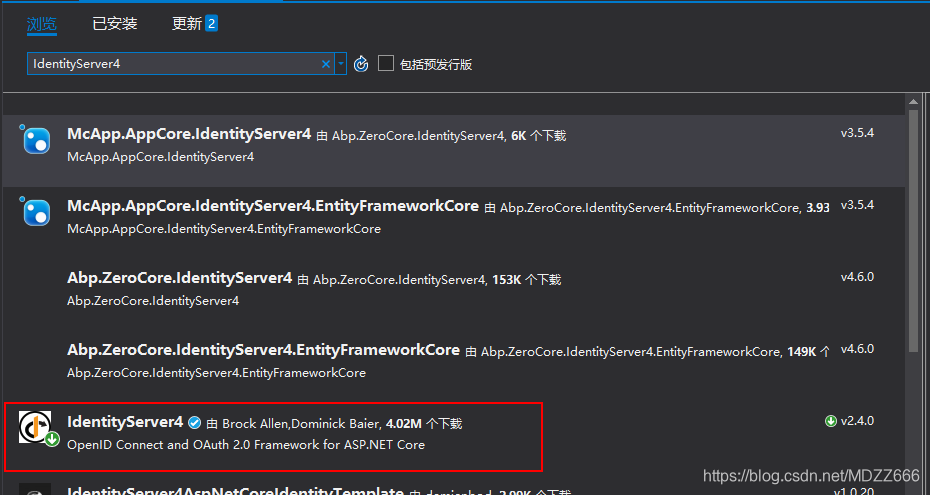
然后在服务端点开NuGet管理包搜索IdentityServer4进行下载
新建一个Config类 ,用来配置IdentityServer4.
    public class config
    {
        public static IEnumerable<ApiResource> GetApiResource()
        {
            return new List<ApiResource>()
            {
                new ApiResource("api","this is api")
            };
        }

        public static IEnumerable<IdentityResource> GetIdentityResources()
        {
            return new List<IdentityResource>()
            {
                new IdentityResources.OpenId(),
                new IdentityResources.Profile(),
                new IdentityResources.Phone()
            };
        }

         public static List<TestUser> GetTestUsers()
        {
            return new List<TestUser>{
              new TestUser()
              {
                    SubjectId="123",
                    Username="Mr.wen",
                    Password="123465",
                    Claims=new Claim[]
                    {
                        new Claim(ClaimTypes.Role,"管理员")
                    }
              },
              new TestUser()
              {
                    SubjectId="456",
                    Username="123",
                    Password="123456",
                    Claims=new Claim[]
                    {
                        new Claim(ClaimTypes.Role,"阅览者")
                    }

              }
            };
        }

         public static IEnumerable<Client> GetClients()
        {
            return new List<Client>()
            {
                new Client()
                {
                    ClientId="mvc_imp",
                    ClientName="Mvc_Name",
                    AllowedGrantTypes=GrantTypes.Implicit,
                    设置是否要授权
                    //RequireConsent=false,

                    //指定允许令牌或授权码返回的地址(URL)
                    RedirectUris={ "http://www.b.net:5001/signin-oidc","http://www.a.cn:5002/signin-oidc" },
                    //指定允许注销后返回的地址(URL),这里写两个客户端
                    PostLogoutRedirectUris={ "http://www.b.net:5001/signout-callback-oidc","http://www.a.cn:5002/signout-callback-oidc" },
                    ClientSecrets={new Secret("secret".Sha256())},
                    AllowedScopes = new List<string>
                    {
                        IdentityServerConstants.StandardScopes.OpenId,
                        IdentityServerConstants.StandardScopes.Profile,
                    },
                }
             };
         }
接下来配置服务端的Startup.cs的Configure和ConfigureServices方法
public void ConfigureServices(IServiceCollection services)
  {
       services.AddIdentityServer(option=>
       {
           //可以通过此设置来指定登录路径,默认的登陆路径是/account/login
           option.UserInteraction.LoginUrl = "/account/login";

       })
       .AddDeveloperSigningCredential()
       .AddInMemoryApiResources(Config.GetApiResource())
       .AddInMemoryClients(Config.GetClients())
       .AddInMemoryIdentityResources(Config.GetIdentityResources())
       .AddTestUsers(Config.GetTestUsers());

         services.AddMvc();
  }
public void Configure(IApplicationBuilder app, IHostingEnvironment env)
 {
      if (env.IsDevelopment())
      {
            app.UseBrowserLink();
            app.UseDeveloperExceptionPage();
      }
      else
      {
           app.UseExceptionHandler("/Home/Error");
      }

       app.UseIdentityServer();

       app.UseStaticFiles();

       app.UseMvc(routes =>
       {
               routes.MapRoute(
                  name: "default",
                  template: "{controller=Home}/{action=Index}/{id?}"
                );
       });
 }
客户端配置
配置Startup.cs文件
 public void ConfigureServices(IServiceCollection services)
 {
            //DefaultChallengeScheme的名字要和下面AddOpenIdConnect方法第一个参数名字保持一致
            services.AddAuthentication(options =>
            {
                options.DefaultScheme = "Cookies";
                options.DefaultChallengeScheme = "oidc";
            })
           .AddCookie("Cookies")
           .AddOpenIdConnect("oidc", options =>
           {
               options.Authority = "http://www.c.cn:5000";
               options.RequireHttpsMetadata = false;

               //指定允许服务端返回的地址,默认是new PathString("/signin-oidc")
               //如果这里地址进行了自定义,那么服务端也要进行修改
               options.CallbackPath = new PathString("/signin-oidc");

               //指定用户注销后,服务端可以调用客户端注销的地址,默认是new PathString("signout-callback-oidc")
               options.SignedOutCallbackPath = new PathString("/signout-callback-oidc");

               options.ClientId = "mvc_imp";
               options.ClientSecret = "secret";
           });
          services.AddMvc();
 }
public void Configure(IApplicationBuilder app, IHostingEnvironment env)
{
      if (env.IsDevelopment())
      {
           app.UseBrowserLink();
           app.UseDeveloperExceptionPage();
      }
     else
     {
         app.UseExceptionHandler("/Home/Error");
     }
     app.UseAuthentication();

     app.UseStaticFiles();

     app.UseMvc(routes =>
     {
        routes.MapRoute(
           name: "default",
           template: "{controller=Home}/{action=Index}/{id?}"
        );
     });
}
到这里,总的配置就配好了,接下来是主要实现代码
服务端
建立AccountController控制器,其中有login方法,在login方法里写我们登录的逻辑
       [HttpPost]
       public async Task<IActionResult> Login(LoginInputModel model)
       {
            //当登录提交给后台的model为null,则返回错误信息给前台
            if (model == null)
            {
                //这里我只是简单处理了
                return View();
            }
            //这里同理,当信息不完整的时候,返回错误信息给前台
            if (string.IsNullOrEmpty(model.Username) || string.IsNullOrEmpty(model.Password))
            {
                //这里只是简单处理了
                return View();
            }

            //model.Username == "123" && model.Password == "123456"
            //if里面的是验证账号密码,可以用自定义的验证,
            //我这里使用的是TestUserStore的的验证方法,
            if (_users.FindByUsername(model.Username)!=null&&_users.ValidateCredentials(model.Username,model.Password))
            {
                   var user = _users.FindByUsername(model.Username);
                //配置Cookie
                AuthenticationProperties properties = new AuthenticationProperties()
                {
                    IsPersistent = true,
                    ExpiresUtc = DateTimeOffset.UtcNow.Add(TimeSpan.FromMinutes(30))
                };

                //使用IdentityServer的SignInAsync来进行注册Cookie
                await HttpContext.SignInAsync(user.SubjectId, model.Username);

                //使用IIdentityServerInteractionService的IsValidReturnUrl来验证ReturnUrl是否有问题
                if (_interaction.IsValidReturnUrl(model.ReturnUrl))
                {
                    return Redirect(model.ReturnUrl);
                }
                return View();
             }
             return View();
        }
客户端
客户端的代码很简单,即想要验证的方法或控制器添加一个Authorize特性就可以了
       [Authorize]
        public IActionResult About()
        {
             ViewData["Message"] = "Your application description page.";
             return View();
        }
到这里,客户端和服务端的核心代码基本结束了,如果想要看程序的UI,或者想要看完整的后台,可以查看我的GitHub
https://github.com/MDZZ3/Identity_SSO
参考
https://www.cnblogs.com/RainingNight/p/oidc-authentication-in-asp-net-core.html