最近需要在平台中搭建属于自己的Nuget包管理功能,对Nuget包做统一的管控,利于在内网环境下拉取Nuget包,提升CICD速度。
查了些资料,从开源项目Baget入手。Baget源码地址:https://github.com/loic-sharma/BaGet,能够搭建私有的Nuget服务器,对Nuget包上传,下载,安装进行管理,以及支持dotnet cli命令。
1.运行Baget
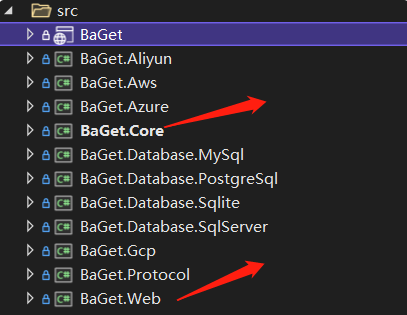
打开Baget项目,文档结构如下:
设置Baget为启动项
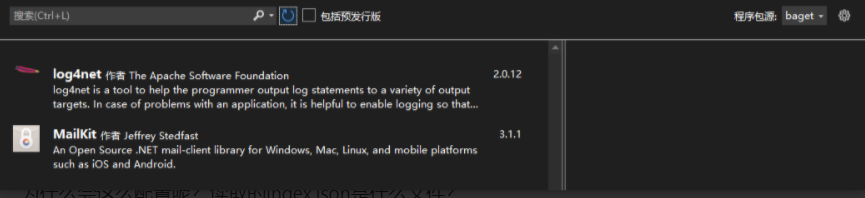
启动成功后,即可上传Nuget包:
通过命令行上传:
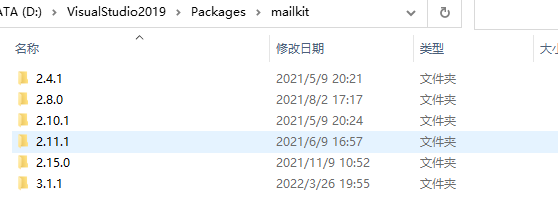
dotnet nuget push -s http://localhost:50561/v3/index.json mailkit.3.1.1.nupkg
其中50561是项目端口号,mailkit.3.1.1.nupkg是上传的Nuget包名
推送成功:

2.分析和整合
A.源服务索引
上传Nuget不是我们这次的重点,需要研究如何配置Nuget包源,常见的是index.json和指定文件夹目录的形式。
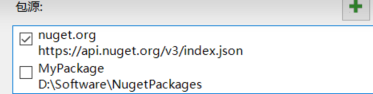
先来配置Baget对应的索引信息,在Nuget包管理中添加如下:
刷新后,加载出Baget管理的Nuget包详情列表:
为什么会这么配置呢?读取的index.json是什么文件?
浏览器访问:http://localhost:50561/v3/index.json
结果如下:
{
    "version": "3.0.0",
    "resources": [
        {
            "@id": "http://localhost:50561/api/v2/package",
            "@type": "PackagePublish/2.0.0"
        },
        {
            "@id": "http://localhost:50561/api/v2/symbol",
            "@type": "SymbolPackagePublish/4.9.0"
        },
        {
            "@id": "http://localhost:50561/v3/search",
            "@type": "SearchQueryService"
        },
        {
            "@id": "http://localhost:50561/v3/search",
            "@type": "SearchQueryService/3.0.0-beta"
        },
        {
            "@id": "http://localhost:50561/v3/search",
            "@type": "SearchQueryService/3.0.0-rc"
        },
        {
            "@id": "http://localhost:50561/v3/registration",
            "@type": "RegistrationsBaseUrl"
        },
        {
            "@id": "http://localhost:50561/v3/registration",
            "@type": "RegistrationsBaseUrl/3.0.0-rc"
        },
        {
            "@id": "http://localhost:50561/v3/registration",
            "@type": "RegistrationsBaseUrl/3.0.0-beta"
        },
        {
            "@id": "http://localhost:50561/v3/package",
            "@type": "PackageBaseAddress/3.0.0"
        },
        {
            "@id": "http://localhost:50561/v3/autocomplete",
            "@type": "SearchAutocompleteService"
        },
        {
            "@id": "http://localhost:50561/v3/autocomplete",
            "@type": "SearchAutocompleteService/3.0.0-rc"
        },
        {
            "@id": "http://localhost:50561/v3/autocomplete",
            "@type": "SearchAutocompleteService/3.0.0-beta"
        }
    ]
}
分析:Json的内容比较像注册的路由。
把Baget的v3/index.json的路由改成v3/index1.json试试,结果如下:
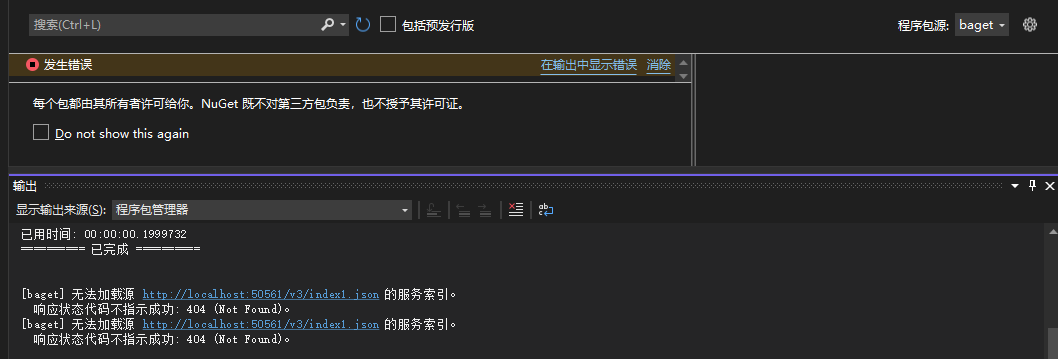
分析:说明Baget提供了/v3/index.json的get请求接口,给Nuget包管理器读取配置信息
通过网络抓包,验证了该猜测

那么举一反三,通过命令行上传包信息,也是http请求:

上传时通过/api/v2/package路由对应的接口
所以我们要做的就是实现对应路由的接口里的逻辑
B.Api项目创建
创建WabApi项目NugetMangeApi,基于.Net Core 3.1。
在WeatherForecastController,添加如下代码:
[HttpGet("/v3/index.json")]
        public async Task<ServiceIndexResponse> GetIndex()
        {
            var resources = new List<ServiceIndexItem>();

            resources.Add(new ServiceIndexItem()
            {
                ResourceUrl = "http://localhost:5192/api/v2/package",
                Type = "PackagePublish/2.0.0"
            });
            resources.Add(new ServiceIndexItem()
            {
                ResourceUrl = "http://localhost:5192/api/v2/symbol",
                Type = "SymbolPackagePublish/4.9.0"
            });
            resources.Add(new ServiceIndexItem()
            {
                ResourceUrl = "http://localhost:5192/v3/search",
                Type = "SearchQueryService/3.0.0-beta"
            });
            resources.Add(new ServiceIndexItem()
            {
                ResourceUrl = "http://localhost:5192/v3/search",
                Type = "SearchQueryService/3.0.0-rc"
            });
            resources.Add(new ServiceIndexItem()
            {
                ResourceUrl = "http://localhost:5192/v3/registration",
                Type = "RegistrationsBaseUrl"
            });
            resources.Add(new ServiceIndexItem()
            {
                ResourceUrl = "http://localhost:5192/v3/registration",
                Type = "RegistrationsBaseUrl/3.0.0-rc"
            });
            resources.Add(new ServiceIndexItem()
            {
                ResourceUrl = "http://localhost:5192/v3/registration",
                Type = "RegistrationsBaseUrl/3.0.0-beta"
            });
            resources.Add(new ServiceIndexItem()
            {
                ResourceUrl = "http://localhost:5192/v3/package",
                Type = "PackageBaseAddress/3.0.0"
            });
            resources.Add(new ServiceIndexItem()
            {
                ResourceUrl = "http://localhost:5192/v3/autocomplete",
                Type = "SearchAutocompleteService"
            });

            resources.Add(new ServiceIndexItem()
            {
                ResourceUrl = "http://localhost:5192/v3/autocomplete",
                Type = "SearchAutocompleteService/3.0.0-rc"
            });
            resources.Add(new ServiceIndexItem()
            {
                ResourceUrl = "http://localhost:5192/v3/autocomplete",
                Type = "SearchAutocompleteService/3.0.0-beta"
            });

            var result = new ServiceIndexResponse
            {
                Version = "3.0.0",
                Resources = resources,
            };

            return await Task.FromResult(result);
        }
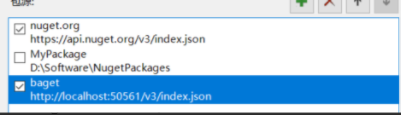
修改启动配置文件,使其端口为5192

在Nuget包管理器中添加我们的配置"MyNuget"

B.Nuget包查询列表
配置完成后,刷新,出现如下异常:
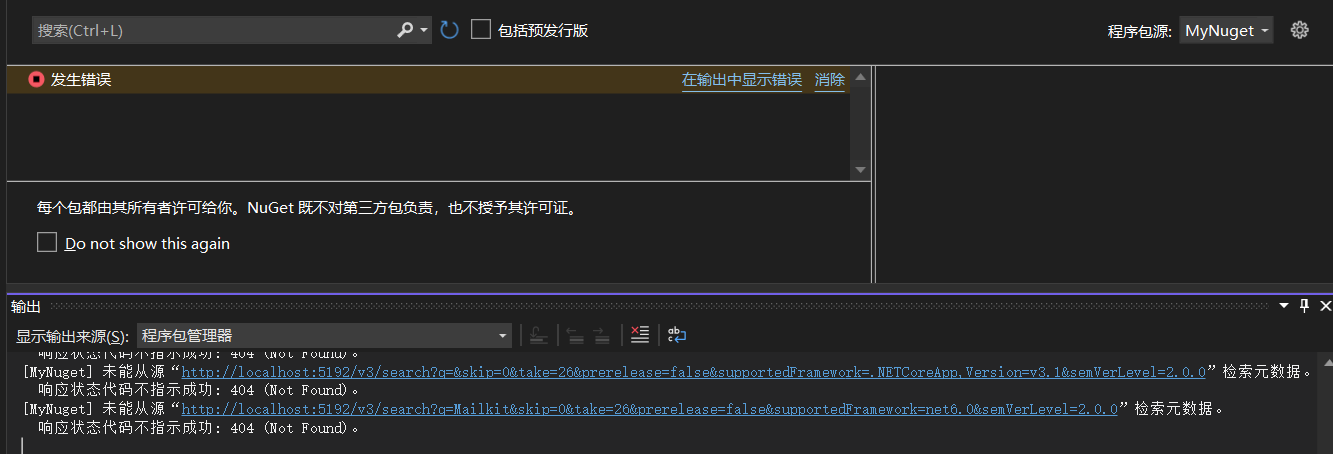
分析:还需要配置/v3/search对应的路由
在Api项目中实现,并添加一条假数据,代码如下:
 [HttpGet("/v3/search")]
        public async Task<ActionResult<SearchResponse>> SearchAsync(

          [FromQuery] string q,
           [FromQuery] string semVerLevel,
           [FromQuery] string packageType,
           [FromQuery] string framework,
          int skip = 0,
         int take = 20,
         bool prerelease = false,
           CancellationToken cancellationToken = default)
        {
            List<SearchResultVersion> versiolist = new List<SearchResultVersion>();
            SearchResultVersion version = new SearchResultVersion();
            version.RegistrationLeafUrl = "http://localhost:50561/v3/registration/mailkit/3.1.1.json";
            version.Version = "3.1.1";
            version.Downloads = 1;
            versiolist.Add(version);

            SearchResponse searchResponse = new SearchResponse();
            searchResponse.Context = new SearchContext();
            searchResponse.Context.Vocab = "http://schema.nuget.org/schema#";
            searchResponse.Context.Base = "http://localhost:50561/v3/registration";
            searchResponse.TotalHits = 1;
            searchResponse.Data = new List<SearchResult>();
            searchResponse.Data.Add(new SearchResult()
            {
                PackageId = "MailKit",
                Version = "3.1.1",
                Description = "",
                Authors = new List<string>() { "Jeffrey Stedfast" },
                Title = "MailKit",
                Versions = versiolist
            });
            return await Task.FromResult(searchResponse);
        }
刷新Nuget包源,结果如下,可以看到我们发布的Nuget包
终于成功了!!

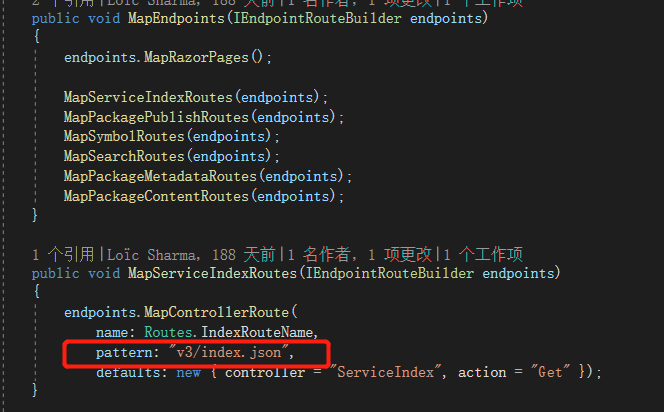
由此可以发现Baget配置的路由,对应了实际Nuget包管理器的路由请求,也就是我们/v3/index.json里配置的路由。
然而,在Baget里是如何配置路由和实现的呢?
通过搜寻源码,在Baget包里找到对应的路由配置:
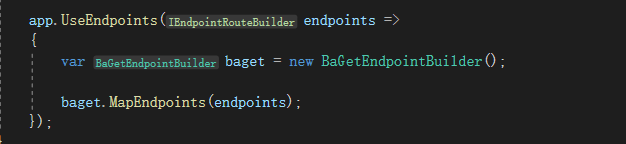
在"BaGetEndpointBuilder.cs"中发现了Baget的相关配置,涉及到安装,卸载等操作的路由。
总结一下:
Baget用了Web作为页面UI展示
类库BaGet中封装了Nuget包管理器对应的操作路由,
类库Baget.Web中对路由进行接收和实现,
Baget.Core中封装了对NugetPackage包读取的操作,核心是封装了Nuget.Version和Nuget.Protocol
以上,仅用于学习和总结!