Element,一套为开发者、设计师和产品经理准备的基于 Vue 2.0 的桌面端组件库
本项目中用Vue整合Element UI进行前端开发,相比于bootstrap,另开贴分析。
1. 如何整合
在 main.js 中写入以下内容可以完整引入:
import Vue from 'vue'
import ElementUI from 'element-ui'
import 'element-ui/lib/theme-chalk/index.css'
import App from './App.vue'

Vue.use(ElementUI)

new Vue({
  el: '#app',
  render: h => h(App)
部分引入,比如button 和select
import Vue from 'vue'
import { Button, Select } from 'element-ui'
import App from './App.vue'

Vue.component(Button.name, Button)
Vue.component(Select.name, Select)
/* 或写为
 * Vue.use(Button)
 * Vue.use(Select)
 */

new Vue({
  el: '#app',
  render: h => h(App)
本项目中main.js文件如下:
import Vue from 'vue'
import App from './App'
import {sync} from 'vuex-router-sync'
import ElementUI from 'element-ui'
import 'element-ui/lib/theme-chalk/index.css'
import router from './router'
import store from './store'
import baseComponents from './components'
sync(store, router)
Vue.use(ElementUI)
Vue.config.productionTip = false
Vue.use(baseComponents)
Vue.mixin({
  methods: {
    $showToast (toast) {
      this.$store.dispatch('toastPush', toast)
    }
  }
})
let vm = new Vue({
  el: '#app',
  router,
  store,
  template: '<App/>',
  components: { App }
})

Vue.use({
  vm
})
2. 应用实例
文本框
<el-input v-model="input" placeholder="请输入内容"></el-input>

<script>
export default {
  data() {
    return {
      input: ''
    }
  }
}
</script>
文本框输入的值会绑定到input,在下面到函数中,可以把input传入后台请求,看下文到logKeyWord
<template>
  <section>
    <div  v-loading='loading'>
      <el-col :span='24' class='toolbar' style='padding-bottom: 0px;'>
        <el-form :inline='true'>
          <el-form-item>
            <el-input v-model='logKeyWord' placeholder='请输入关键字' clearable></el-input>
          </el-form-item>
          <el-form-item>
            <el-button type='primary' v-on:click='getAllLogs'>查询</el-button>
          </el-form-item>

        </el-form>
      </el-col>

      <el-table :data='logLists' stripe style=' 100%; margin: 0 auto; text-align:center;'>
        <el-table-column label='ID'>
          <template slot-scope='scope'>
            <label>{{scope.row.id}}
              <span></span>
            </label>
          </template>
        </el-table-column>
         <el-table-column label='时间'>
          <template slot-scope='scope'>
            <label>{{scope.row.createTime}}
              <span></span>
            </label>
          </template>
         </el-table-column>
          <el-table-column label='操作'>
           <template slot-scope='scope'>
             <label>{{scope.row.operateContent}}
               <span></span>
             </label>
           </template>
          </el-table-column>
          <el-table-column label='操作人'>
            <template slot-scope='scope'>
              <label>{{scope.row.userId}}
                <span></span>
              </label>
            </template>
          </el-table-column>
         <el-table-column label='操作结果'>
            <template slot-scope='scope'>
              <label>{{scope.row.displayName}}
                <span></span>
              </label>
            </template>
          </el-table-column>
      </el-table>

    </div>
  </section>
</template>
<style rel='stylesheet/scss' lang='scss'>
.el-table thead tr th {
  background-color: rgba(28,148,255,0.6) !important;
  color: #fff;
}
.el-table th{
  text-align: center;
}
.addBtn {
  background: #fff;
  color: #1C94FF;
}
</style>
<script lang='babel'>
import webapi from '../../api/webapi'
import {mapState} from 'vuex'

export default {
  name: 'log',
  data () {
    return {
      logKeyWord: '',
      logLists: [],
      loading: false,
      textMap: {
        update: '编辑',
        create: '新增',
        delete: '删除账号'
      },
      dialogFormVisible: false,
      dialogLoading: false,
      temp: {
        role: ''
      },
      dialogStatus: '',
      disabledFlag: true // 角色是否可更改
    }
  },
  computed: {
    ...mapState({
      menuList: state => state.menuList.menuList
    })
  },

  mounted () {
    this.getAllLogs()
  },
  methods: {
    handleEdit (index, row) {
      this.getRoles(row)
      this.temp = Object.assign({}, row) // copy obj
      this.dialogStatus = 'update'
      this.dialogFormVisible = true
    },
    async handleDelete (index, row) {
      try {
        let temp = Object.assign({}, row)
        const params = {
          roleId: temp.id
        }
        const res = await webapi.manage.roles(params)
        if (res.code === '200') {
          this.getRoleInfo()
          this.$message({
            title: '成功',
            message: '删除成功',
            type: 'success',
            duration: 2000
          })
        } else {
          this.$message({
            title: '失败',
            message: res.msg,
            type: 'error',
            duration: 2000
          })
        }
      } catch (e) {
        console.log(e)
      }
    },

    async getAllLogs () {
      try {
        this.loading = true
        const params = {
          logKeyWord: this.logKeyWord
        }
        const res = await webapi.manage.allLogs(params)
        if (res.code === '200') {
          this.logLists = res.data
        } else {
          this.logLists = []
        }
      } catch (e) {
        console.log(e)
      } finally {
        this.loading = false
      }
    },
    itemClick (node) {
      console.log('node', JSON.stringify(node.model))
    }
  }
}
</script>
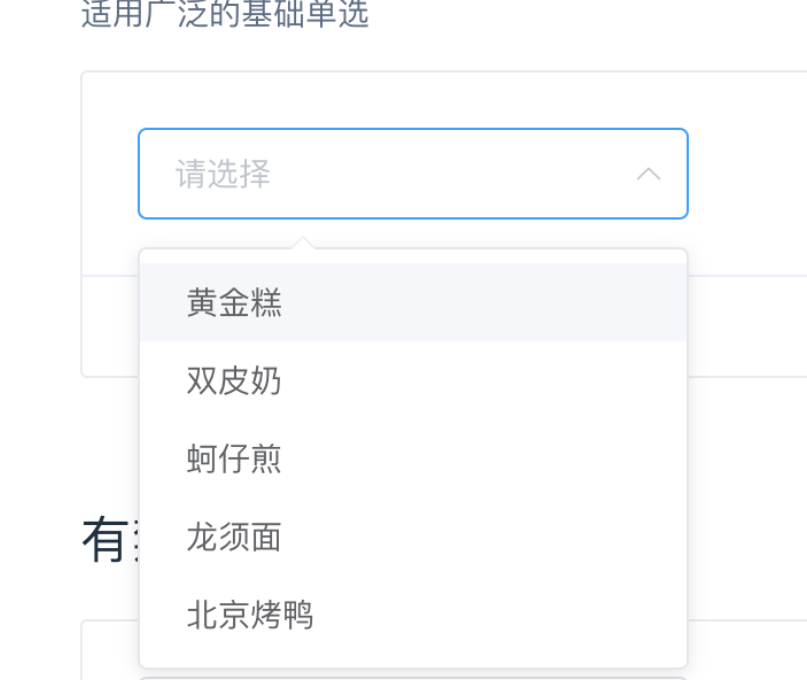
下拉列表
<el-select v-model="value" placeholder="请选择">
    <el-option
      v-for="item in options"
      :key="item.value"
      :label="item.label"
      :value="item.value">
    </el-option>
  </el-select>
</template>

<script>
  export default {
    data() {
      return {
        options: [{
          value: '选项1',
          label: '黄金糕'
        }, {
          value: '选项2',
          label: '双皮奶'
        }, {
          value: '选项3',
          label: '蚵仔煎'
        }, {
          value: '选项4',
          label: '龙须面'
        }, {
          value: '选项5',
          label: '北京烤鸭'
        }],
        value: ''
      }
    }
  }
</script>

<template>
    <el-table
      :data="tableData"
      style=" 100%">
      <el-table-column
        prop="date"
        label="日期"
        width="180">
      </el-table-column>
      <el-table-column
        prop="name"
        label="姓名"
        width="180">
      </el-table-column>
      <el-table-column
        prop="address"
        label="地址">
      </el-table-column>
    </el-table>
  </template>

  <script>
    export default {
      data() {
        return {
          tableData: [{
            date: '2016-05-02',
            name: '王小虎',
            address: '上海市普陀区金沙江路 1518 弄'
          }, {
            date: '2016-05-04',
            name: '王小虎',
            address: '上海市普陀区金沙江路 1517 弄'
          }, {
            date: '2016-05-01',
            name: '王小虎',
            address: '上海市普陀区金沙江路 1519 弄'
          }, {
            date: '2016-05-03',
            name: '王小虎',
            address: '上海市普陀区金沙江路 1516 弄'
          }]
        }
      }
    }
  </script>
项目中采用如下写法,在element的table组件中使用slot-scope(作用域插槽)来实现该需求,slot-scope到值继承了父组件传来到值,然后进行处理。
<el-table :data='logLists' stripe style=' 100%; margin: 0 auto; text-align:center;'>
        <el-table-column label='ID'>
          <template slot-scope='scope'>
            <label>{{scope.row.id}}
              <span></span>
            </label>
          </template>
        </el-table-column>
         <el-table-column label='时间'>
          <template slot-scope='scope'>
            <label>{{scope.row.createTime}}
              <span></span>
            </label>
          </template>
         </el-table-column>
          <el-table-column label='操作'>
           <template slot-scope='scope'>
             <label>{{scope.row.operateContent}}
               <span></span>
             </label>
           </template>
          </el-table-column>
          <el-table-column label='操作人'>
            <template slot-scope='scope'>
              <label>{{scope.row.userId}}
                <span></span>
              </label>
            </template>
          </el-table-column>
         <el-table-column label='操作结果'>
            <template slot-scope='scope'>
              <label>{{scope.row.displayName}}
                <span></span>
              </label>
            </template>
          </el-table-column>
Element,一套为开发者、设计师和产品经理准备的基于 Vue 2.0 的桌面端组件库
本项目中用Vue整合Element UI进行前端开发,相比于bootstrap,另开贴分析。
1. 如何整合
在 main.js 中写入以下内容可以完整引入:
部分引入,比如button 和select
本项目中main.js文件如下:
2. 应用实例
文本框
文本框输入的值会绑定到input,在下面到函数中,可以把input传入后台请求,看下文到logKeyWord
下拉列表
表格
项目中采用如下写法,在element的table组件中使用slot-scope(作用域插槽)来实现该需求,slot-scope到值继承了父组件传来到值,然后进行处理。
