Pytorch环境搭建(Anaconda+Pycharm,清华镜像源)
1. 安装anaconda
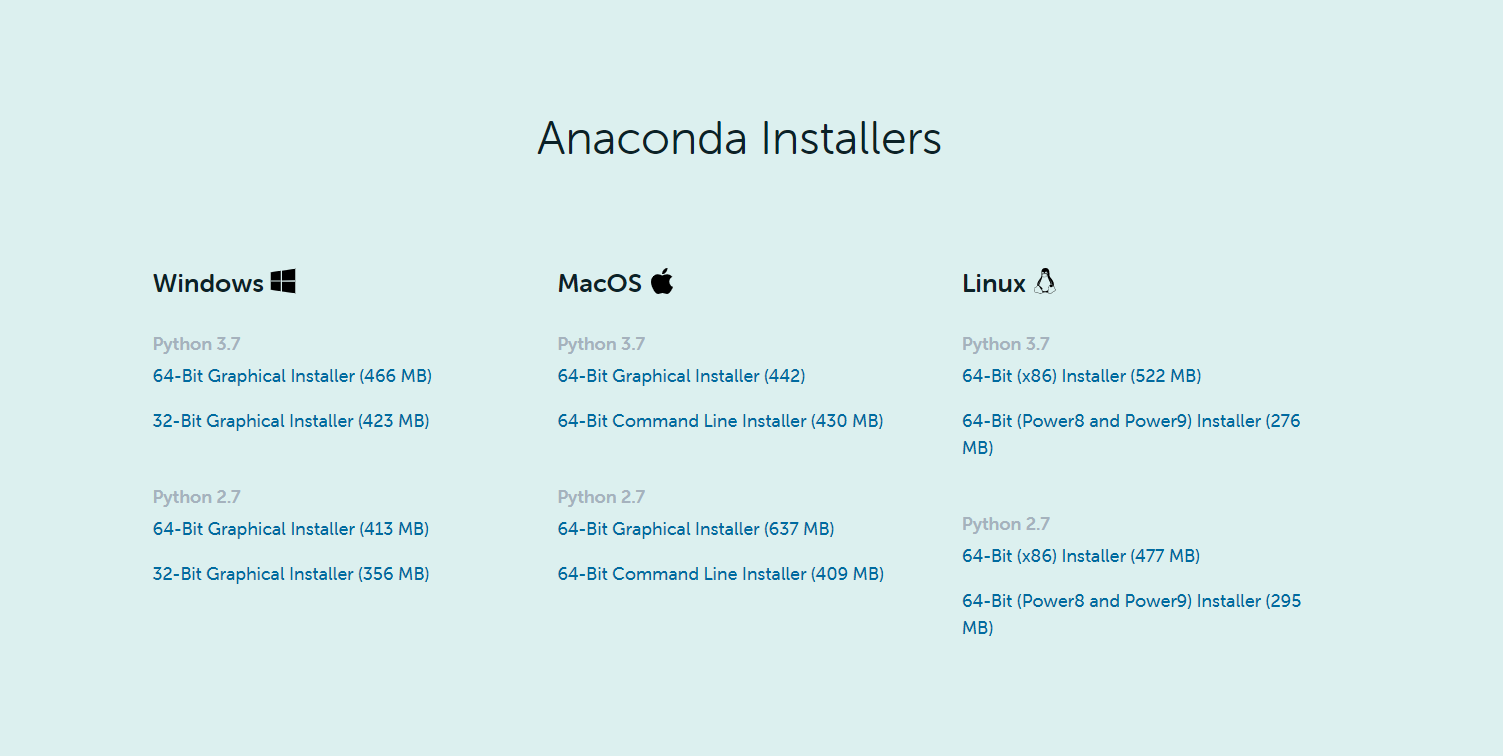
前往Anaconda官网下载个人版
2. 添加清华镜像源
由于pytorch的服务器在国外,直连下载的话很慢,所以选用清华镜像源下载
# 添加清华镜像
conda config --add channels https://mirrors.tuna.tsinghua.edu.cn/anaconda/pkgs/free/
conda config --add channels https://mirrors.tuna.tsinghua.edu.cn/anaconda/pkgs/main/
# 添加pytorch镜像
conda config --add channels https://mirrors.tuna.tsinghua.edu.cn/anaconda/cloud/pytorch/
# for legacy win-64
conda config --add channels https://mirrors.tuna.tsinghua.edu.cn/anaconda/cloud/peterjc123/
conda config --set show_channel_urls yes
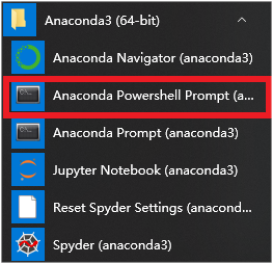
3. 创建新的conda虚拟环境
conda create --name pytorch python=3.7
# 激活 进入新环境
activate pytorch
4. 安装Pytorch
conda install pytorch torchvision cudatoolkit=10.2
这里比官网的命令少了一个-c pytorch
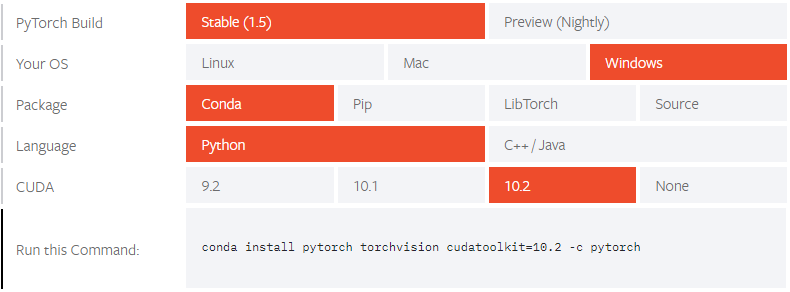
主要是因为-c pytorch表示指定使用pytorch channel,这个服务器位于国外,下载速度很慢,使用刚刚添加进default channel的清华镜像源可以得到一个较快的下载速度
验证是否安装成功在当前环境下输入命令
python
import torch
import torchvision
5. 配置Pycharm
5.1 安装Pycharm
前往Pycharm官网下载社区版,然后安装
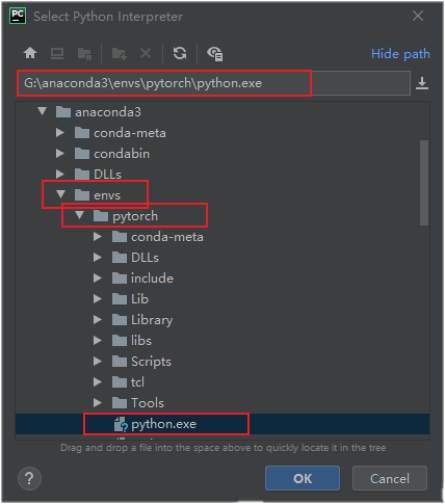
5.2 设置Python Interpreter
-
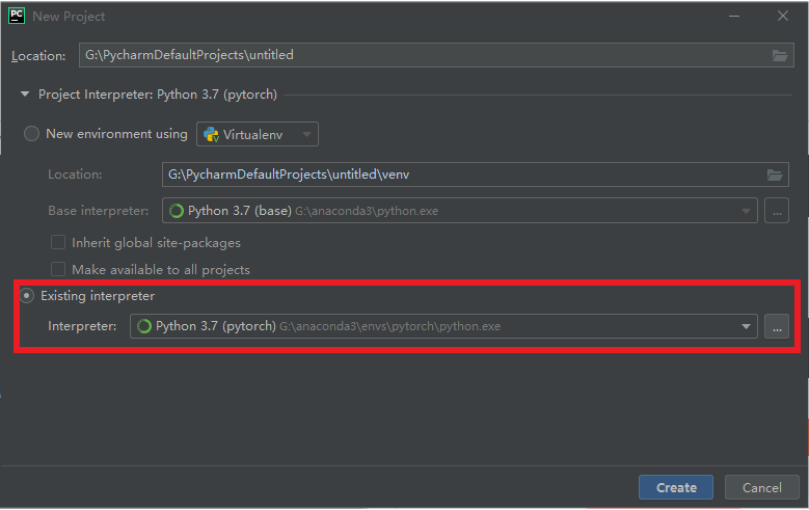
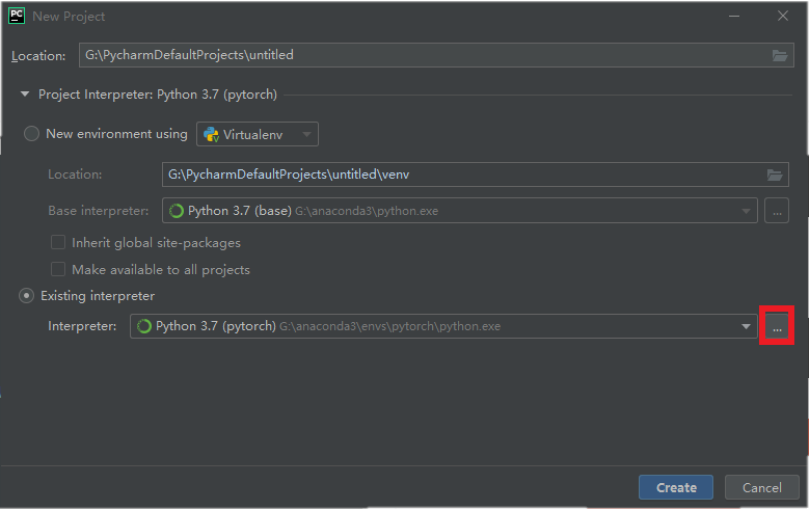
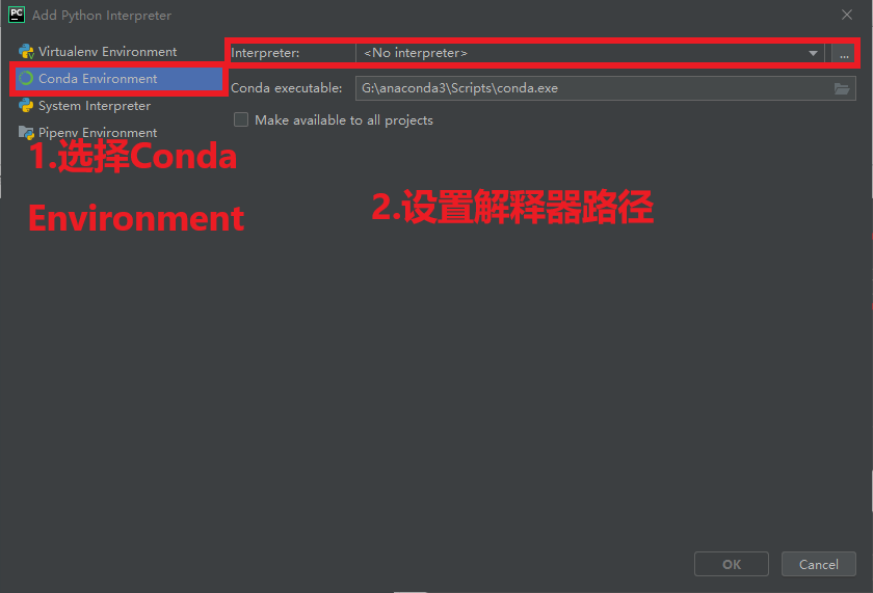
在新建project界面或是在主界面菜单File->Setting->Python Interpreter
Pytorch在Pycharm的环境就搭建完成了
